8
4. In reinforced concrete structures (cellars, high-rise buildings, etc.), DCF signal reception is weaker,
depending on the conditions. In extreme cases, place the weather station close to a window
toward the transmitter.
The reception of DCF radio signal is aected by the following factors:
• thick walls and insulation, basements and cellars
• inadequate local geographical conditions (these are dicult to assess in advance)
• atmospheric disturbances, thunderstorms, electrical appliances with no interference elimination,
television sets and computers located near the DCF receiver.
If the weather station cannot detect DCF signal, time and date must be set manually.
Note: If the weather station detects DCF signal but the current time on the display is incorrect (e.g. shifted
±1 hour), you must always set the correct time zone for the country where you are using the station, see
Manual Setting of Time and Date. The current time will be shown with the appropriate time zone dierence.
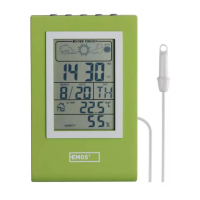
Manual Setting of Time and Date
Note: pressing of each button is accompanied by a beep (cannot be deactivated).
1. Press and hold the MODE button for 3 seconds.
2. Use the +/12/24 or button to set the following parameters: time zone – hour – minute –
second – year – month – day – calendar language (GE, FR, ES, IT, NE, DA, RU, EN) – country – city.
Note: it takes approximately 20 seconds after entering the city code to display the moonrise/moonset and
sunrise/sunset time.
Table with country names and city codes for setting moonrise/moonset and sunrise/sunset
time.
(see Table)
Countries:
GER – Germany
DAN – Denmark
ESP – Spain
FRA – France
FIN – Finland
GB – Great Britain
HUN – Hungary
CRO – Croatia
ITA – Italy
IRL – Ireland
LUX – Luxembourg
NOR – Norway
NET – Netherlands
POL – Poland
POR – Portugal
RUS – Russia
SWE – Sweden
SLK – Slovakia
SLO – Slovenia
SRB – Serbia
AUS – Austria
BEL – Belgium
SWI – Switzerland
CZR – Czech Republic
GR – Greece
CY – Cyprus
RO – Romania
BG – Bulgaria
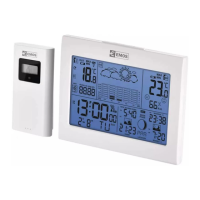
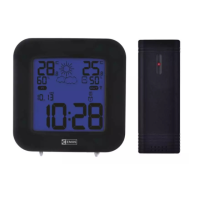
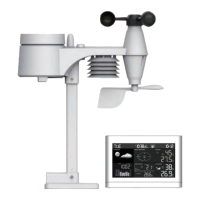
Changing Sensor Channel and Connecting Additional Sensors
The station can be paired with up to 3 wireless sensors.
1. Long-press the CHANNEL button on the station; the icon will start ashing.
2. Remove the cover from the battery compartment and insert batteries (2 x 1.5 V AAA).
3. Set the desired sensor channel number (1, 2, 3) by sliding the switch (icon no. 42) located in the
battery compartment of the sensor. The channel number will be shown on the sensor's screen on
the right. Data from the sensor will be loaded into the station within 3 minutes. Repeat the whole
procedure if the sensor signal is not detected.
Choose the desired channel – 1, 2 or 3 – for the sensor by repeatedly pressing the CHANNEL button.
The number will be displayed in eld no. 23 in the top left in the
icon.
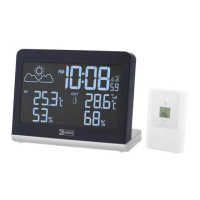
Displaying Data from Multiple Sensors, Automatic Cycling through Values from
Connected Sensors
Press the CHANNEL button repeatedly to display data from all connected sensors on the weather
station, one by one.
You can also activate automatic cycling through data from all connected sensors:
1. Turning on cycling
Repeatedly press the CHANNEL button until the display shows the
icon.
Data from all connected sensors will be shown automatically and repeatedly on the station's display
one after another.
2. Turning o cycling
Repeatedly press the CHANNEL button until the
icon disappears.