POLISHER INSTALLATION
1. Plug the Micromotor into the front of the control box. This is done by inserting the male connector
at the end of the Micromotor cable, into the female receptacle on the front panel of the unit and
rotating the locking collar clockwise.
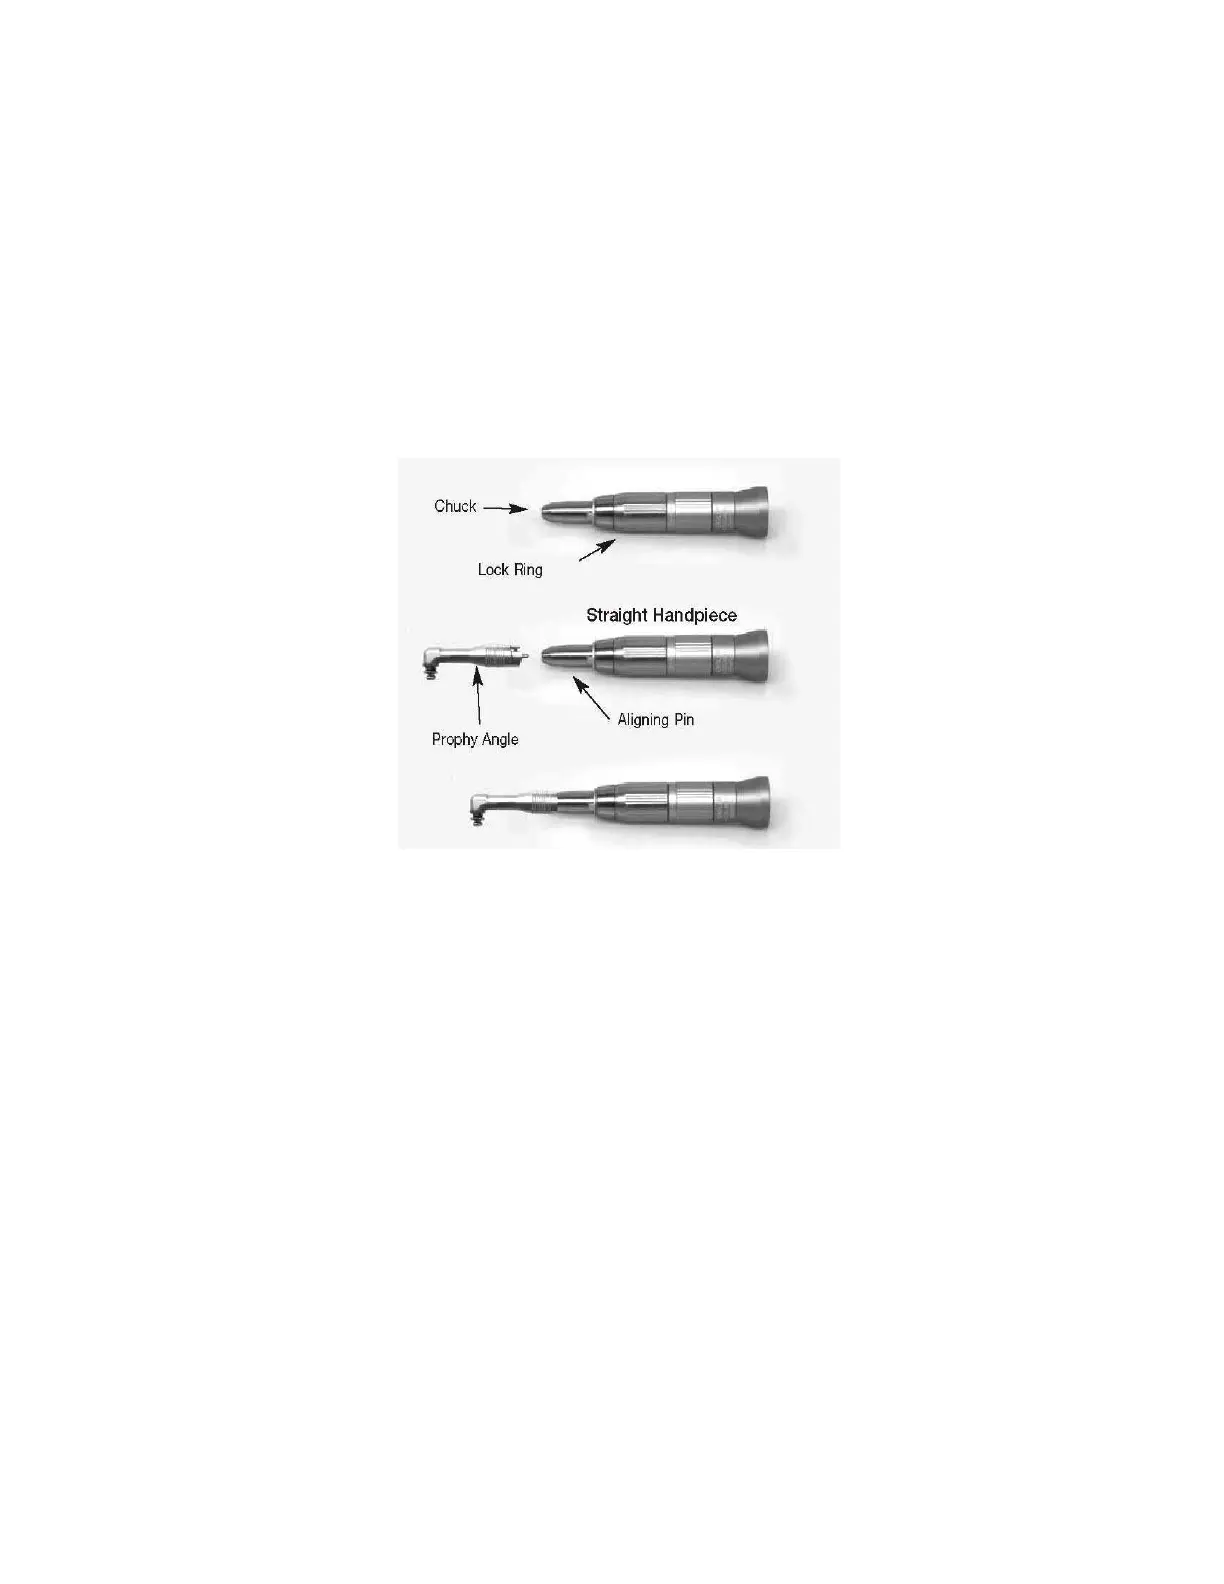
2. Slide the Straight Handpiece down over the top of the Micromotor, until it snaps into place.
3. Line up the notch of the Prophy Angle with the Aligning Pin on the Straight Handpiece, and then
push the shaft of the Prophy Angle into the chuck of the Straight Handpiece.
4. Rotate the Lock Ring counter-clockwise, until it clicks and locks the prophy angle in place.
5. Place a disposable rubber polishing cup on the end of the Prophy Angle by snapping it on. The
Prophy Angle is now secured and ready for operation.
6. Rotate the selector knob on the front of unit to forward operation. NOTE: When using the polisher
the RED LED indicator should be on. NOTE: It is suggested to use a low to mid range speed
setting for polishing.
5