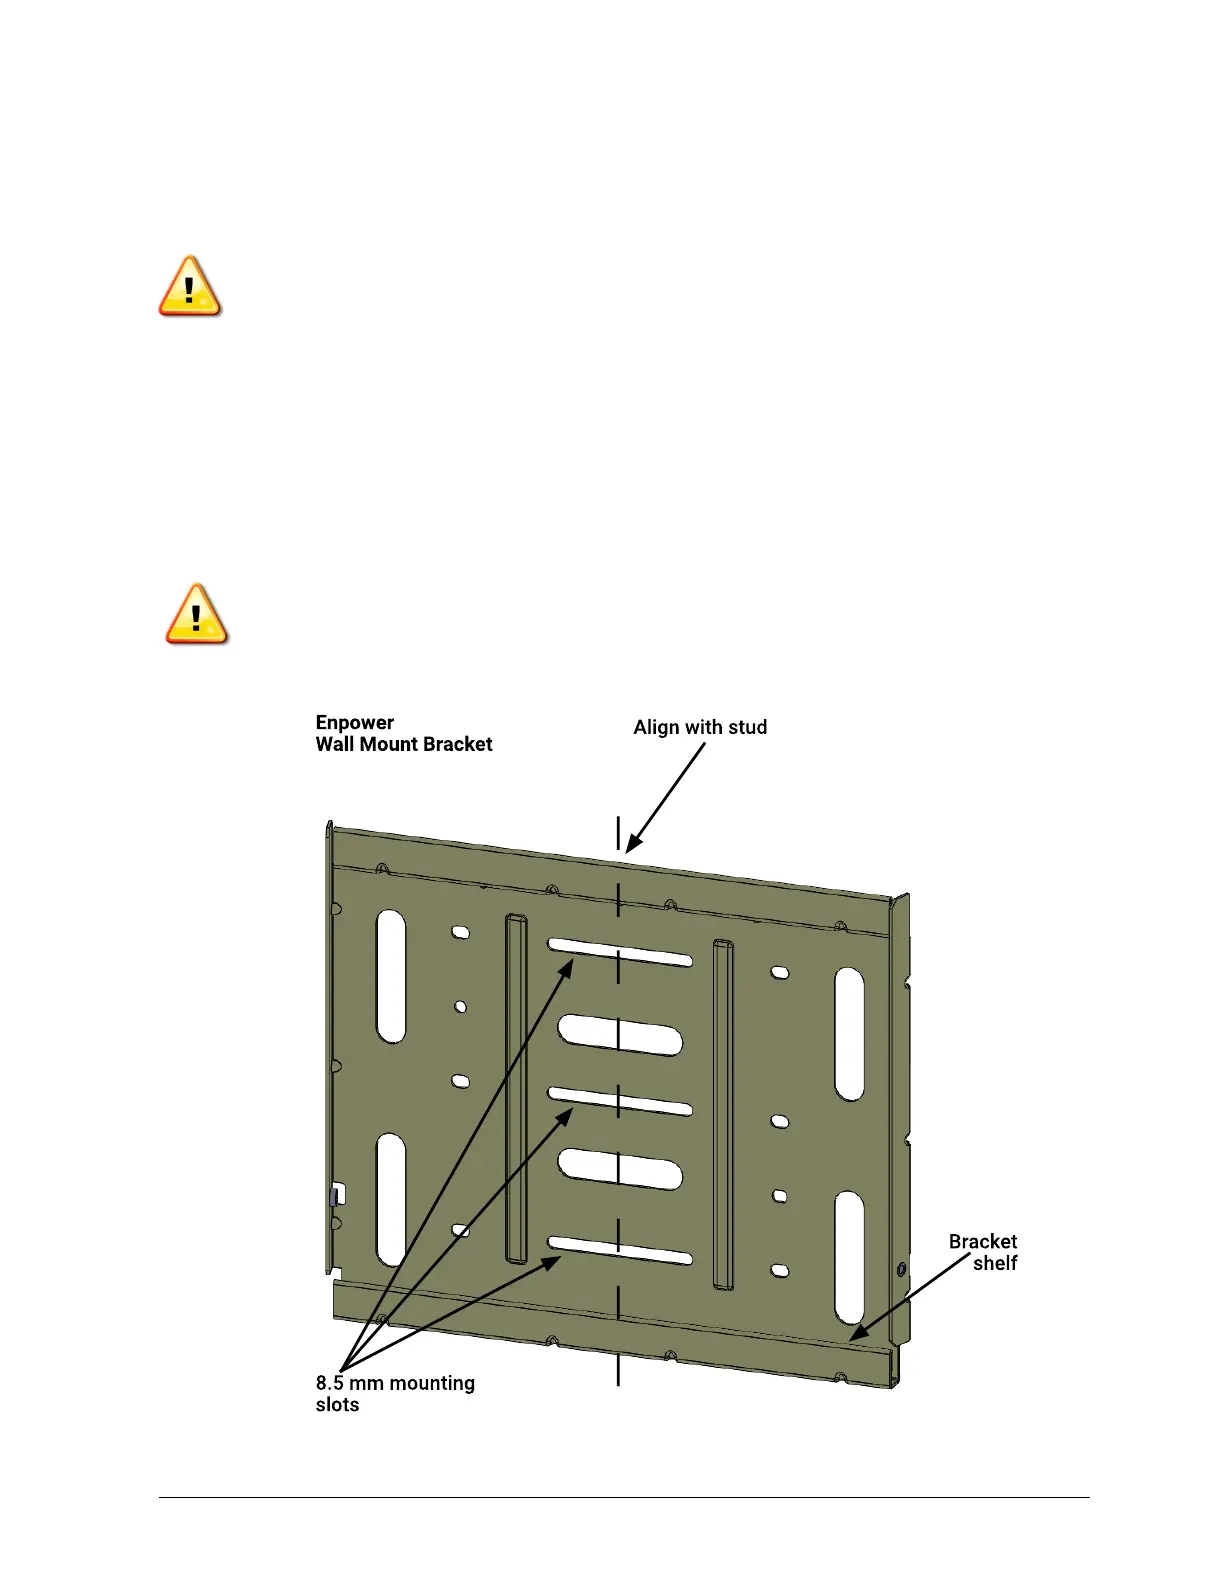
Step 2: Install the Wall-Mount Bracket
A. Mark a plumb line over the wall stud as a guide.
WARNING! Multiple risks. Make sure not to drill or attach into electric wiring or pipes that are
in the wall!
B. Remove the wall mount bracket only from the shipping box.
C. Place the wall-mount bracket on the wall so that the mounting holes in the middle of the bracket
align with the center of the stud. Use a level to keep the bottom of the wall-mount bracket level.
D. Use the #10, 1/4”, or 5/16” wood screws (or masonry attachments if installing in masonry) to
attach the bracket using one screw and washer for each slot. The slot size of the Enpower wall
mount bracket is 8.5 mm. Use an appropriately sized washer for each of the screws, and check
with a structural engineer and local standards for local requirements.
E. Verify that the wall-mount bracket is level, solidly attached to the wall, and oriented for upright
installation of the Enpower.
WARNING! Risk of injury and equipment damage. Do not mount an Enpower on a bracket
that is not properly attached to a wall.
WARNING! Risk of injury and equipment damage. Protect the Enpower from impact damage
and improper use.