Damp Pro
SHOULD YOU ENCOUNTER ANY PROBLEMS
INSTALLING THIS UNIT, CONTACT YOUR SUPPLIER
10
9. With the mains supply isolated, wire the power cable into the
unswitched fuse spur then wire the unswitched fuse spur into the
mains supply (see wiring diagram on page 4).
Use two of the 8g x 1” screws to attach the spur to a loft
joist.
10. Heater units can be wired to a heater enable switch (not included).
Connect it to the heater enable cable and fit it in an accessible area.
Use two of the 8g x 1” screws to attach the switch to the wall.
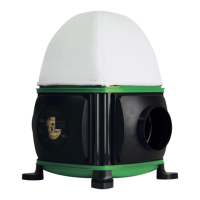
11. Reconnect the mains supply at the local isolator. After a few
seconds air will begin to flow from the diffuser (see page 13 for air
flow rate settings).
11
9 10
AFTER INSTALLATION THE END USER SHOULD
KEEP THIS GUIDE FOR FUTURE REFERENCE
DO NOT
THROW AWAY
12
9. With the mains supply isolated, wire the power cable into the
unswitched fuse spur then wire the unswitched fuse spur into the
mains supply (see wiring diagram on page 5).
Use two of the 8g x 1” screws to attach the spur to a loft
joist.
10. If a wired heater enable switch is required, connect it to the
black heater cable. Mount it in an accessible area of the property.
Use two of the 8g x 1” screws to attach the switch to the wall.
11. Reconnect the electrical supply to the unit. Air should begin to
flow from the diffuser. Press button 1 to show current air flow rate.
12. Further presses will cycle through the air flow rate settings.
9 10
11 12
Single press Further presses
109
 Loading...