AFTER INSTALLATION THE END USER SHOULD
KEEP THIS GUIDE FOR FUTURE REFERENCE
DO NOT
THROW AWAY
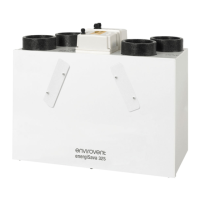
EnergiSava
®
200
• 1x energiSava
®
200 unit
• 1x Remote control
• 1x Instruction guide
• 1x User guide
• 1x Wall mounting bracket
• 5x Screws 8g x 2.0”
• 5x Plasterboard plugs
• 2x Wall mount spacers
• 2x Screws 10g x 0.5”
EnergiSava
®
200 App
• 1x energiSava
®
200 app unit
• 1x Instruction guide
• 1x User guide
• 1x App guide
• 1x Wall mounting bracket
• 5x Screws 8g x 2.0”
• 5x Plasterboard plugs
• 2x Wall mount spacers
• 2x Screws 10g x 0.5”
Box Contents
Pre - Installation Checklist
• Does the unit fit in the space where it will be installed?
• Is there room to connect ducts to the spigots without tight duct bends?
• Is there room to access and replace the filters after installation?
• Are there any obstructions above or below the locations where the input and
extract valves are to be fitted?
• Is the mounting surface strong enough to support the unit?
• Is the mounting surface level?
• Are there adequate facilities to connect the unit condensate drain to the
internal waste system of the property?
• If required, the unit can be floor mounted using the additional floor mounting
accessory kit. (Order code FIXINGKIT-ES200F). Mounting instructions shown
later on in this guide.
The floor mounted version of the unit also contains:
2x large mounting brackets
2x small mounting brackets
16x Screws 10g x 0.5”
6
 Loading...