Home
Epilog Laser
Engraver
Fusion Pro 48
Epilog Laser Fusion Pro 48 Assembly Replacement
5
of 1
of 1 rating
22 pages
Give review
Manual
Specs
To Next Page
To Next Page
To Previous Page
To Previous Page
Loading...
P
R
O 3
2 & 48 X
-
A
X
IS A
SSEM
BL
Y
8
3.
En
ter
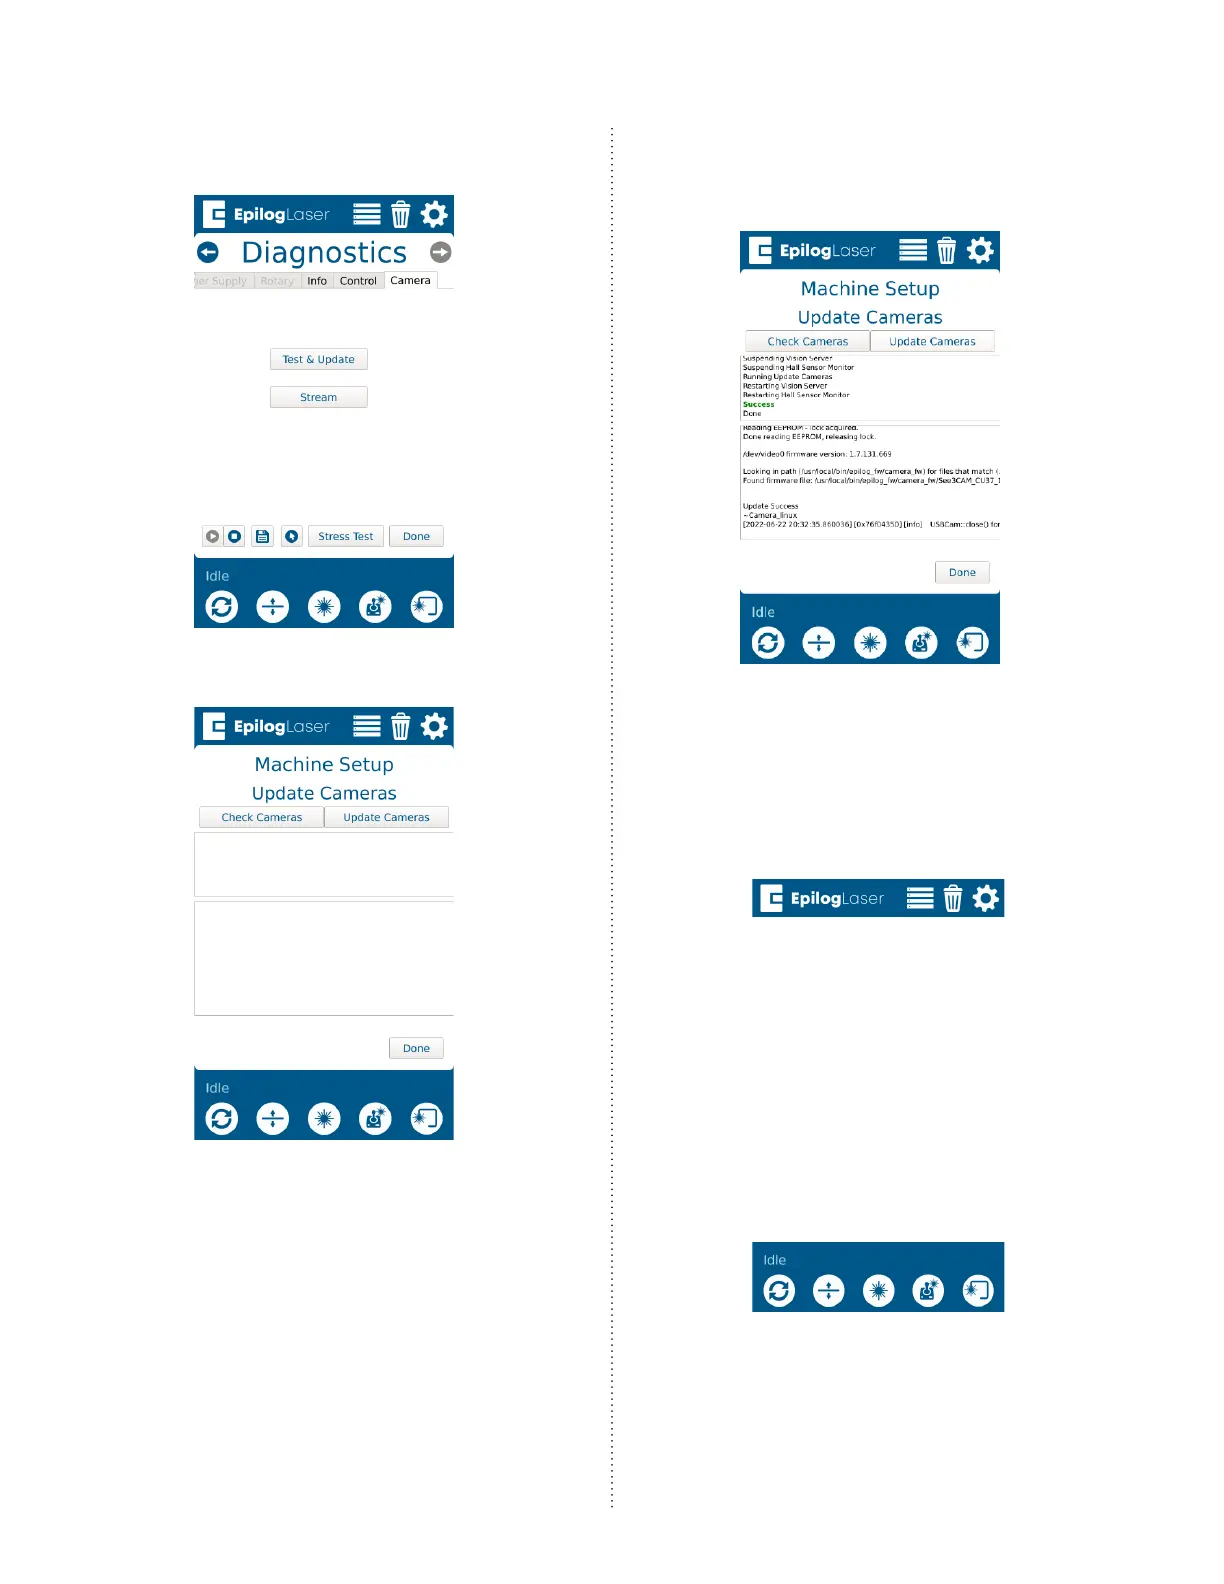
the Diagnostics menu and scr
oll t
o
the Camer
a
tab
. Pr
ess
T
est & Updat
e:
4.
Press Update:
5.
Allow
the
engr
aver
to
complete the
update
. Once done, a success message
will appear
:
Updating the
Peripher
als
1.
A
t the display
panel, press
the gear
icon
in
the upper
right
-hand corner
of
the
display
to open
the Settings menu:
7
9
Other manuals for Epilog Laser Fusion Pro 48
Original Instructions
242 pages
Manual
9 pages
5
Based on 1 rating
Ask a question
Give review
Questions and Answers:
Need help?
Do you have a question about the Epilog Laser Fusion Pro 48 and is the answer not in the manual?
Ask a question
Epilog Laser Fusion Pro 48 Specifications
General
Brand
Epilog Laser
Model
Fusion Pro 48
Category
Engraver
Language
English
Related product manuals
Epilog Laser Fusion
10 pages
Epilog Laser Fusion Maker
11 pages
Epilog Laser Fusion Pro 32
242 pages
Epilog Laser FusionPro 16000
242 pages
Epilog Laser Mini Series
4 pages
Epilog Laser Helix
5 pages
Epilog Laser MINI
17 pages
 Loading...


