Do you have a question about the Episode ES Series and is the answer not in the manual?
Details options for positioning speakers, including on-wall or cabinet placement for optimal sound.
Provides instructions for installing the speaker within or on top of a cabinet for home theater setups.
Explains how to attach and adjust the kickstand to angle the speaker towards the listener for optimal sound.
Details the correct placement of rubber feet when using kickstands to prevent speaker slippage.
Recommends the vertical orientation for the active mid-bass driver when mounting on a wall for performance.
Offers guidance on placing speakers near the TV for an immersive audio-visual experience, avoiding separation.
Describes optimal placement for rear speakers in a home theater, either behind or on the side walls.
Details essential steps for making secure loudspeaker connections, including wire stripping and polarity.
Provides a test method to check speaker phase and ensure correct audio output, bass, and vocal clarity.
Explains the procedure for gently removing and re-installing the speaker grille using pins.
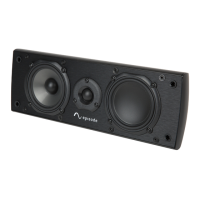
The Episode On-Wall Speakers are designed to deliver high-quality audio for home theater and home audio installations. These speakers are suitable for use as Left, Center, Right, and Surround speakers within a home theater surround system, offering flexibility in placement and configuration. They are engineered with advanced technological components to ensure high performance and a lifetime of enjoyment.
The primary function of the Episode On-Wall Speakers is to reproduce sound with clarity and depth, enhancing the listening experience for various audio content, including movies, music, and games. The ES-350-OWLCR-M and ES-350-OWLCR-L models are designed to integrate seamlessly into different environments, whether mounted on a wall or placed on a cabinet or shelf.
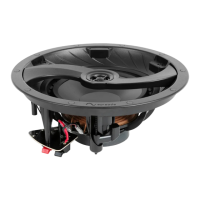
The ES-350-OWLCR-M model features an active mid-bass driver (Dished Cone) and a passive radiator (Flat Cone). When mounted vertically on a wall, it is recommended that the active mid-bass driver be positioned towards the floor to ensure proper acoustic performance. This design consideration helps optimize sound dispersion and bass response in a vertical orientation.
For the ES-350-OWLCR-L model, there is an option to install an optional IR Receiver directly into the speaker behind the grille cloth. This feature eliminates the need for a surface-mounted stick-on receiver, providing a cleaner aesthetic. To install, users simply punch out the center of the pass-through and slide the IR Receiver through the exposed hole. A spacer is included to ensure the front edge of the IR receiver is flush with the back of the grille cloth, which is crucial for maintaining accurate IR reception at its maximum level. For some IR receivers, a layer of electrical tape around the threads can create a more snug fit within the on-wall speaker, further securing the receiver and optimizing performance.
The Episode On-Wall Speakers offer flexible mounting options, allowing them to be placed on a cabinet top, a shelf, or mounted directly on a wall.
When placing the speaker on a cabinet shelf, it is important to position the front edge of the speaker flush with the front of the shelf. Placing the speaker further back on the shelf can degrade the sound quality, so careful positioning is recommended to maintain optimal audio performance.
For shelf or cabinet placement, the speakers include kickstands that allow for angle adjustment. This feature is particularly useful for angling the soundbar towards the listener's ears, ensuring proper audio projection. To attach the kickstand, users place it on the rear of the on-wall speaker and secure it with a shoulder bolt and washer. The kickstand height can be adjusted to achieve the desired angle. The kickstand can also be inverted if the on-wall speaker needs to point downwards. To prevent the speaker from slipping when using the kickstands, two rubber feet are included. These feet should be installed approximately 3 inches from the left and right outer edges and 1/4 inch from the front edge of the speaker. If the kickstand is used in the inverted position, the feet should be placed at the front edge of the speaker.
For wall mounting, a wall mounting template is provided to ensure proper and accurate positioning. Users should locate wall studs using a stud finder. If stud locations do not align with the desired speaker placement, wall molly or anchors with an appropriate weight rating should be used. After positioning and leveling the template, screw locations are marked on the wall, and the brackets are secured. If mounting the speaker horizontally, rubber bumpers are placed in line with the brackets at the bottom of the speakers; these are not needed for vertical mounting. The speaker then slides onto the wall brackets, with the rear screws fitting into the slots, completing the wall installation.
The speakers are designed to be connected to an amplifier or receiver. High-quality 14 to 16 gauge stranded speaker wire is recommended for connection to the speaker's binding posts. Proper connections are crucial for optimal performance. Users should ensure that the outer jacket of the speaker wire is separated by at least 2 inches, and approximately 1/4 inch of insulation is stripped from each conductor before inserting them into the speaker terminals. It is vital to ensure no stray strands of wire protrude and to observe proper polarity (+ to + and – to –) for each speaker and at the amplifier. After connecting, the home theater receiver should be turned on, and all loudspeakers in the system should be calibrated according to the receiver or surround processor manufacturer's instructions.
To verify phase, a simple test can be performed. While sitting in the normal listening position, play music with the receiver set to Mono. Listen for full and even bass and centered, even-volume vocals. If the sound is not right, turn off the receiver, reverse the connections for one of the speakers, and repeat the test at the same volume level. The correct phase is achieved when the sound has the loudest and best-sounding bass, and the vocals are centered and clear.
Maintaining the Episode On-Wall Speakers is straightforward. For cleaning the cabinet, a dampened soft cloth or paper towel can be used. The grille is best cleaned by brushing it off with a lint-free cloth.
The grille is held in place by pins and can be removed gently by pulling around the edge away from the speaker, slowly working from one end to the other. To re-install, align the grille pins with the cups in the speaker and push into place. This simple removal and re-installation process allows for easy cleaning and access to the speaker components if needed.
| Tweeter Size | 1 inch |
|---|---|
| Tweeter Type | Silk Dome |
| Frequency Response | 50Hz - 20kHz |
| Impedance | 8 Ohms |
| Woofer Size | 6.5 inches |