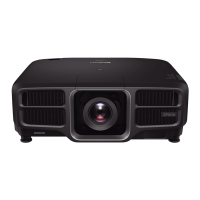
Do you have a question about the Epson EB-L25000U and is the answer not in the manual?
Configures aspect ratio and screen type for optimal image display.
Adjusts image position on the screen to account for margins due to Screen Type settings.
Details how to shift the lens to adjust projected image position, with ranges for different lens types.
Explains how to adjust the image size using zoom controls, with notes for specific lens models.
Guides on how to adjust the projector's focus for a clear image, including troubleshooting steps.
Provides steps to correct image warping and distortion, especially for specific lens models.
Provides methods for connecting a computer to the projector via various cable types (computer, HDMI, DVI-D).
Explains how to connect various video sources like component video, SDI, and HDMI to the projector.
Instructions for connecting the projector to a network using a LAN cable for projection and status checks.
Step-by-step guide for installing the optional wireless LAN unit for network connectivity.
Explains how to project images by automatically detecting input signals or manually switching sources.
Details how to change directly to the target image using remote control or control panel buttons.
Introduces methods like H/V-Keystone, Quick Corner, Curved Surface, Corner Wall, and Point Correction for image distortion.
Allows independent correction of each of the four corners of the projected image.
Allows selection of optimal image quality by choosing from preset modes like Dynamic, Cinema, Presentation, etc.
Automatically adjusts luminance based on displayed image brightness for rich images, using Dynamic Contrast.
Explains how to change the aspect ratio to suit image type, height/width ratio, and signal resolution.
Allows adjustment of tint, saturation, and brightness for specific color axes (R, G, B, C, M, Y).
Explains how to adjust halftone brightness differences based on the connected device using correction values or graphs.
Adjusts image resolution using Image Enhancement for clearer images with better texture and material feel.
Explains how to set the brightness for the projector's light source using various modes.
Details automatic online and individual image adjustments for multi-projector setups.
Methods for combining multiple images, including automatic tiling and manual adjustments.
Guides on automatically setting the arrangement and positioning of multiple projectors for tiling.
Details manual arrangement of images for each projector when lining up and projecting.
Explains how to fine-tune overlapping areas to create a seamless screen between multiple projectors.
Adjusts brightness and tone in overlapping image areas to reduce noticeable differences.
Adjusts color individually in specific areas where color does not match after Black Level adjustment.
Automatically adjusts tint and brightness for multiple projectors, especially when networked.
Details the automatic correction of brightness and tint for multiple projectors based on the darkest projector.
Fine-tunes color balance and brightness from black to white for each color tone.
Guides for manually adjusting images from all projectors individually.
Enables simultaneous projection of images from two sources side-by-side on the screen.
Pauses moving images to allow frame-by-frame projection or operations without displaying images.
Allows temporarily switching off the image on screen to focus audience attention or during file changes.
Details procedures for saving, loading, erasing, and resetting projector settings and geometry correction values.
Guides on how to schedule events like power on/off and input source switching at specified times.
Explains how to limit projector use by activating password protection, including different protection types.
Covers settings for multi-projector setups including Projector ID, Tiling, Geometry Correction, Edge Blending, and Screen Matching.
Explains how to perform batch setup for multiple projectors using a USB flash drive.
Details the process of saving projector settings to a USB flash drive, including file naming and precautions.
Guides on how to apply saved batch setup files from a USB flash drive to other projectors.
Explains how to perform batch setup by connecting the computer and projector using a USB cable.
Details how to save batch setup files from the projector to a computer via USB connection.
Details the meaning of the projector's five indicators and their status during regular operation and warm-up.
Explains how to use the control panel LCD to check projector status, detailed status, or error history.
Lists common image-related issues like 'No images appear', 'fuzzy', 'distorted', or incorrect colors.
Troubleshooting steps for when no image is displayed, covering power, indicators, shutter, and configuration settings.
Steps to resolve fuzzy, out-of-focus, or distorted images, checking focus, projection distance, and condensation.
Troubleshooting steps for remote control issues, including battery check, alignment, and receiver settings.
Steps to resolve issues when the projector fails to turn on, checking power switch, indicators, and power connections.
Provides information on air filter replacement periods and instructions for replacing the air filter.
Automatically adjusts color tone deterioration for the entire screen based on default settings.
Provides a list of projection distances and lens shift ranges for various screen sizes and lens models.
Lists the vertical and horizontal adjustment ranges for H/V-Keystone correction across different lens types.
Provides detailed specifications for the projector, including dimensions, LCD size, resolution, light source, and power consumption.
