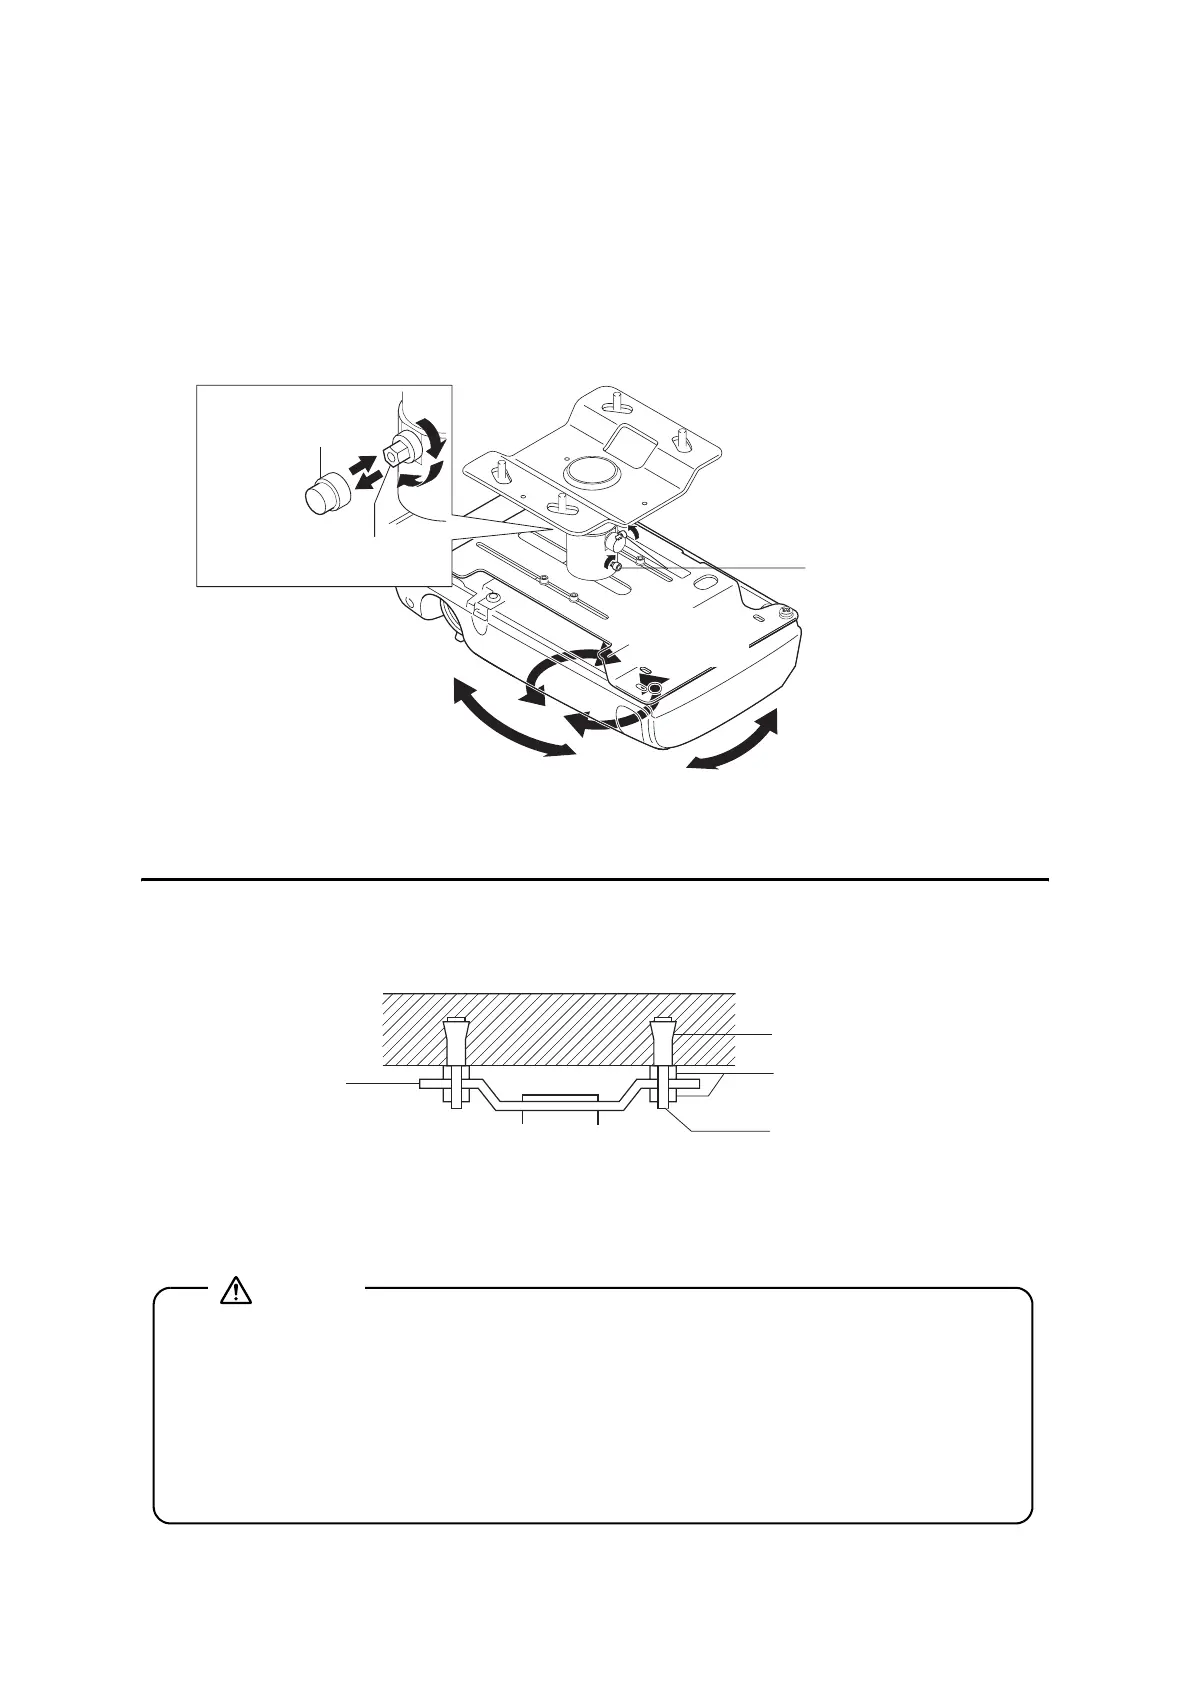
10
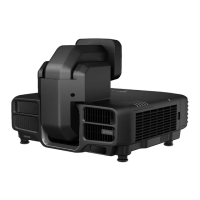
Adjust by carrying out the following steps.
(1) Remove the screw cap (protruding type) from the tilt adjusting screw.
(2) Partly tighten the tilt adjusting screw using the offset wrench provided.
(3) Adjust the projection position of the projector.
(4) Fully tighten the tilt adjusting screw using the offset wrench provided.
(5) Tighten the two tilt fixing screws using the hexagon wrench provided.
(6) Fit the screw cap (protruding type) onto the tilt adjusting screw.
3 Installing on a Concrete Ceiling
(1) Fit a commercially available anchors and bolts to the concrete ceiling.
(2) Fit the ceiling plate with a commercially available nuts.
• If there is a hanging ceiling or something else that interferes with installation on the
ceiling, purchase and fit a separate extension pipe.
→ For details, see "4 Extension Pipe" on page 11.
(5) Tilt fixing screws
(2 pcs.)
(1)(6) Screw
cap
(2)(4) Tilt adjusting screw
Sideways tilt
Horizontal
rotation
Vertical tilt
(3)
Ceiling plate
Concrete
Anchors
Nuts
Bolts
When installing the ceiling plate on the ceiling, install all parts so that
they can fully withstand the combined weight and lateral movement of
the projector body and ceiling mount. Use nuts and bolts that are M12
or higher. Failure to do so could cause the projector to fall.
Epson accepts no responsibility for the projector falling due to
inadequate installation.
Warning
 Loading...