12
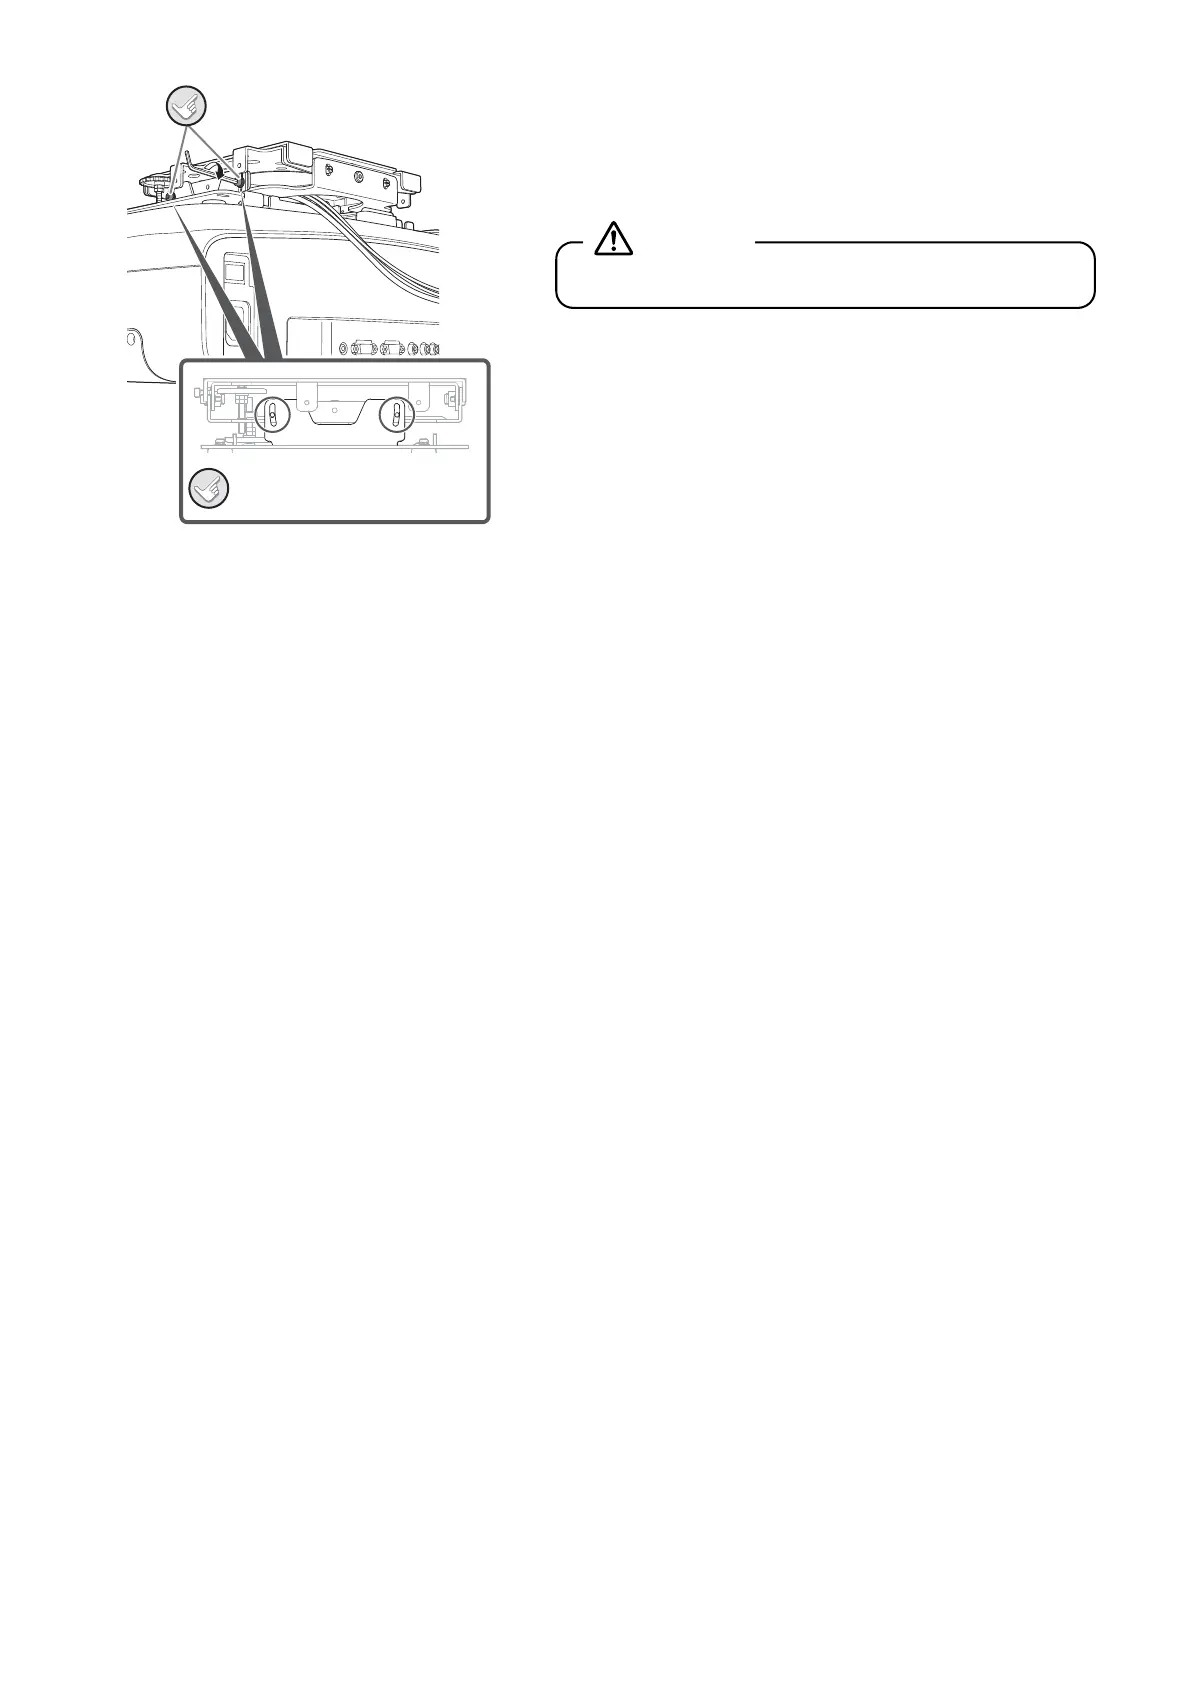
C Insert the M4x10 screws into the screw holes on the
projector plate and tighten them with the ball point hex
wrench.
Angle adjustment should be done later, so there's no need to
firmly tighten the screws.
When adjusting the angle of the projector, refer to "Adjusting the Position of the Projected Image" in the next section.
Secure these.
Do the same
for the other side.
Do not pull the cables forcibly.
Warning
 Loading...