Do you have a question about the Epson ET-5880 and is the answer not in the manual?
Guide to unpacking the printer and removing all protective materials from inside.
Instructions for filling the printer's ink tanks using the provided bottles.
Steps to complete the ink charging process, including waiting and confirmation.
Instructions for loading paper into the paper cassette and setting guides.
Guide to connecting the fax line to the printer and setting up fax functionality.
Instructions for installing software via CD or download, and connection options.
Information on printing from mobile devices and using voice assistants.
Steps to resolve issues when network setup is unsuccessful.
Guide to resolving printouts with lines or incorrect colors.
Steps for when the setup cannot find the product after USB connection.
Information on how to contact Epson for technical assistance.
This document serves as a "Start Here" guide for the Epson ET-5800/ET-5850/ET-5880 series of products, outlining the initial setup, ink filling, paper loading, software installation, and basic troubleshooting. It emphasizes safety, proper handling, and the use of genuine Epson supplies.
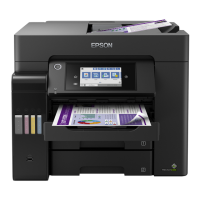
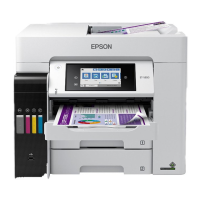
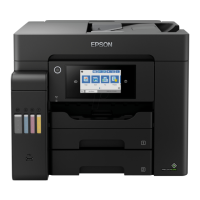
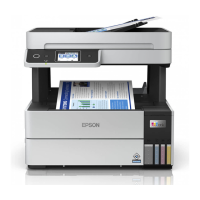
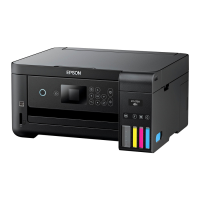
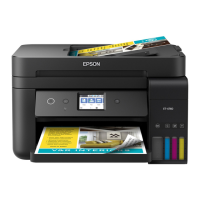
The Epson ET-5800/ET-5850/ET-5880 is a multifunction printer designed for various printing, scanning, and copying tasks, with an emphasis on high-capacity ink tanks for extended use. It supports both wired and wireless network connections, allowing for flexible placement and access. The device is capable of printing from computers, smartphones, and tablets, and even offers voice-activated printing capabilities. Its core function revolves around providing an efficient and cost-effective printing solution by utilizing refillable ink tanks rather than traditional cartridges. The printer is designed to handle a range of paper types and sizes, including plain paper, specialty papers, and envelopes, through its paper cassette and rear paper feed slot. It also includes an Automatic Document Feeder (ADF) for efficient scanning and copying of multiple pages. The control panel, featuring an LCD screen, allows users to manage settings, initiate tasks, and monitor the device's status. Fax functionality is also integrated, requiring a phone cord connection to a telephone wall jack.
The setup process begins with unpacking the device and removing all protective materials. This includes lifting the scanner unit to access and remove internal packing materials, ensuring the transportation lock is in the correct position. Once unpacked, the next crucial step is filling the ink tanks. The guide provides clear instructions on how to open the ink tank cover, uncap the ink bottles, and insert them into the correct color-coded filling ports. It highlights the importance of not squeezing the bottles and waiting for the ink to fill naturally. The vacuum-packed ink bottles are designed for reliability, and users are advised not to open them until ready to fill the tanks. After filling the black ink tank, the process is repeated for the other colors (cyan, magenta, yellow). The device uses high-capacity ink bottles, which are designed to provide a significant amount of ink for initial setup and subsequent use. Part of the ink from the included bottles is used during the initial ink charging process, which takes approximately 9 minutes. During this time, it's crucial not to unplug or turn off the product, raise the scanner unit, or load paper to avoid wasting ink. After the initial charge, an additional set of ink bottles is used to fully top off the tanks.
Paper loading is another key usage feature. The guide instructs users to pull out the paper cassette, slide out the side edge guides, and insert paper with the glossy or printable side facedown. It's important to ensure the paper is loaded against the front edge guide and not sticking out, and that the side edge guides are adjusted snugly against the paper without being too tight. The arrow mark on the side edge guide indicates the maximum paper loading capacity. After loading, the cassette is reinserted, and paper settings are selected on the control panel.
Connecting the device to a power source is straightforward, involving plugging the power cord into the back of the product and an electrical outlet. Users are cautioned not to connect the printer to a computer yet. Once powered on, the control panel needs to be raised, and the power button pressed to turn on the product. The initial setup involves selecting language, country, date, and time settings via the LCD screen.
Software installation is critical for full functionality. Users are advised to ensure the product is NOT CONNECTED to their computer during this phase. Software can be installed from the included CD (Windows only) or downloaded from the Epson support website. The setup program guides users through selecting their connection type: wireless, direct USB, or wired network. Wireless setup often attempts to configure automatically, but users may need to enter their network name (SSID) and password. For USB connections, a USB cable (not included) is required, and for wired networks, an Ethernet cable (not included) is necessary. The guide also mentions the availability of PCL or PostScript drivers for download.
Mobile and voice-activated printing features enhance usability. Users can print directly from smartphones or tablets using Epson iPrint via iOS or Android devices when connected to the same network. Android devices (v4.4 or later) can also print directly by tapping the menu icon. Epson Connect allows printing from anywhere, whether next to the printer or remotely. Voice-activated assistants can also be used to print various items by linking the Epson product to an Epson Connect account.
The document touches upon several maintenance-related aspects, primarily through troubleshooting tips. If lines or incorrect colors appear in printouts, users are advised to run a nozzle check and, if necessary, clean the print head. This is a common maintenance task for inkjet printers to ensure optimal print quality.
For network setup issues, the guide suggests checking the network name (SSID), restarting the router, allowing firewall access, and correctly entering the network password. Printing a network connection report is recommended to identify problems and solutions.
If the product's screen is dark, users should ensure the product is turned on and then touch the LCD screen to wake it from sleep mode. If the setup is unable to find the product after connecting with a USB cable, users should verify that the product is on and securely connected.
The guide also provides information on replacing ink. It lists the ultra high-capacity replacement ink bottle codes (T542 for black, cyan, magenta, and yellow), emphasizing the use of genuine Epson T542 pigment inks. Using non-Epson inks, especially non-pigment ones, may cause damage not covered by the warranty.
For long-term storage of remaining ink, users are instructed to close the ink bottles with their caps. The guide also mentions that bottle caps should be replaced before disposing of empty bottles.
The document directs users to the online User's Guide for more detailed information on loading capacity, available paper types and sizes, loading envelopes, using the rear paper feed slot or ADF, and changing settings. Technical support resources, including the Epson support website and phone numbers, are provided for further assistance. Finally, Epson offers a recycling program for end-of-life hardware and ink bottles, encouraging proper disposal.
| Maximum Print Resolution | 4800 x 2400 dpi |
|---|---|
| Duplex Printing | Automatic |
| Automatic Document Feeder | Yes |
| ADF Capacity | 50 sheets |
| Functions | Print, Copy, Scan, Fax |
| Connectivity | USB, Ethernet, Wi-Fi, Wi-Fi Direct |
| Display | 4.3" color touchscreen |
| Ink Colors | Black, Cyan, Magenta, Yellow |
| Scanner Type | Flatbed color image scanner |
| Scan Resolution | 1200 x 2400 dpi |
| Print Technology | PrecisionCore |
| Print Speed (Black) | 25 ppm (ISO) |
| Mobile Printing | Epson Connect, Apple AirPrint |
| Ink Type | EcoTank |
| Paper Sizes | A4, A5, A6, Letter, Legal |
| Weight | 39.2 lbs |
| Paper Capacity | 500 sheets (2 x 250 sheet trays) |