This document provides instructions for setting up and using the LQ-1310 printer, covering unpacking, assembly, software installation, and basic operation.
Function Description
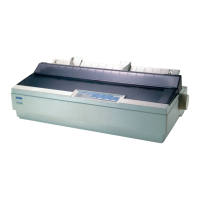
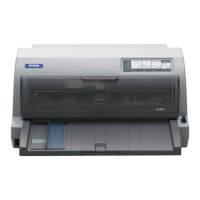
The LQ-1310 is a dot matrix printer designed for reliable printing, particularly with continuous multipart forms and single sheets. It supports various interface types, including IEEE1284 (Parallel), EIA-232D (Serial), and USB, allowing for flexible connectivity to different computer systems. The printer's core function involves transferring data from a computer to paper by striking an ink ribbon with a print head, creating characters and graphics. It is built to handle demanding printing tasks, making it suitable for environments requiring durable and consistent output, such as businesses, offices, or specialized applications that rely on multipart forms for record-keeping or invoicing. The design emphasizes ease of use for setup and routine maintenance, ensuring that users can quickly get the printer operational and maintain its performance over time.
Usage Features
Unpacking and Initial Setup:
The initial setup process is designed to be straightforward. Users begin by carefully unpacking the printer from its packaging. This involves removing all protective materials, which are clearly indicated in the instructions. Some components, such as the power plug, may come pre-attached, and their shape might vary by region.
Assembling the Printer:
Assembly primarily involves installing the paper tension unit and the ribbon.
- Paper Tension Unit: The paper tension unit needs to be pulled upright and pushed firmly into place until it clicks, ensuring it is securely attached.
- Ribbon Installation: The ribbon is inserted between the print head and the carriage. It's crucial to ensure correct orientation, avoiding insertion on the far side of the carriage, as this is explicitly marked as incorrect. Once inserted, the ribbon should be tensed, and the hook and push mechanism used to attach it, followed by closing the cover.
- Print Head and Cables: Before proceeding, users must confirm that the print head is in the middle position and that all internal protective materials are removed. A specific caution is given not to touch the white cable inside the printer, highlighting the sensitivity of internal components.
Connecting the Power Cord:
The power cord connection is a simple plug-and-play process. Users must first confirm that the printer's power switch is in the OFF position (marked with an 'O') before plugging in the power cord.
Connecting to a Computer:
The LQ-1310 offers multiple connectivity options:
- USB: For USB connections, the cable connectors have a specific orientation. Users must ensure the connector is correctly aligned before firmly inserting it into the appropriate port on both the printer and the computer.
- IEEE1284 (Parallel): Parallel connections also require firm insertion and fastening of the connectors. The instructions show how to connect the cable to the printer and then to the computer, ensuring a secure fit.
- EIA-232D (Serial): Similar to parallel, serial connections involve firmly connecting and fastening the cable to both the printer and the computer.
A general caution applies to all connections: users should not connect or disconnect the printer while it is turning on, as this could potentially damage the device or the computer.
Installing the Printer Software (Windows):
For Windows users, software installation is initiated by inserting the installation media. The process involves following on-screen instructions. For Windows 2000 users, specific prompts may appear regarding Microsoft digitally signed drivers, requiring confirmation to continue the installation. The guide notes that administrator privileges might be required for software installation, and users facing issues should consult their administrator.
Loading Paper:
The printer supports two main types of paper loading:
- Printing on Single Sheets:
- The left sprocket needs to be slid and locked into position.
- The right sprocket is then slid to the edge of the paper.
- The paper is inserted into the feed slot, and the lever is pushed back.
- The left edge guide is moved to the '0' position to align the paper correctly.
- Printing on Continuous Paper:
- Users must first turn off the printer.
- The lever is pulled forward, and the continuous paper is loaded.
- The instructions show the printer cover removed for clarity, but explicitly state that it is not necessary to remove the cover during normal operation.
Maintenance Features
The LQ-1310's design incorporates several features that simplify routine maintenance and ensure long-term performance.
Print Head and Ribbon Management:
- Ribbon Tensioning: The ability to tense the ribbon after installation is a key maintenance feature. Proper ribbon tension ensures consistent print quality and extends the life of the ribbon by preventing slack that could lead to jams or uneven ink distribution.
- Print Head Positioning: The instruction to confirm the print head is in the middle position during assembly is a preventative measure. This ensures the print head is correctly aligned for initial operation and helps avoid potential damage or misalignment issues that could arise from an improperly parked print head.
- Ribbon Replacement: While not explicitly detailed as a step-by-step process in this quick start guide, the clear instructions for ribbon installation imply a straightforward replacement process. Users can easily remove an old ribbon and install a new one by following the same steps for insertion, ensuring minimal downtime.
Paper Path Management:
- Removal of Protective Materials: The emphasis on removing all protective materials from the printer, including those inside, is crucial for preventing obstructions in the paper path and ensuring smooth operation. This proactive step helps avoid paper jams and damage to internal components.
- Paper Tension Unit: The paper tension unit, which needs to be firmly attached, plays a role in maintaining proper paper feed. A correctly installed tension unit helps prevent paper from skewing or jamming, contributing to reliable printing.
- Continuous Form Handling: The design for loading continuous paper, including the use of sprockets and a lever, facilitates easy and secure paper feeding. This system is robust, reducing the likelihood of paper misfeeds during long print jobs, which is a common issue in dot matrix printers.
General Care and Troubleshooting:
- "Do not touch the white cable": This specific warning highlights a sensitive internal component. Adhering to this instruction prevents accidental damage to critical wiring, which could lead to printer malfunctions.
- Power Management: The instruction to turn off the printer before connecting the power cord or loading continuous paper is a standard safety and maintenance practice. It prevents electrical surges or accidental operations that could harm the printer or the user.
- User's Guide Reference: The guide frequently directs users to the "Troubleshooting section in the User's Guide" and "For detailed information about the printer and troubleshooting, refer to the User's Guide." This indicates that a comprehensive manual is available for more in-depth problem-solving and maintenance procedures, empowering users to address issues beyond basic setup.
- Online Support: The provision of a website address (http://www.epson.com) for additional information and the User's Guide ensures that users have access to up-to-date support resources, including detailed maintenance instructions, FAQs, and driver downloads. This online resource is invaluable for long-term printer care and problem resolution.
In summary, the LQ-1310 is designed for robust performance with a focus on user-friendly setup and maintenance. Its features support both continuous forms and single-sheet printing, making it a versatile tool for various printing needs. The clear instructions and emphasis on proper handling of components contribute to its reliability and ease of use over its operational lifespan.