EasyManuals Logo

Epson PowerLite 575W Installation Guide

Epson PowerLite 575W
96 pages
To Next Page IconTo Next Page
To Previous Page IconTo Previous Page
Page #26 background imageLoading...
Page #26 background image
26
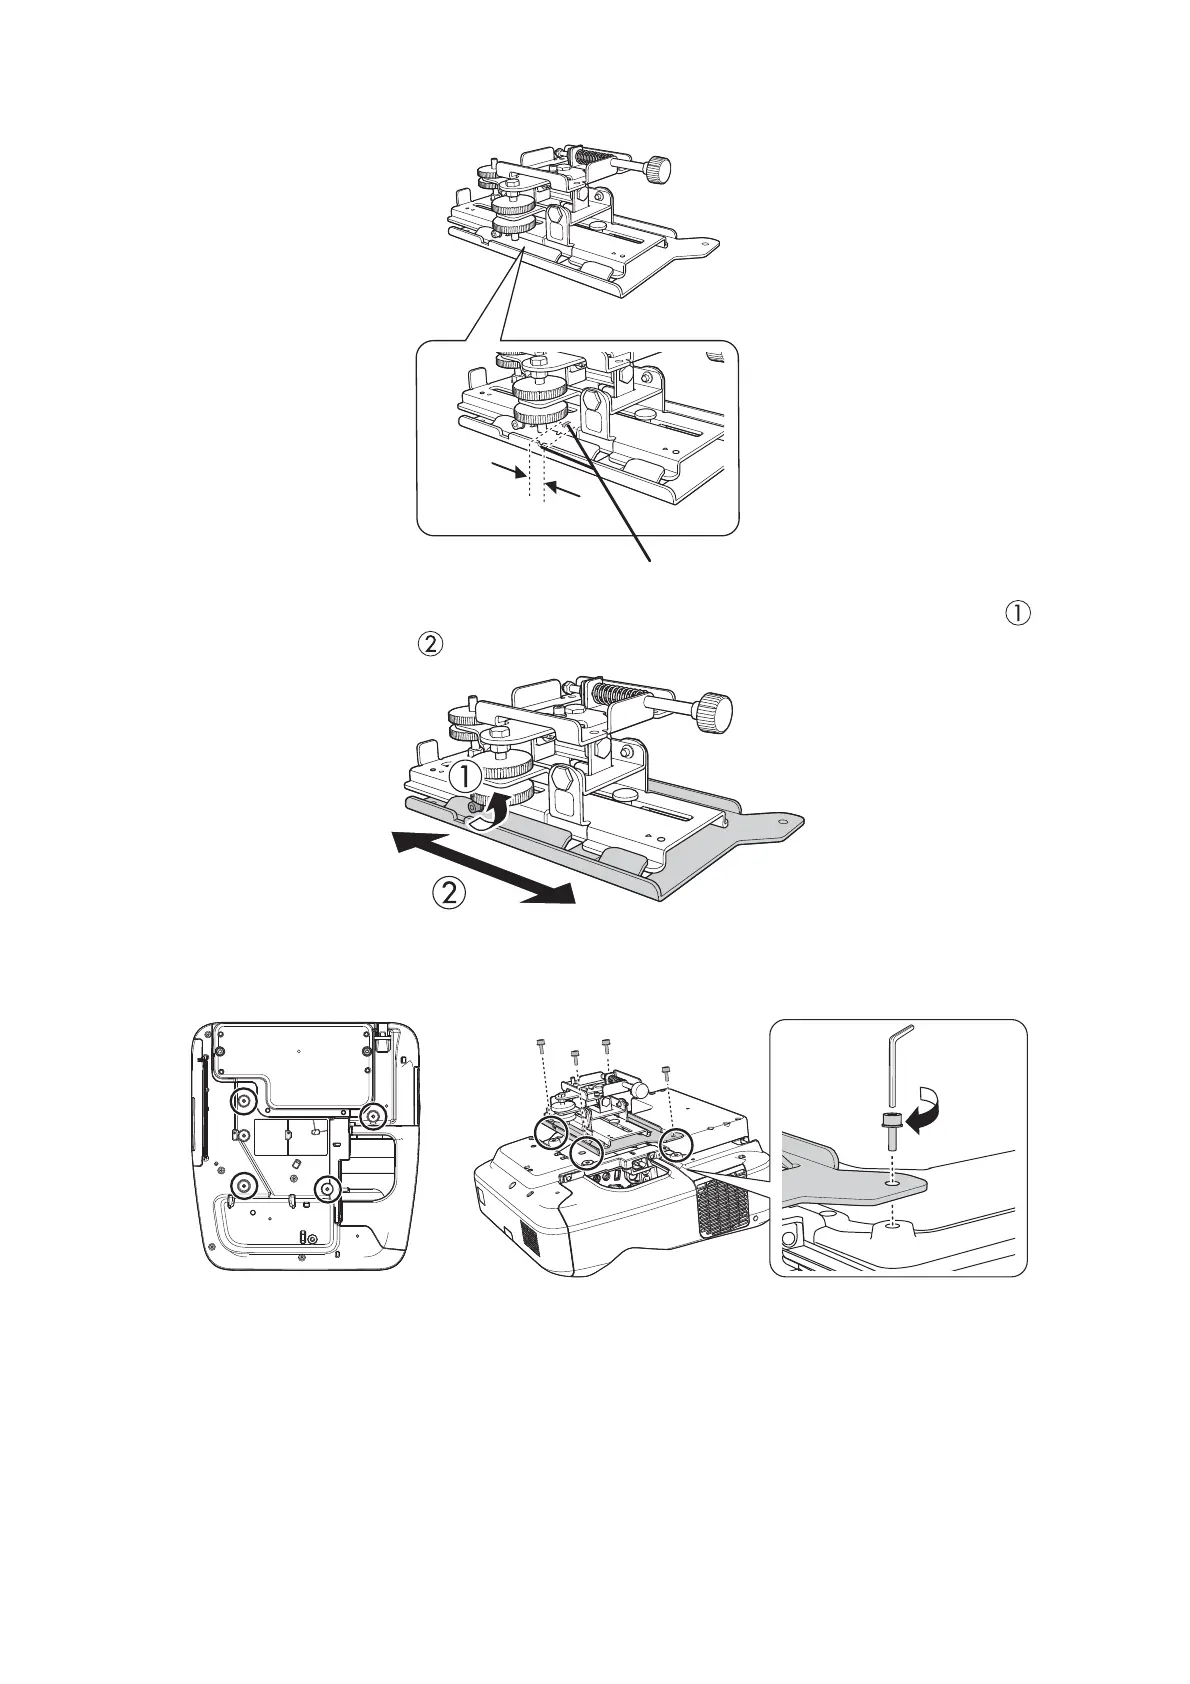
2. Align the 3-axis adjustment unit with the slide plates alignment mark.
If the 3-axis adjustment unit is not aligned, loosen the M4 x 12 mm hexagon socket head cap bolt ( )
and correct the alignment ( ). Then, tighten the M4 × 12 mm hexagon socket head cap bolt.
3. Attach the 3-axis adjustment unit and slide plate to the projector.
Attach the 3-axis adjustment unit and slide plate to the projector using the M4 × 12 mm hexagon socket
head cap bolts (×4) supplied.
Alignment mark
Bolt locations

Table of Contents

Other manuals for Epson PowerLite 575W

Questions and Answers:

Question and Answer IconNeed help?

Do you have a question about the Epson PowerLite 575W and is the answer not in the manual?

Epson PowerLite 575W Specifications

General IconGeneral
BrandEpson
ModelPowerLite 575W
CategoryProjector
LanguageEnglish

Related product manuals