EasyManuals Logo

Epson PowerLite 575W Installation Guide

Epson PowerLite 575W
96 pages
To Next Page IconTo Next Page
To Previous Page IconTo Previous Page
Page #42 background imageLoading...
Page #42 background image
42
7 Attaching the Covers
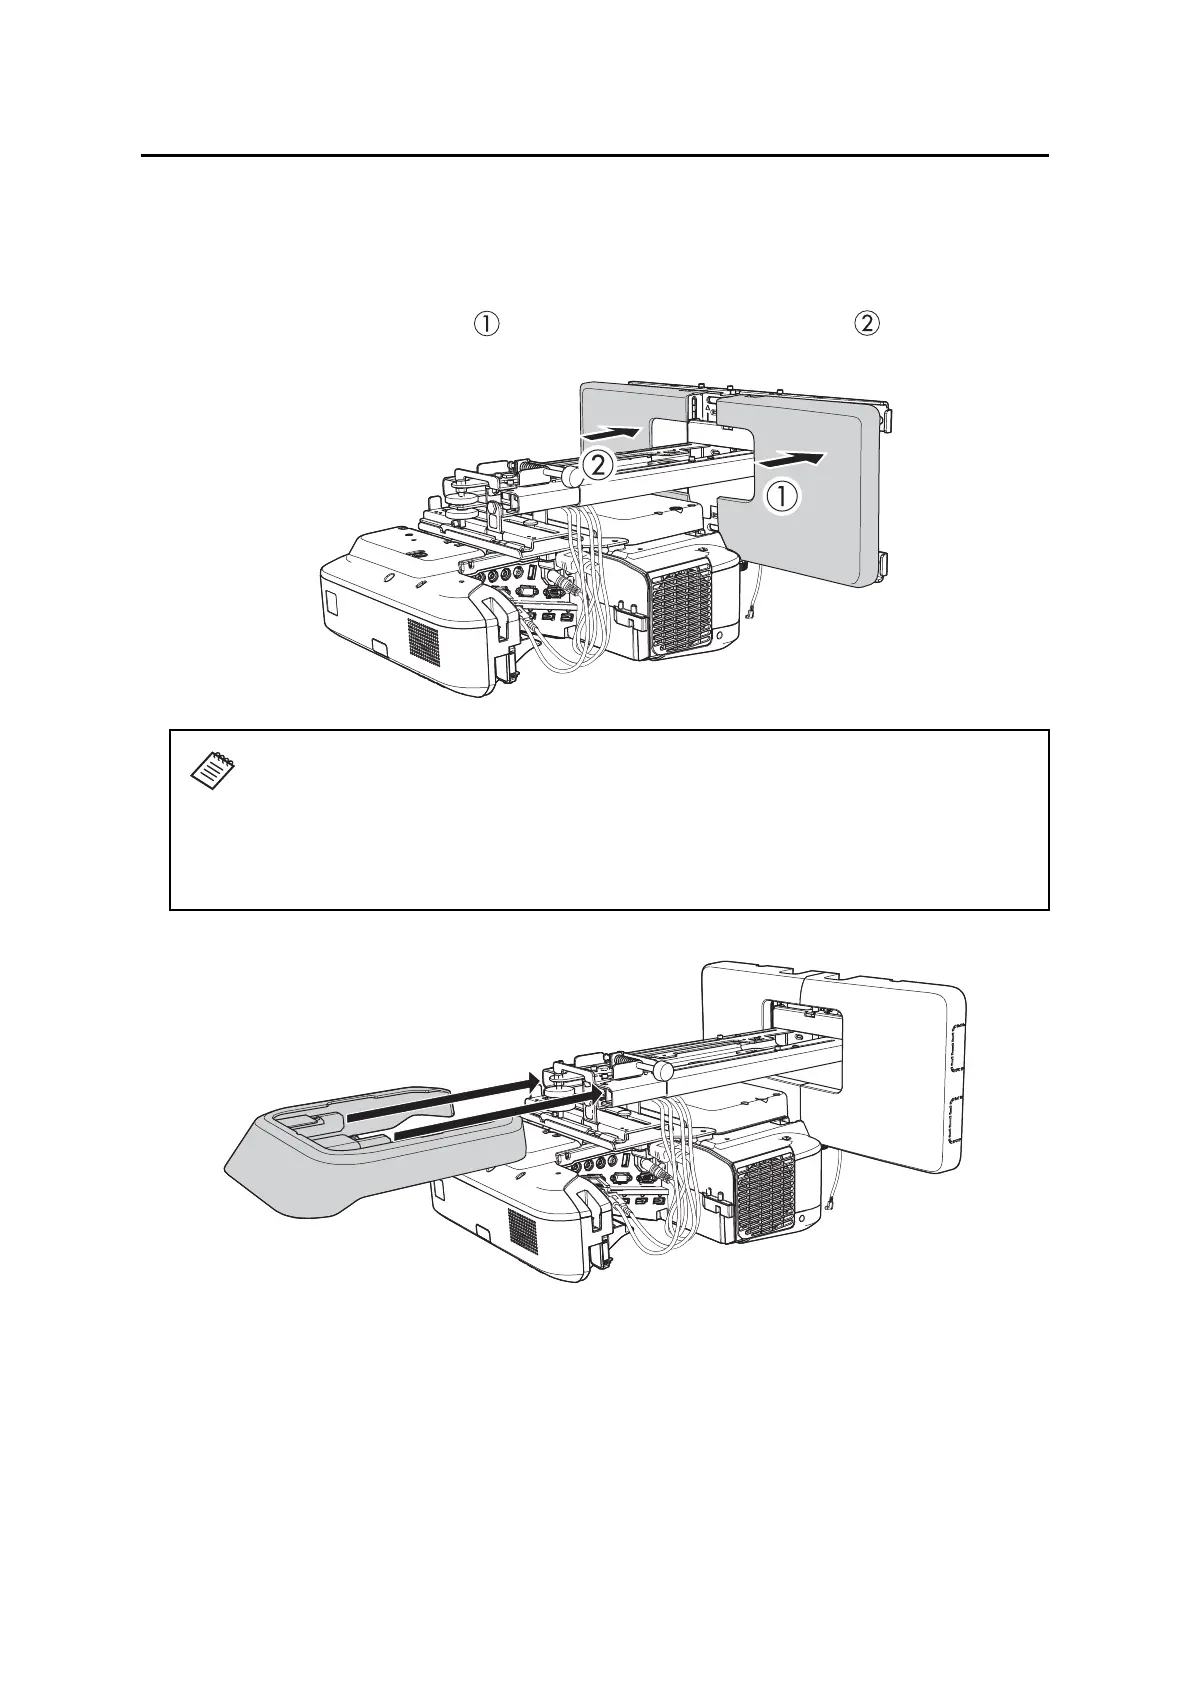
A Attach the wall plate cover and end cap
If you need to use a security cable, make sure you attach it before installing the wall plate cover. See
page 44 for instructions.
1. Attach the right wall plate cover ( ) first, then attach the left wall plate cover ( ). Snap the tabs on
the cover into the holes on the wall plate. (If you need to remove the cover, press the tabs.)
2. Attach the end cap to the mount arm.
Depending on how the cables are wired, you may need to cut out parts of the wall
plate cover to allow the cables to be passed through it.
When cutting the thin section of the wall plate cover and passing the cables through,
make sure you perform deburring to smooth off any sharp edges to prevent damaging
the cables.
Also, make sure you operate the cutter safely.

Table of Contents

Other manuals for Epson PowerLite 575W

Questions and Answers:

Question and Answer IconNeed help?

Do you have a question about the Epson PowerLite 575W and is the answer not in the manual?

Epson PowerLite 575W Specifications

General IconGeneral
ResolutionWXGA (1280 x 800)
Aspect Ratio16:10
Display Technology3LCD
Lamp Life10, 000 hours (Eco Mode)
Weight5.5 lbs (2.5 kg)
Zoom Ratio1.6x
Projection Size30 - 300 inches
ConnectivityHDMI, VGA, USB, Composite, Audio In/Out
Keystone CorrectionVertical: ±30 degrees, Horizontal: ±30 degrees
Noise Level28 dB (Eco Mode)
Output PortsVGA, Audio Out
Speakers16W Mono

Related product manuals