Do you have a question about the Epson PowerLite 680 and is the answer not in the manual?
Connect your computer to the projector using VGA, USB, or HDMI cables.
Connect the USB-B port to your computer for software installation and display.
Connect the Computer1 or Computer2 port to your computer's monitor port.
Connect one HDMI cable end to the projector and the other to your computer's HDMI port.
Connect external displays and audio devices to enhance your presentations.
Configure the projector for a wired network connection using the projector's menu system.
Connect a dynamic microphone to the projector's Mic port using a 3.5 mm mini-jack cable.
Connect multiple video devices and use Source Search to switch between them.
Connect MHL-compatible devices like tablets and smartphones to the HDMI 1/MHL port.
Access online manuals, documentation, FAQs, and troubleshooting advice.
Contact Epson support specialists for assistance during warranty periods.
Visit the support page for common problems and register for updates.
Purchase screens or other accessories from authorized resellers or online.
This document provides a comprehensive guide for setting up and using the PowerLite® 670/675W/680/685W projector, covering initial connections, remote control operation, network configuration, and troubleshooting.
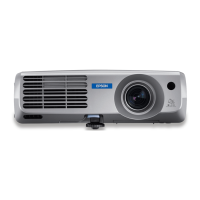
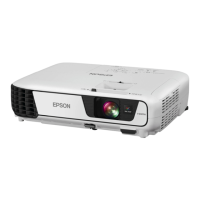
The PowerLite® 670/675W/680/685W is a versatile projector designed for various presentation and media display needs. It supports multiple input sources, including computers, video devices, USB devices, and mobile media devices, allowing for flexible content delivery. The projector can be integrated into a wired or wireless network, enabling advanced features like remote control and network projection. It also offers external monitor and speaker connections to enhance audio-visual presentations.
Before connecting, you must remove screws and a cable cover. The projector supports various input types:
The remote control requires two AA batteries.
You can control the projector through a web browser, performing many of the same functions as the physical remote control.
For iOS or Android™ devices, download the Epson iProjection™ app from www.epson.com/iprojectorapp (U.S.) or www.epson.ca/iprojectorapp (Canada).
To maintain optimal performance and prevent overheating, the air filter needs to be cleaned periodically. The document mentions sliding a switch to open the air filter cover, indicating that the filter is accessible for cleaning or replacement. Regular cleaning of the air filter helps ensure proper airflow and cooling for the projector.
The projector's functionality can be enhanced through software updates. For USB Display software, instructions are provided for both Windows and Mac operating systems, indicating that updates may be released to improve compatibility or add features. For network projection, the EasyMP Multi PC Projection software is used, which may also receive updates.
This comprehensive guide ensures users can effectively set up, operate, and maintain their PowerLite® 670/675W/680/685W projector for a seamless presentation experience.
| Matrix type | 3-panel (p-Si TFT active) |
|---|---|
| Number of colors | 1.073 billion colors |
| Native aspect ratio | 4:3 |
| Projection distance | 0.34 - 0.6 m |
| Projection technology | 3LCD |
| Contrast ratio (typical) | 14000:1 |
| Screen size compatibility | 55.4 - 92.7 \ |
| Projector native resolution | XGA (1024x768) |
| Keystone correction, horizontal | -3 - 3 ° |
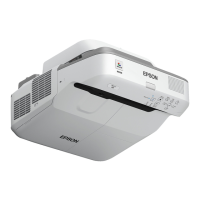
| Placement | Wall |
| Product type | Wall-mounted projector |
| Product color | Grey, White |
| Cable lock slot | Yes |
| Market positioning | Presentation |
| Cable lock slot type | Kensington |
| Lamp type | UHE |
| Lamp power | 250 W |
| Light source type | Lamp |
| Service life of light source | 5000 h |
| Service life of light source (economic mode) | 10000 h |
| Focus | Manual |
| Throw ratio | 0.31 - 0.42:1 |
| Fixed focal length | 3.7 mm |
| Focal length range | - mm |
| Operating temperature (T-T) | 5 - 40 °C |
| Noise level | 35 dB |
| Noise level (economic mode) | 30 dB |
| Power source | AC |
| AC input voltage | 100 - 240 V |
| AC input frequency | 50 - 60 Hz |
| Power consumption (standby) | - W |
| Power consumption (typical) | 373 W |
| Power consumption (economy mode) | 324 W |
| 3D | - |
| Full HD | No |
| Analog signal format system | NTSC, NTSC 4.43, PAL, PAL 60, PAL M, PAL N, SECAM |
| Audio (L/R) in | 3 |
| Audio (L/R) out | 1 |
| Serial interface type | RS-232 |
| USB 2.0 ports quantity | USB 2.0 ports have a data transmission speed of 480 Mbps, and are backwards compatible with USB 1.1 ports. You can connect all kinds of peripheral devices to them. |
| S-Video inputs quantity | 0 |
| RMS rated power | 16 W |
| Depth | 401.3 mm |
|---|---|
| Width | 368.3 mm |
| Height | 188 mm |
| Weight | 5715 g |