C
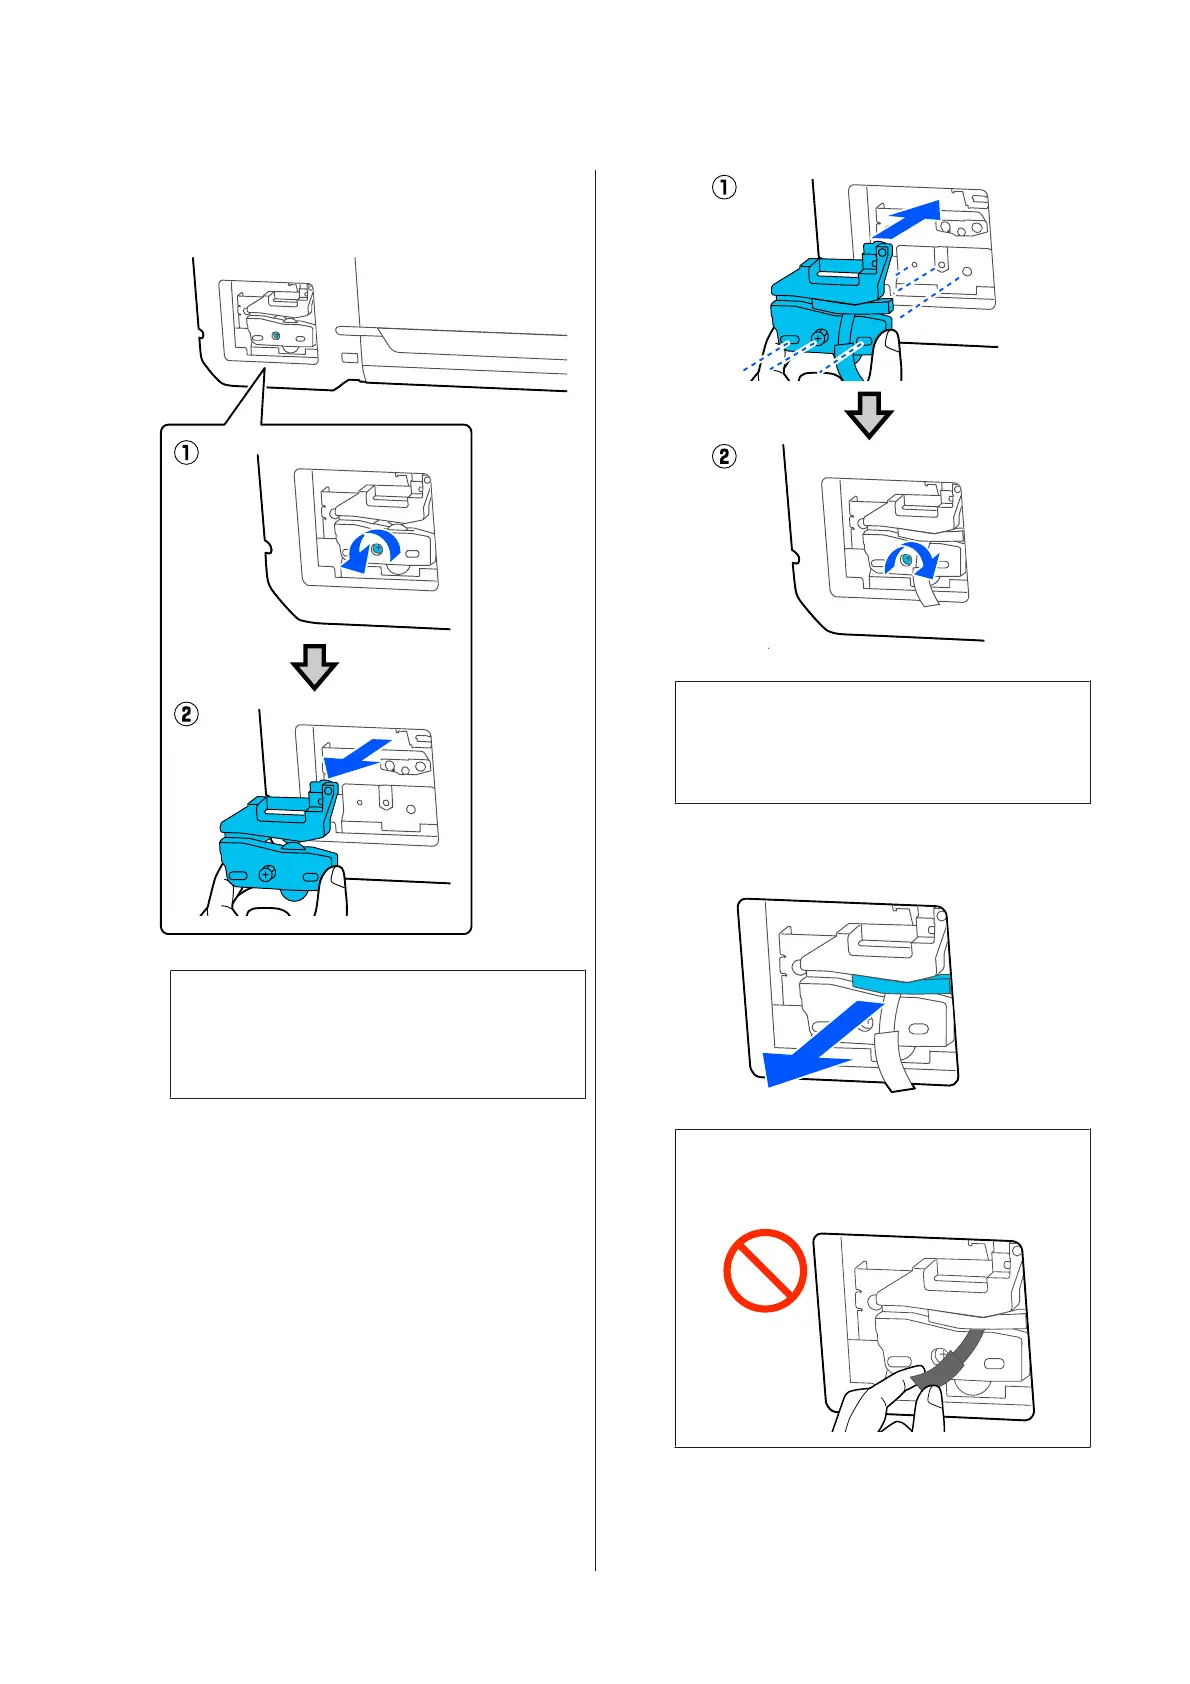
Loosen the screw holding the cutter in place
using a cross-head screwdriver and pull the
cutter straight out.
Note:
Place the used cutter in a plastic bag, then dispose
of in accordance with regional ordinances, and as
directed by local government.
D
Install the new cutter.
Insert the cutter so that the pin on the printer
matches up with the hole on the cutter. Use a
cross-head screwdriver to tighten down the
screw to hold the cutter in place.
c
Important:
Screw the cutter firmly, otherwise the cut
position may be slightly shifted or skewed.
E
Remove the protective material shown in the
figure.
c
Important:
Do not pull the protective sheet.
SC-T3100M Series/SC-T5100 Series/SC-T3100 Series/SC-T5100N Series/SC-T3100N Series/SC-T2100 Series User's Guide
Maintenance
184
 Loading...