EasyManuals Logo

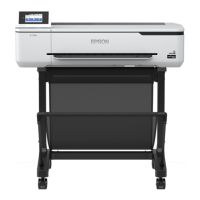
Epson SC-T2100 Series User Manual

Epson SC-T2100 Series
230 pages
To Next Page IconTo Next Page
To Previous Page IconTo Previous Page
Page #87 background imageLoading...
Page #87 background image
A
Ready the two top sheets and trim the excess
from the left sheet by cutting along the line
joining the two join guides (the centers of the X
marks).
B
Lay the upper left sheet on top of upper right
sheet. Lineup the X marks as shown in the
illustration below, and temporarily fasten them
using an adhesive tape on the back.
C
With the two sheets overlapping, trim the
excess by cutting along the line joining the two
cut guides (the lines to the left of the X marks).
D
Rejoin the two sheets.
Use an adhesive tape to stick the backs of the
sheets together.
E
Repeat steps 1 to 4 for the lower two sheets.
SC-T3100M Series/SC-T5100 Series/SC-T3100 Series/SC-T5100N Series/SC-T3100N Series/SC-T2100 Series User's Guide
Printing with the Printer Driver from Your Computer
87

Table of Contents

Questions and Answers:

Question and Answer IconNeed help?

Do you have a question about the Epson SC-T2100 Series and is the answer not in the manual?

Epson SC-T2100 Series Specifications

General IconGeneral
Printer TypeLarge Format Printer
Maximum Print Resolution2400 x 1200 dpi
Number of Ink Colors4 (Cyan, Magenta, Yellow, Black)
Memory1 GB
Operating SystemsWindows, macOS
Media HandlingRoll and Sheet
Maximum Print Width24 inches
ConnectivityUSB, Ethernet, Wi-Fi
Paper SizesA1, A2, A3, A4, B1, B2, B3, B4
Media TypesPlain paper, photo paper, matte paper
Print TechnologyPrecisionCore® MicroTFP printhead

Related product manuals