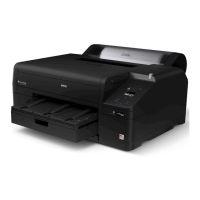
LFP CS Quality Assurance Department (Asakawa KG)
Spectroproofer Troubleshooting
20090130
1) Start-up Sequence.
Open the menu, select:
16 Seconds: 37 Seconds: "OPTION SETUP"
Spectroproofer Green Led turns "ON" Calibration tile Reading
43 Seconds
Paper Press Lowering
50 Seconds
Backing Color Check
0 Seconds: then Spectroproofer
POWER ON
Seconds
12345678910111213141516 17 18 19 20 21 22 23 24 25 26 27 28 29 30 31 32 33 34 35 36 37 38 39 40 41 42 43 44 45 46 47 48 49 50 …
then Status information
Make sure the light of the ILS
is bright for 1 second.
Make sure the paper Press lower
down correctly. then scroll down and select "Backing Color"
Make sure the green LED above OK Make sure the green LED of the OK Make sure the light of the ILS OK
the Power Button is "ON" mounter is "ON" is bright for 1 second.
Question 4) Does the light turn on for one second
50 seconds after printer power ON ?
Question 2) Does the Mounter Green LED turn on Yes: See the check 5, Question 5).
Check the Backing Color
15 seconds after printer power ON ?
No: go to Question 3B)
Yes: See the check 3, Question 3.
No: Wait a few more seconds.
If the below message appears, it means
the Spectroproofer power cable or
Question 1) Is the Green LED Bright
USB cable is not connected.
when powering ON ?
Yes: See the check 2, Question 2. Question 3) Doe the light turn on for one second
No: There is a problem with the Printer.
37 seconds after printer power ON ? GRAY is NG BLACK or WHITE is OK
Yes: See the check 4, Question 4).
No: Wait a few more seconds. Question 5) What is the BACKING COLOR ?
If the below message appears, it means
BLACK or WHITE:
o to question 5B
the Spectroproofer power cable or
GRAY:
o to question 5C
USB cable is not connected.
Question 5B
Did the li
ht turn on at the check 3 and 4 ?
Yes: Your ILS is working. Make sure the White calibration tile is correctly set.
Question 2B) Does the above message appear 40 Seconds after printer power on ? No: Turn the printer off and back on to do the check 3 and 4 once again.
Yes: Turn-OFF the printer, plu
the Mounter power cable & USB then re-start the printer.
fter one more try, if at this point the light is no bright, the ILS is probably NG and should be replaced.
IMPORTANT! Make sure the printer is Off when you connect the cable(s) !
Question 5C
Did the li
ht turn on at the check 3 and 4 ?
No: If the Mounter LED is Li
htnin
, then turn the printer Off and back on to perform check 3. Yes:
o to below question 5D
If the LED is not bright although the connections are correct, there is a problem with the Mounter.
No: Turn the printer off and back on to do the check 3 and 4 once again.
After one more try, if at this point the light is no bright, the ILS is certainly NG and should be replaced.
Question 5D) Is there a clean backing, is it correctly placed ? Is there a clan white calibration tile, is it correctly placed ?
Question 3B) Does the above message appear ? Yes: Go to Question 5E)
Yes: Turn-OFF the printer, plug the ILS then re-start the printer. (Power on again)
No: Place the backin
and/or the white calibration tile correctl
and
o to Question 5E
After one more try, if at this point the message appears although the ILS is connected, there may be a Mounter problem Note: A "Carriage Error" message can be caused by a missing/dirty calibration tile or backing.
IMPORTANT! Make sure the printer is Off when you connect the cable(s) !
Question 5E
Is the ILS set correctl
in the carria
e, the two left and ri
ht pins plu
ed in the holders holes
No: Turn the printer off and back on to do the check 3 and 4 once a
ain. Yes: Turn the printer off and back on to re-start the procedure.
After one more try, if at this point the light is no bright, the ILS is probably NG and should be replaced.
No: Set it correctly and turn the printer off and back on to restart the procedure.
Power "ON" the Printer.
(If correctly connected, the Spectroproofer is
automatically powered "on" when the printer is started)
Check 1 !
Check 2 !
Check 3 !
Check 4 !
Check 5 !