EasyManua.ls Logo

Epson ST-M1000 User Manual

Epson ST-M1000
4 pages
To Next Page IconTo Next Page
Page #1 background imageLoading...
Page #1 background image
Start Here
IMPORTANT: Before using this product, make sure you read these
instructions and the safety instructions in the online User’s Guide.
1
Unpack
Note: Do not open the ink bottle until you are ready to fill the ink tank.
The ink bottle is vacuum packed to maintain reliability.
1 Remove all protective materials from the product.
Caution: Do not touch the flat white cable, translucent film, or
the ink tubes.
2 Close the printer cover until it clicks.
Note: Do not connect the power cord yet.
2
Fill ink tank and charge
the ink
Warning: Keep the ink bottle out of the reach of children and do not
drink the ink.
Caution: This product requires careful handling of ink. If ink spills,
wipe it off immediately with a damp towel to avoid permanent stains. If
ink gets on your clothes or belongings, it may not come off.
Note:
Epson cannot guarantee the quality or reliability of third-party ink.
Use the ink bottle included with the printer to set up the product.
Part of the ink will be used to charge the print head. This bottle may
print fewer pages compared with replacement ink bottles.
1 Open the ink tank cover, then open the cap.
2 Unpack the ink bottle. Hold the ink bottle upright and
slowly turn the bottle cap to remove it.
Caution: Do not shake or squeeze the ink bottle. Do not touch
the top of the ink bottle after its cap is removed.
3 Insert the ink bottle into the filling port, as shown below.
Note: Do not force the bottle into position.
4 Wait for the ink to fill the tank. Do not squeeze the bottle.
Note: If ink does not flow from the bottle, lift and reinsert the
bottle.
ST-M1000
Question and Answer IconNeed help?

Do you have a question about the Epson ST-M1000 and is the answer not in the manual?

Epson ST-M1000 Specifications

General IconGeneral
Maximum Print Resolution1200 x 2400 dpi
FunctionsPrint
ConnectivityUSB, Ethernet
Paper Handling Input250 sheets
Weight4.5 kg
Mobile PrintingApple AirPrint
Printing MethodPrecisionCore Heat-Free Technology

Summary

Unpack and Initial Setup

Remove Protective Materials

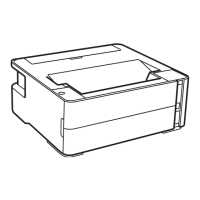
Remove all protective materials from the product before proceeding with setup.

Fill Ink Tank and Charge Ink

Prepare Ink Tank Access

Open the ink tank cover and then open the cap to access the ink filling port.

Prepare Ink Bottle

Carefully unpack the ink bottle and remove its cap by turning it slowly.

Insert Ink Bottle

Insert the ink bottle into the designated filling port for ink transfer.

Ink Filling Process

Allow ink to fill the tank naturally without squeezing the bottle.

Connect Power and Start

Connect power, turn on the printer, and initiate ink charging.

Load Paper

Install Software and Connect

Software Installation Prerequisites

Ensure the printer is not connected to the computer before installing software.

Download Software Package

Download and execute the printer's software package from the specified URL.

Troubleshooting Common Issues

Related product manuals