Epson Stylus C88
8 - Epson Stylus C88 6/05
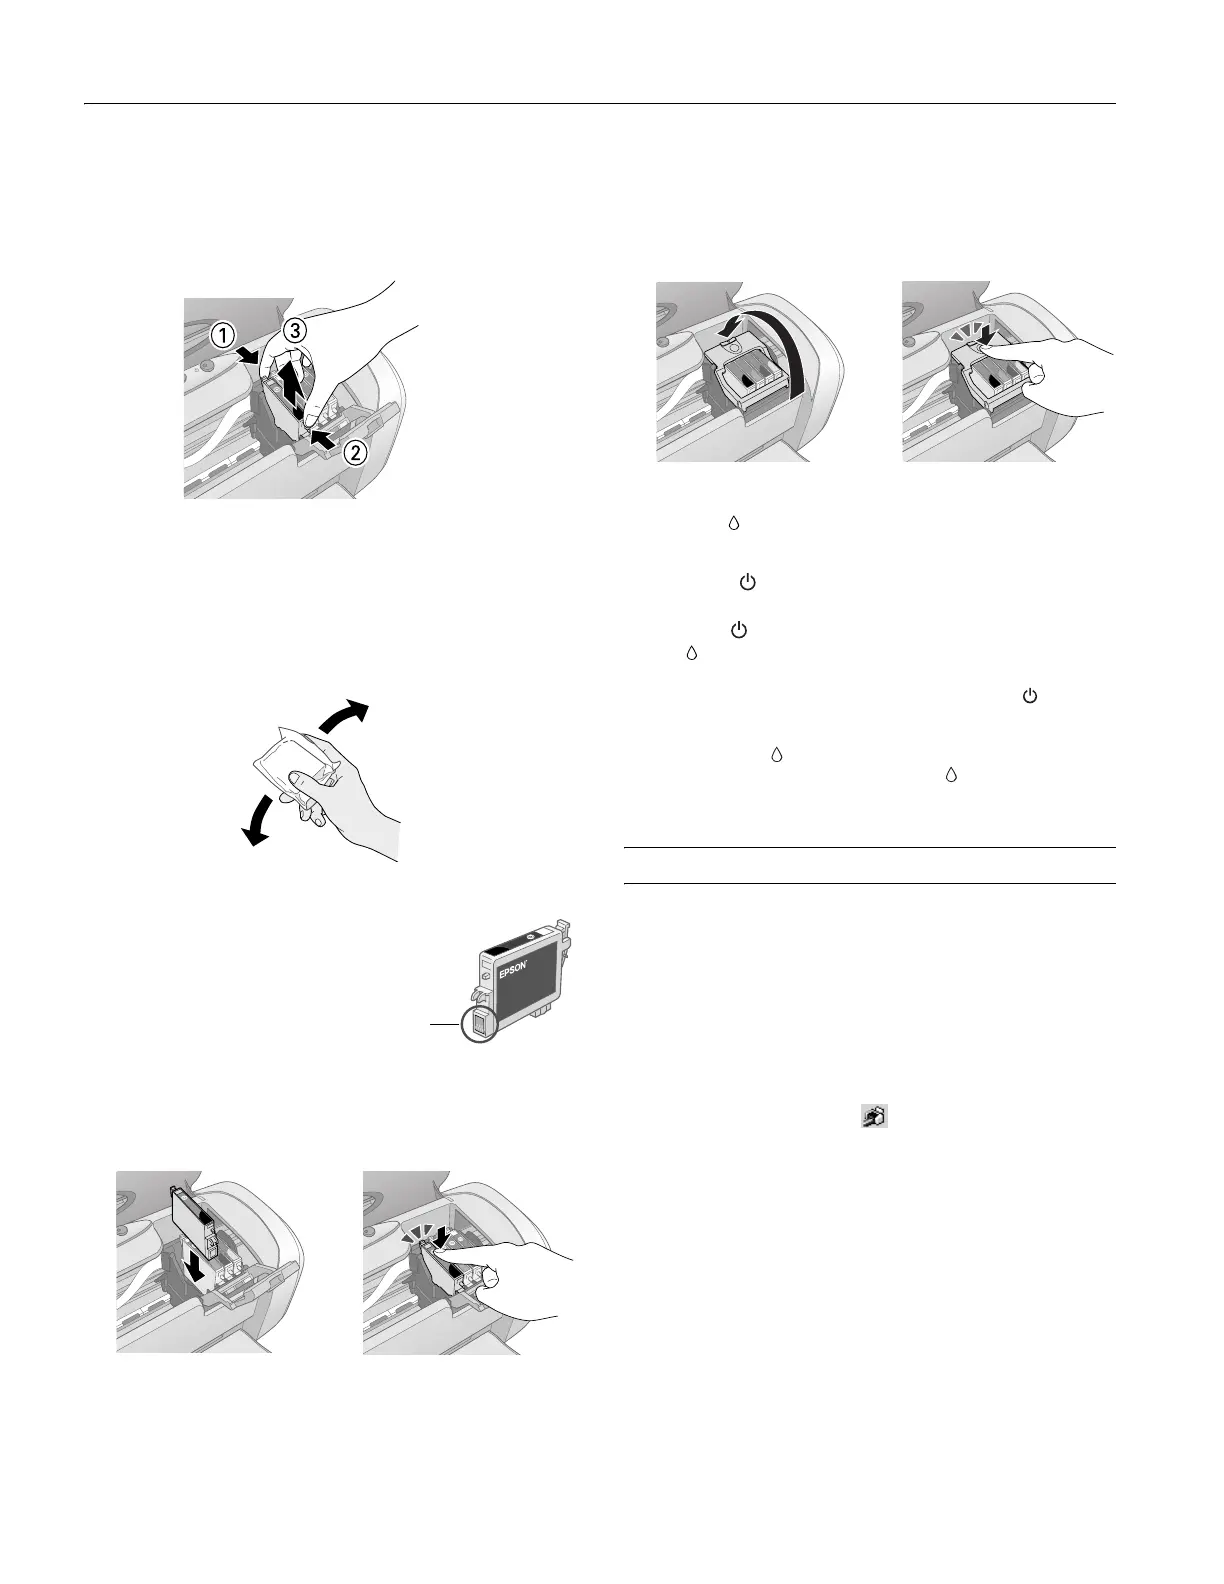
5. Open the cartridge cover.
6. Squeeze the back tab of the empty/low cartridge and lift it
out of the printer. Don’t take the used cartridge apart or try
to refill it.
Warning: If ink gets on your hands, wash them thoroughly with
soap and water. If ink gets into your eyes, flush them
immediately with water.
7. Before you remove the new cartridge from its package,
shake it four or five times. Then remove it from the
package.
Caution: Do not remove
or tear the label on the
cartridge; otherwise ink
will leak.
Don’t touch the green
chip on the front of the
cartridge; you may inhibit
normal operation and
printing.
8. Lower the cartridge into the holder and push it down until
it clicks into place.
9. If you need to replace other ink cartridges, repeat steps 6
through 8 before continuing with step 10.
10. Close the ink cartridge cover and make sure you hear it click
into place.
11. Close the printer cover.
12. Press the ink button. The printer begins charging the ink
delivery system.
The green power light flashes and the printer makes
noise. Charging takes about 1 minute. When it’s finished,
the green power light stops flashing and stays on, and the
red light goes out.
Caution: Never turn off the printer while the green power
light is flashing, or you’ll waste ink.
Note: If the red light stays on (not flashing), the ink cartridge
may not be installed correctly. Press the ink button again and
reinstall the ink cartridge until it clicks into place.
Aligning the Print Head
If your printouts look blurry or grainy, or you see light or dark
vertical banding, you may need to align the print head.
Note: Banding may also occur if your cartridges are low on ink or you
need to clean the print head.
1. Turn on the printer.
2. Load several sheets of paper.
3. Windows: Right-click the printer icon on your taskbar
(in the lower right corner of your screen). Select
Print Head
Alignment
.
Note: If you don’t see the icon, go to your printer properties
window, click the Maintenance tab, then select Print Head
Alignment.
Macintosh OS X: Open the Applications folder and
double-click the
Epson Printer Utility icon. Select
Stylus C88 in the printer list, click OK, and select
Print Head Alignment.
Don’t touch
the green part

 Loading...