22 Maintenance
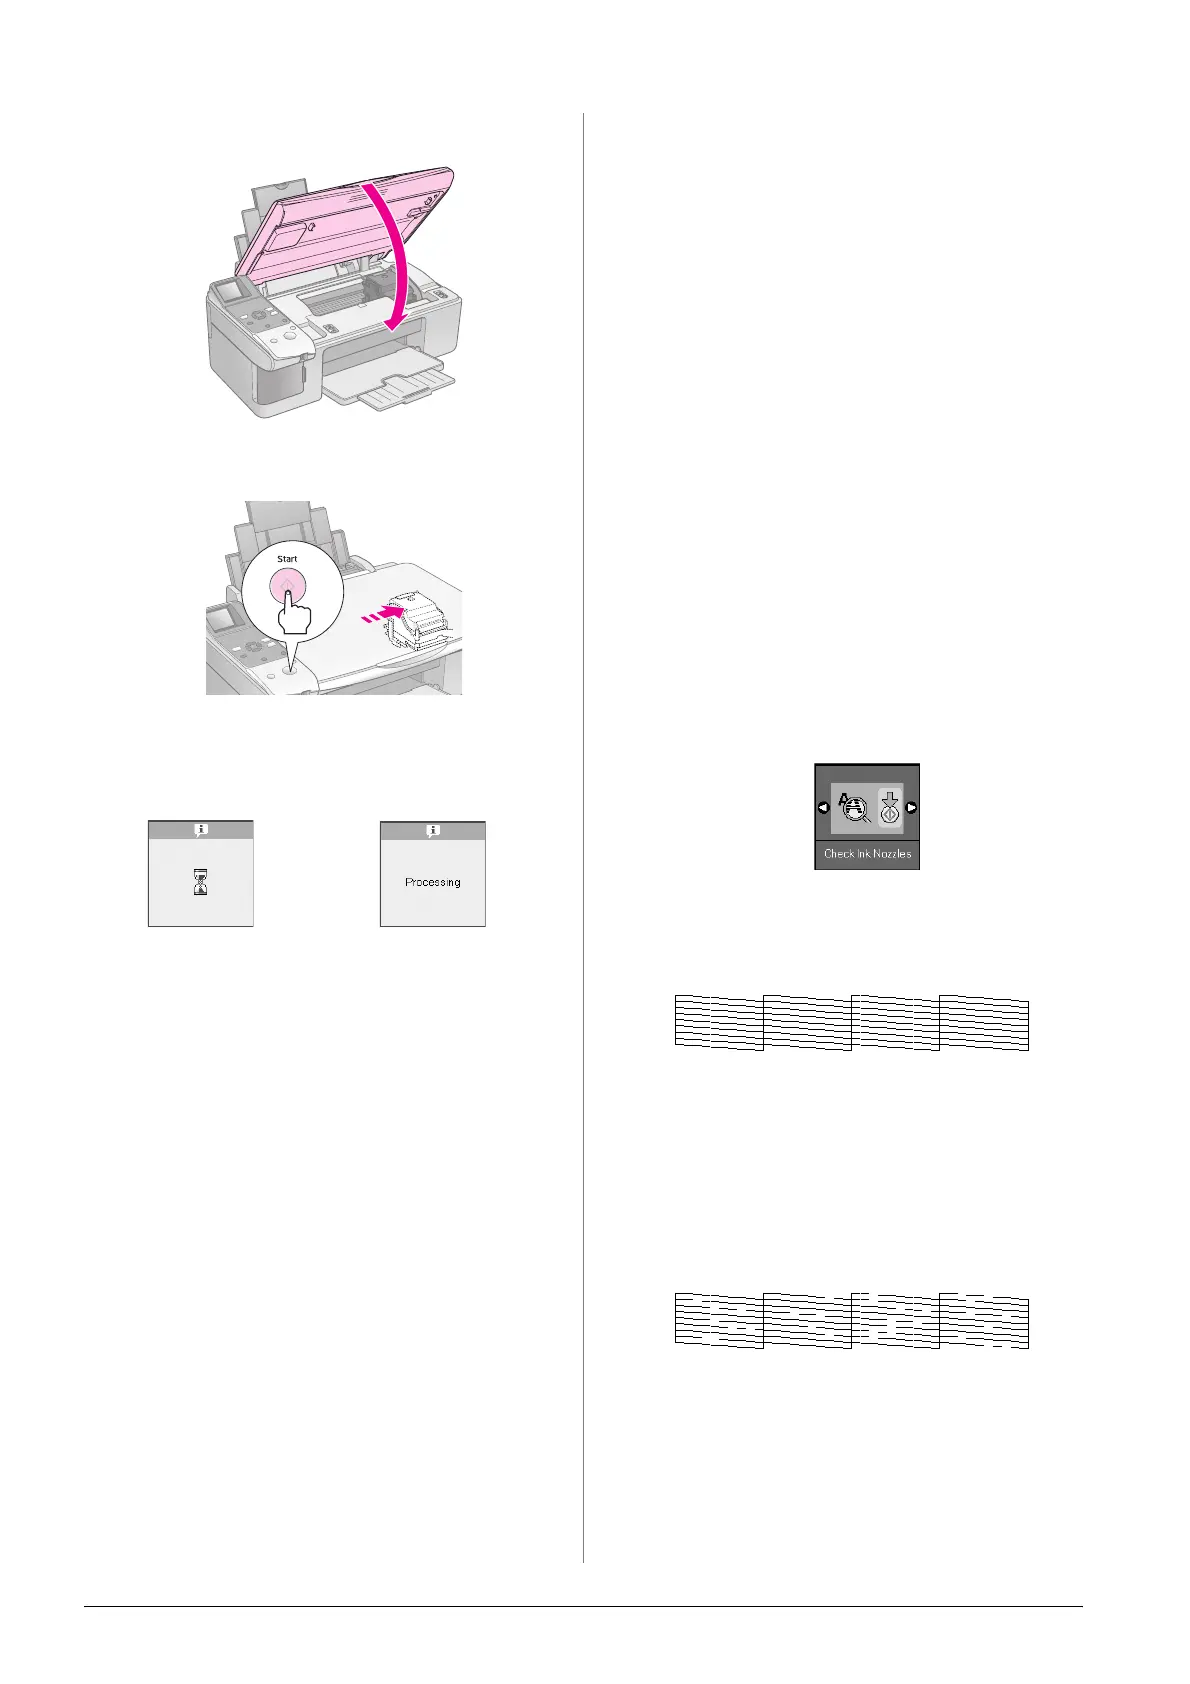
10. Close the scanner unit.
11. Press the x Start button.
When the product begins charging, one of the
following LCD screens is displayed.
This takes about one minute. When the ink
charging finishes, it automatically returns to the
Copy mode.
c Caution:
Do not turn off the product during ink charging as this will
waste ink.
Checking and Cleaning the
Print Head
If your printouts are unexpectedly light, colors are
missing, or you see light or dark lines across the
page, you may need to clean the print head. This
clears the print head nozzles, which can become
clogged if you do not use the product for a long time.
Tip:
We recommend that you turn on the product at least once a month
to maintain good print quality.
Checking the print head
You can print a nozzle check pattern to see if any
print head nozzles are clogged, or to check the results
after cleaning the print head.
1. Load A4-size plain paper in the sheet feeder
(& page 6).
2. Press the F [Setup/Utilities] button.
3. Use the l or r button to select Check Ink
Nozzles, and then press the x Start button to
print the nozzle check pattern.
4. Examine the nozzle check pattern you printed.
Each staggered line should be solid, with no
gaps, as shown.
■ If your printout looks okay, the print head
does not need to be cleaned yet. Press the F
[Setup/Utilities] button to return to the
previous mode.
■ If you see any gaps, as shown below, clean
the print head as described in the next
section.
Icon display Text display
 Loading...


