Do you have a question about the Epson Stylus Office TX320F and is the answer not in the manual?
Instructions for unpacking the printer and its accessories.
Steps to connect the power cable and turn on the printer.
Guide to selecting language, region, date, and time settings.
Instructions for installing ink cartridges before use.
Steps for loading paper into the printer.
Instructions for connecting the phone cord for fax functionality.
Ensure printer is disconnected and insert the product CD to start installation.
Select language, install, and connect the USB cable when prompted.
Specific steps for Mac OS X 10.4 users to add the printer.
Access user guide, online help, and contact support for assistance.
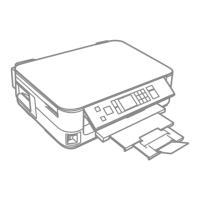
Description of printer buttons and display functions.
Information on purchasing genuine Epson paper and ink cartridges.
Guidance for error messages and connectivity issues.
| Print Technology | Inkjet |
|---|---|
| Functions | Print, Scan, Copy, Fax |
| Print Resolution | 5760 x 1440 dpi |
| Scanner Type | Flatbed |
| Scan Resolution | 1200 x 2400 dpi |
| Fax Speed | 33.6Kbps |
| Connectivity | USB 2.0, Ethernet, Wi-Fi |
| Fax Transmission Speed | Approx. 3 sec per page |
| Paper Sizes | A4, A5, B5, Letter, Legal |
| Display | LCD screen |
| Paper Handling | Input tray: 120 sheets, Output tray: 50 sheets |
| Copy Speed (Black) | 34 cpm (Draft) |
| Ink Cartridges | 4 individual ink cartridges (Black, Cyan, Magenta, Yellow) |