EPSON Stylus CX7300/CX7400/DX7400/NX200/TX200 series/SX200 series/Stylus CX8300/CX8400/DX8400/NX400/TX400 series/SX400 series Revision C
DISASSEMBLY/ASSEMBLY Disassembling the Printer Mechanism 133
Confidential
4.5.20 Waste Ink Pads
Parts/Components need to be removed in advance
Document Cover/ASF Cover/Scanner Unit/Panel Unit/Upper Housing/Card Slot
Cover/Lower Housing/Main Board Unit/Left Frame/Front Frame/Right Frame/CR
Motor/CR Scale/Hopper/Main Frame Assy/ASF Unit/Ink System Unit/Star Wheel
Holder Assy/EJ Roller/Front Paper Guide/PF Encoder Sensor/PF Scale/PF Roller
Removal procedure
1.
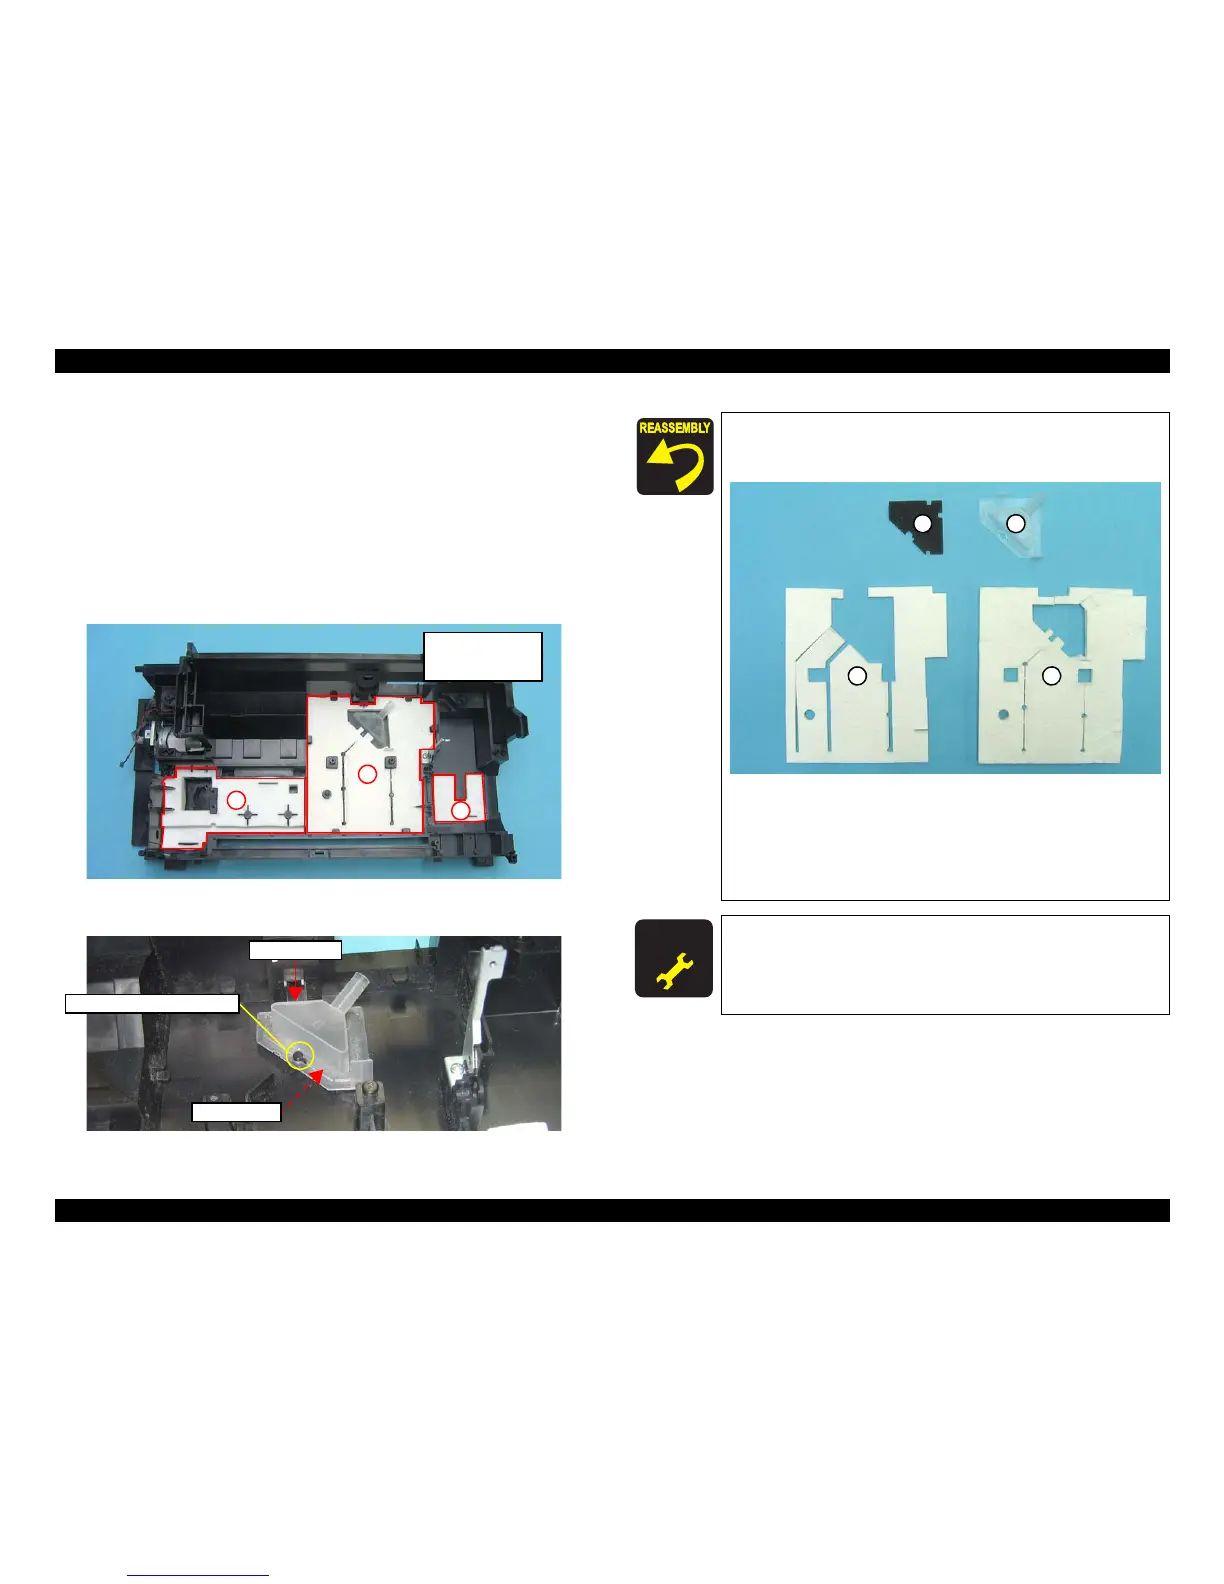
Remove the Waste Ink Pads (x5) from the sections indicated with A to C of the Base
Frame.
Figure 4-101. Removing the Waste Ink Pads
2. Remove the Waste Ink Cover and the Diffusion Sheet.
Figure 4-102. Removing the Waste Ink Cover and Diffusion Sheet
A
B
C
A: Waste Ink Pads x2
B: Waste Ink Pads x2
C: Waste Ink Pad x1
Waste Ink Cover
Diffusion Sheet
Guide Pin and Positioning Hole
When installing the Diffusion Sheet, Waste Ink Cover, and
the Waste Ink Pads (x2) on section B, attach them in the
order given in the figure below.
Figure 4-103. Installing the Waste Ink Pads
When installing the Waste Ink Cover, be sure to align the
guide pin (x1) of the Base Frame with the positioning hole
(x1) of the Waste Ink Cover as shown in
Figure 4-102. Make
sure to confirm the cover is properly secured on the Diffusion
Sheet without any gap.
A D J U S T M E N T
R E Q U I R E D
Whenever the Waste Ink Pads is removed/replaced, the required
adjustments must be carried out.
• Chapter 5 “ ADJUSTMENT” (p.141)
 Loading...


