Start Here
4 Slide the edge guides against the paper, but not too
tight. Make sure the paper is under the tabs on the edge
guides.
5 Gently insert the paper cassette.
Note: The paper may slide forward slightly as you insert the
cassette. This is normal.
6 Extend the output tray and raise the paper stopper as
shown. (Do not raise the stopper for legal-size paper.)
5
Install software
Note: If your computer does not have a CD/DVD drive, you can
download the software from the Epson website (see “Epson technical
support”).
Caution: Be sure to close your other programs, including any screen
savers and virus protection software, before beginning this software
installation.
1 Make sure the printer is NOT CONNECTED to your
computer.
Windows
®
: If you see a Found New Hardware screen, click
Cancel and disconnect the USB cable. You can’t install your
software that way.
2 Insert your product CD.
Read these instructions before using your printer.
1
Unpack
Caution: Do not open ink cartridge packages until you are ready to
install the ink. Cartridges are vacuum packed to maintain reliability.
Remove all tape and protective materials, including the foam and
plastic inside the printer.
2
Turn on
1 Connect the power cord to the back of the printer and to an
electrical outlet.
Caution: Do not connect to your computer yet.
2 Press the power button.
3
Install ink cartridges
1 Open the front cover.
2 Unpack the four ink cartridges.
3 Shake each cartridge as shown for about 5 seconds.
4 Install each cartridge in the correct slot for its color.
Push each cartridge in until it clicks.
5 Close the front cover.
The printer starts priming the ink. This takes about 12
minutes. When the green power light stops flashing,
priming is complete.
Note: The included cartridges prime the printer and print about 1000
black pages/900 color pages. Actual page count may vary.
Caution: Don’t turn off the printer or open the cover while it is
priming or you’ll waste ink.
4
Load paper in the cassette
You can load letter-, A4-, or legal-size plain paper in the
cassette. For instructions on loading envelopes and special
paper in the rear MP tray, see the online User’s Guide.
1 Pull out the paper cassette.
2 Slide the edge guides outward.
Note: If you are loading legal-size paper, extend the cassette as
shown.
3 Insert the paper with the glossy or printable side face
down.
Note: Make sure the paper is loaded against the front edge
guide and not sticking out from the end of the cassette.
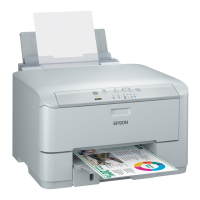
WorkForce
®
Pro WP-4020