Do you have a question about the Epson WorkForce WF-2960 and is the answer not in the manual?
Remove all protective materials from the product and lift the scanner unit until it locks.
Remove all protective materials from inside the printer.
Download and use the Epson Smart Panel app for interactive setup.
Skip app setup and proceed to turn on and configure the printer.
Raise control panel, turn on product, wait for power light.
Select language, country, date, and time.
Lift scanner unit, gently shake black ink cartridge, unpack cartridges.
Remove yellow tape, insert cartridges until they click into place.
Printer charges ink for approx. 5 minutes; do not interrupt.
Pull out paper cassette, slide edge guides to fit paper.
Insert paper with printable side down, keep cassette flat.
Pull out output tray, adjust print quality via LCD screen.
Download and run product software from Epson website.
Select connection type: Wireless, Direct USB, or Wired Network.
Tips for resolving network connection problems and ensuring correct settings.
Advice for lines or incorrect colors in printouts, including nozzle checks.
Troubleshooting dark screens and setup issues with USB connections.
Instructions to access the online User's Guide and support videos.
Information for downloading drivers, manuals, FAQs, and contacting Epson support.
This document serves as a "Start Here" guide for the Epson WF-2960 printer, providing essential setup instructions, safety information, and troubleshooting tips. It emphasizes the use of genuine Epson cartridges and directs users to online resources for detailed information and support.
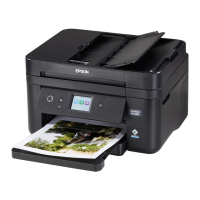
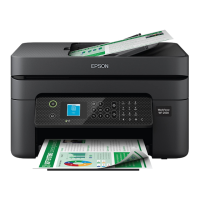
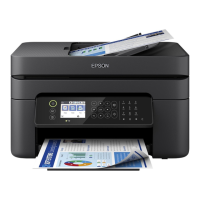
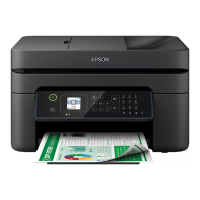
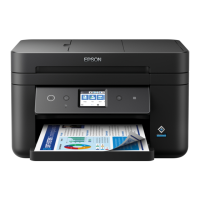
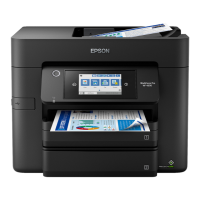
The Epson WF-2960 is a multifunction printer designed for home or small office use, capable of printing, scanning, and faxing. It supports both wired and wireless network connections, allowing for flexible placement and access. The printer is designed to work with Epson Smart Panel, a mobile application that facilitates an interactive, step-by-step setup process using a smartphone or tablet. For users who prefer not to use a mobile device, the printer can also be set up directly through its control panel. It supports mobile and voice-activated printing, enabling users to print directly from Android devices, remotely via Epson Connect, or through voice assistants. The printer is designed for use with Epson-branded ink cartridges, with a strong emphasis on the reliability and performance benefits of genuine Epson supplies.
The setup process begins with unpacking the printer and removing all protective materials. Users are guided to lift the scanner unit until it locks into place, then remove internal protective materials, being careful not to touch the flat white cable. The power cord is connected to the back of the product and an electrical outlet, with a caution against connecting to a computer at this stage.
For initial setup, users have two primary options:
Ink cartridge installation is a critical step. Users are cautioned to keep cartridges out of reach of children and not to drink the ink. The included initial cartridges are specifically for printer setup and are not intended as replacements or for resale. To install, the scanner unit is lifted until it locks. The black ink cartridge should be gently shaken, but other color cartridges should not. All cartridges are unpacked, and only the yellow tape is removed from each. Users are warned not to remove other labels or seals, or to touch specific areas, to prevent ink leakage. Cartridges are inserted into their respective color holders and pressed down until they click into place. Once all cartridges are installed, the scanner unit is lowered.
After ink installation, users select "Installed" on the printer's screen. The printer then begins an ink charging process, which takes approximately 5 minutes. During this time, users are cautioned not to turn off the printer or raise the scanner unit to avoid wasting ink. A completion message will appear on the LCD screen when charging is finished. As part of the setup, the product's serial number is sent to a secure Epson server to enable participation in programs like the Epson ink replenishment program, with a separate opportunity for consent.
The guide then directs users to follow on-screen instructions to adjust print quality. This requires loading 4 sheets of letter-size paper. Users can choose to "Adjust Later" if they prefer.
Loading paper involves pulling out the paper cassette, squeezing a tab on the right edge guide to slide the side edge guides all the way out, and inserting paper with the glossy or printable side down. The edge guides are then slid against the paper, but not too tightly. The cassette is kept flat while being inserted all the way. Finally, the output tray is pulled out. After loading paper, users follow LCD screen instructions to adjust print quality and select paper settings.
Fax line connection involves connecting a phone cord from a telephone wall jack to the "LINE" port on the product. Users can choose to set up the fax immediately by pressing "Proceed" or defer it by pressing "Set up later."
Software installation is the final major step. Users are instructed to ensure the product is NOT CONNECTED to their computer before installing software. For Windows users, if a "Found New Hardware" screen appears, they should click "Cancel" and disconnect the USB cable. Users download and run the product's software package from the Epson support website. After running the setup program, they select their connection type on the "Select Your Connection" screen:
The printer supports mobile printing from Android devices (v4.4 or later) by connecting the printer and device to the same network and selecting the print option from the menu. The Epson Smart Panel app also functions as a printing and scanning control center. Remote printing is available via Epson Connect. Voice-activated printing is supported by linking the Epson product to an Epson Connect account and then to a voice-activated assistant.
The document provides troubleshooting tips for common issues:
The guide also directs users to the online User's Guide for more detailed information on loading capacity, available paper types and sizes, loading envelopes, using the ADF, and other settings. Epson offers a recycling program for end-of-life hardware and ink cartridges, with information available on their website. Firmware updates are periodically provided to address security, performance, and minor bug fixes, and to ensure the printer functions as designed. These updates may affect the functionality of third-party ink.
| Print Technology | Inkjet |
|---|---|
| Max Print Resolution | 5760 x 1440 dpi |
| Paper Capacity | 150 sheets |
| Functions | Print, Copy, Scan, Fax |
| Maximum Scan Resolution | 1200 x 2400 dpi |
| Fax Capability | Yes |
| Automatic Document Feeder | Yes, 30 sheets |
| Print Speed (Black) | 14 ppm (ISO) |
| Print Speed (Color) | 7.5 ppm (ISO) |
| Connectivity | USB, Ethernet, Wi-Fi, Wi-Fi Direct |
| Duplex Printing | Yes |
| Scanner Type | Flatbed |
| Display | 2.4" color LCD |
| Mobile Printing | Apple AirPrint |
| Paper Sizes | Letter, Legal, A4, A5, A6 |
| Dimensions (W x D x H) | 14.8" x 13.7" x 9.5" |


 Loading...