Connecting Devices to the FWT
Fixed Wireless Terminal: G32 and G36 models 19
• The PBX can be programmed to utilize Least Cost Routing
(LCR), if available, to automatically choose the trunk where the
G36 FWT is connected.
• If the PBX does not offer LCR, choose the trunk where the G36
FWT is connected manually with a special dialed prefix. Check
the installation in the same way as before.
The G36 FWT is compatible with most analog PBXs on the market.
G36 FWT connectivity to the analog trunk of the PBX
If the PBX fulfils the requirements for FWT connectivity, listed above,
follow all the installation steps as described in the topic Installing the FWT
on the Wall documented on page 4.
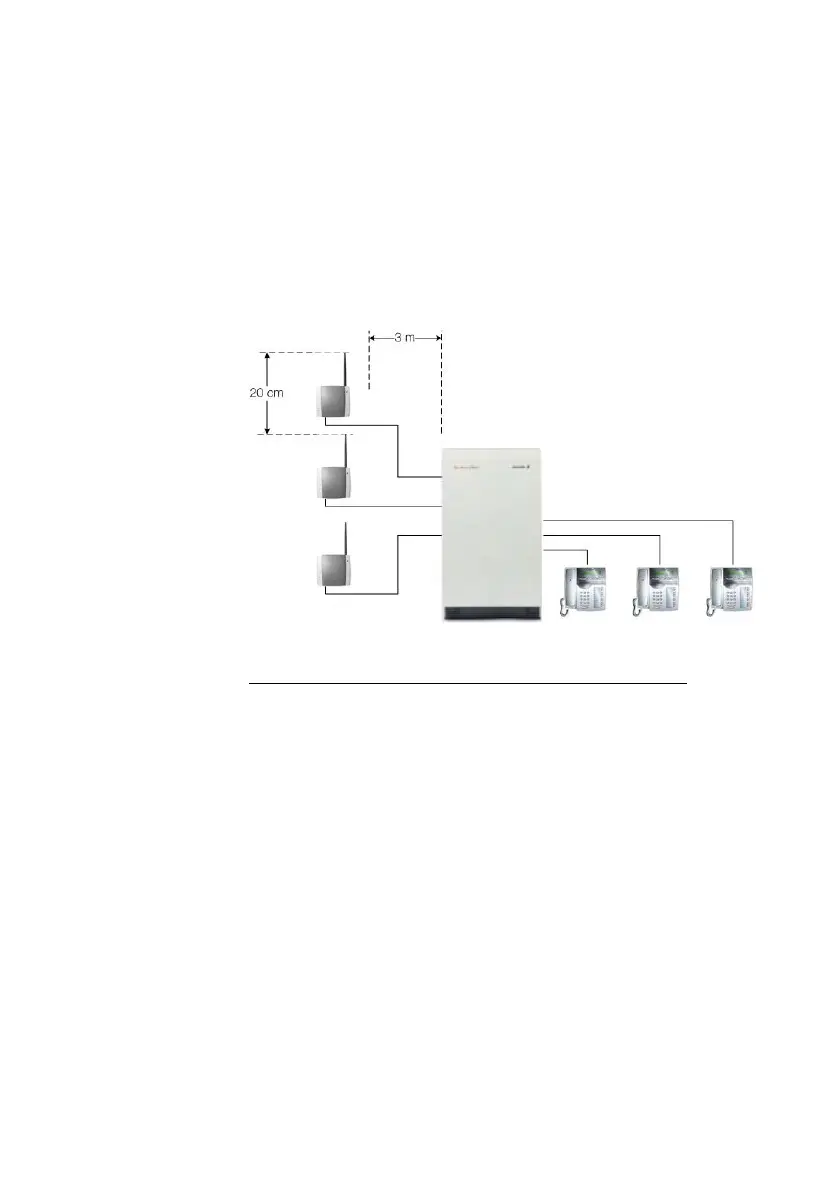
Note: A minimum distance of 3 meters between the G36 FWT and
the PBX is recommended. The cable distance between the PBX
and the G36 FWT should not exceed 600 meters, and the
connection cable should be at least 0.4mm
2
in diameter.
Warning: If you install more than one G36 FWT to a PBX, their
antennas have to be separated by 20 cm in height or 2 meters in
the horizontal.
If you are using an analog PBX — disconnect the telephone you have used
to enter the PIN and test the FWT, and connect the analog trunk cable
from the PBX to the FWT telephone line interface.
Check your PBX programming guide to see how to program your PBX to
route certain calls through the FWT trunk if you are using a Least Cost
Routing (LCR) programmed PBX. Once LCR is programmed, make a call
to a mobile telephone number. See if the call is established through the
FWT and check the speech quality.