24
Maintenance and Cleaning (Continued)
INTERNAL CARE CONTINUED
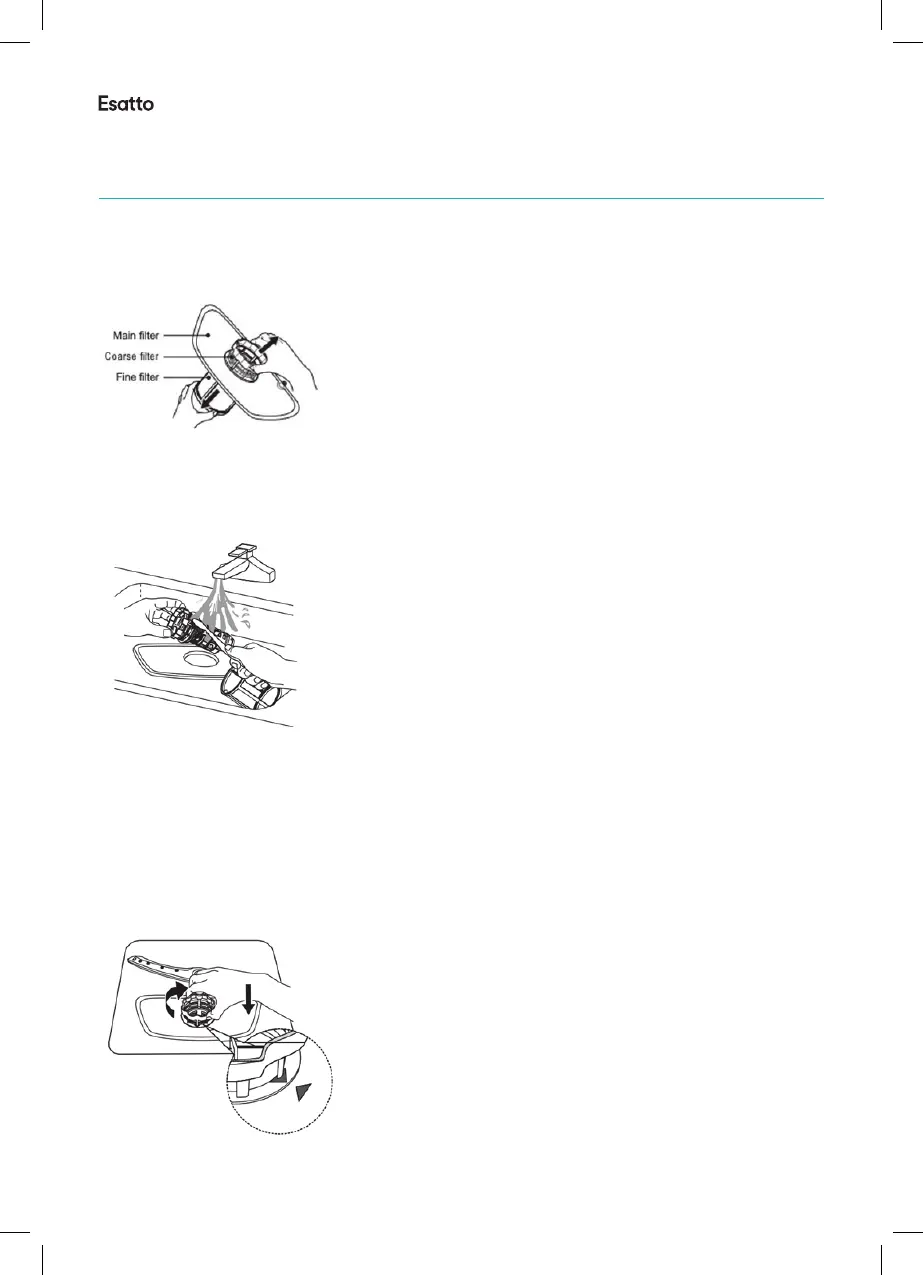
Step 2 With the lter assembly removed from the dishwasher, the ne lter can be pulled o the bottom
of the lter assembly (refer to gure 25 below). This ne lter is covered by a ne mesh. Rinse this under
running water from your tap and wipe any residual food residue o the lter.
Figure 25- The lter assembly once removed from the dishwasher cabinet base.
Step 3 Detach the course lter by gently squeezing the tabs at the top and pulling it away from the mesh
main lter. Under running tap water, clean both the mesh main lter and the course lter, removing any
residual food or foreign objects. For a more thorough clean you may like to use a soft cleaning brush (i.e. a
soft bristtled toothbrush).
Figure 26- Rinsing and scrubbing any residual food particles or foreign objects from the lter components.
Step 4 Before re-tting the lter housing into your dishwasher, it’s worth checking that the housing in the
base of the dishwasher is clean and clear of foreign objects (including bone fragments, broken glass, etc).
Caution! We recommend wearing gloves to protect your hands from any potential broken glass or sharp
foreign objects that may be sitting in the base of the lter housing.
Step 5 Reassemble the lter in the reverse order of disassembly. Replace the lter into the base of the
dishwasher and turn the coarse lter head in a clockwise direction until it locks back into place. You will
notice the arrows to align on the course lter and the metal main lter when locked in position.
Figure 27- Retting the lter system into the base of the dishwasher.