8
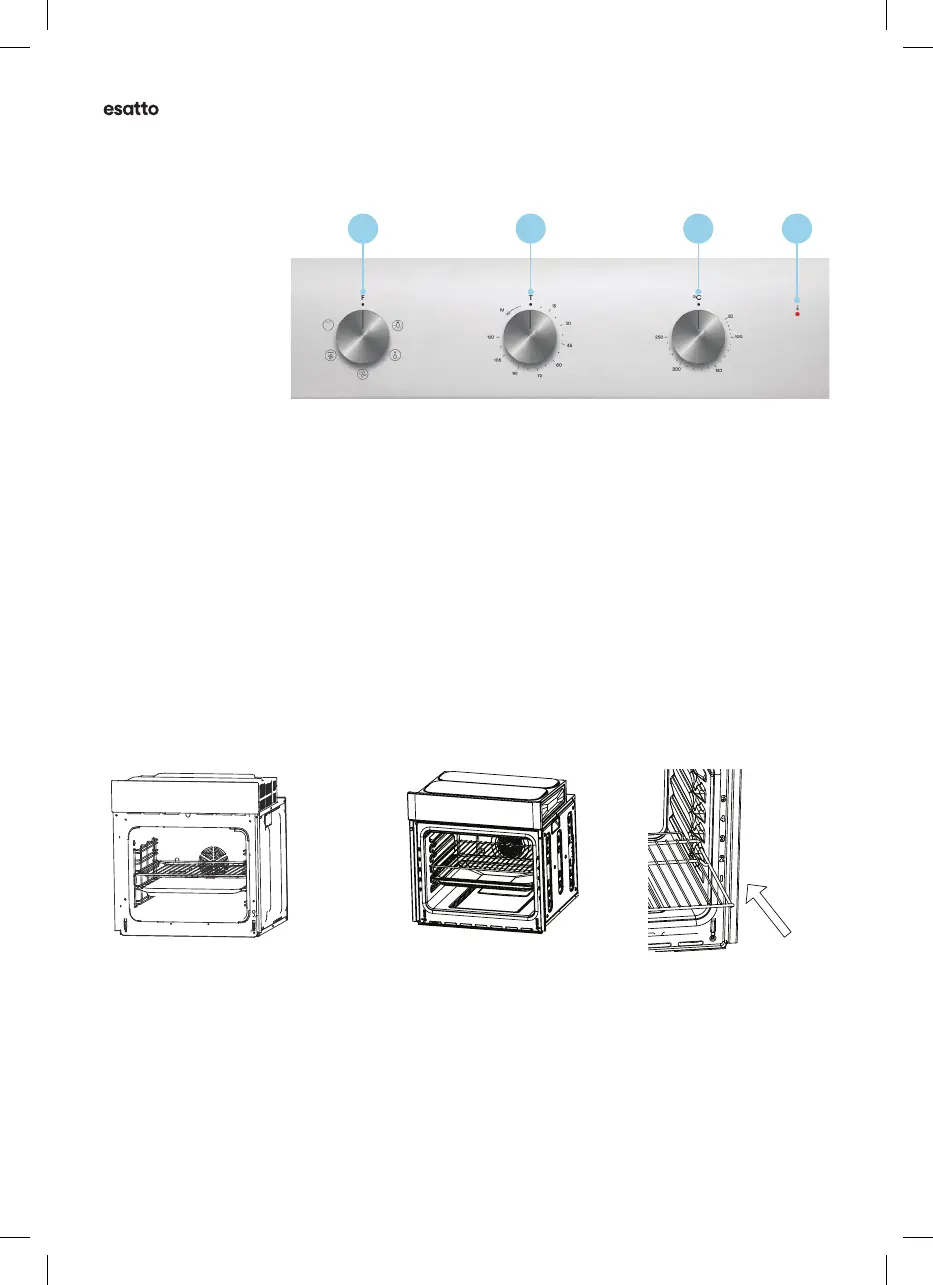
CONTROL PANEL
1. Function Knob
2. Timer Knob
3. Temperture Knob
4. Prehet Indictor
ACCESSORIES
Your Estto Built-in Oven is supplied with:
• 2 × Wire Shelves
For grill, dishes, cke pn with items for rosting nd grilling
• 2 × Slider brckets
These shelf support rils on the right nd left sides of the oven cn be removed.
Dishes nd try cn be plced on the oven bse, using the Grill nd Grill Fn functions.
• 1 × Bking Try
For cooking lrge quntities of food such s ckes, pstries, frozen food etc,
or for collecting ft/spillge nd met juices.
SHELF PLACEMENT
To ensure the oven shelves operte sfely, correct plcement of the shelves between
the side ril is impertive. Shelves nd the pn only cn be used between the rst nd fth
lyers. The shelves should use with the right direction, it will ensure tht during creful
removl of the shelf or try, hot food items should not slide out.
Your Built-in Oven
Note: The images in this user manual are for reference only. Your appliance may appear dierently.
3 41 2
BULB REPLACEMENT
For replacement, process as follows:
1> Disconnect power from the mains outlet or switch off the circuit breaker of the unit's mains outlet.
2> Unscrew the glass lamp cover by turning it counter-clockwise (note, it may be stiff) and replace
the bulb with a new one of the same type.
3> Screw the glass lamp cover back in place.
NOTE: Only use 25-40W/220V-240V, T300°C halogen lamps.
SHELF PLACEMENT WARNING:
SECURING THE OVEN TO THE CABINET
1. Fit oven into the cabinet recess.
2. Open the oven door.
3. Secure the oven to the kitchen cabinet with two
distance holders " A " which fit the holes in the
oven frame and fit the two screws " B ".
To ensure the oven shelves operate safely, correct placement of the shelves between the side rail
is imperative. Shelves and the pan only can be used between the first and fifth layers.
The shelves should be used with the right direction, it will ensure that during careful removal of the
shelf or tray, hot food items should not slide out.
OR
 Loading...