Do you have a question about the ESCALADE Atomic and is the answer not in the manual?
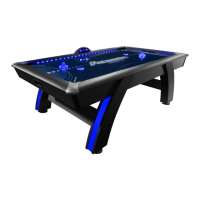
Two adults are necessary for the safe and proper assembly of the 90" Indiglo Air Hockey Table.
Start all bolts by hand before tightening to ensure correct alignment and prevent cross-threading.
Read and understand manual text as diagrams may be modified; prioritize written instructions.
Attach the left and right legs to the air hockey table cabinet using Allen head bolts and washers.
Install end leg panels and leg levelers, then tighten previous bolts and connect leg wires.
Check power, switch, adapter, and junction box connections before replacement.
Remove corner caps, side top rail, and unplug existing LED rail light.
Install new LED rail lights, reconnect, and reassemble the side top rail and corner caps.
Verify power, switch, adapter, and junction box connections before proceeding with leg light replacement.
Disconnect scorer, remove leg, detach lens, and unplug LED leg light.
Install new LED leg lights, reattach lens, leg, leveler, and scorer.
Remove screws and cap, replace CR2016 battery, and reassemble the LED puck.
LED puck battery lasts 7 hours; turn off when not in use to conserve life.
Charge LED strikers via USB port; indicator turns off when fully charged.
Strikers charge in 4 hours, last 7 hours; turn off when not in use.
Use indoor outlets, avoid trip hazards, clean playfield with motor running, and do not sit or lean on table.
Place near wall, turn motor off when not in use, level table with leg levelers, and cover when not in use.
Product warranted to original owner for 90 days against defects in material/workmanship under normal use.
Warranty void if damaged by accident, misuse, negligence, improper service, or failure to follow instructions.
Contact Customer Service for replacement components or comparable product during the warranty period.
Implied warranties limited to 90 days; no liability for incidental damages. Legal rights may vary by state.
This document is an instruction manual for the Atomic 90" Indiglo Air Hockey Table, model G04801W/F. It covers assembly, operation, maintenance, and warranty information for the product.
The Atomic 90" Indiglo Air Hockey Table is a recreational game table designed for playing air hockey. It features LED lighting in the legs and rail, an electronic scorer, and LED strikers and pucks for an enhanced playing experience. The table is intended for indoor use and requires at least two adults for assembly.
| Brand | ESCALADE |
|---|---|
| Model | Atomic |
| Category | Video Gaming Accessories |
| Language | English |