Installation continued
Operation
POWERING ON THE DEVICE
The device will power on automatically when plugged in and can also be powered by
pressing and holding the Multifunction button until the LED’s activate (when connected to
power).
LOOP RECORDINGS
Once the SD card is full, the camera will continuously overwrite the oldest footage recorded
with recent recordings. To protect a clip so that it will not be overwritten, press the
Multifunction button so that the clip is moved into the locked content partition.
EMERGENCY RECORDINGS
An Emergency Recording is triggered when the Multifunction button is pressed or when the
G-Sensor registers a significant impact (hard braking or collision). Emergency Recordings
create locked files that are not overwritten by Continuous Loop Recording. To ensure that
important footage is not lost surrounding an incident, the prior video clip is locked if the
incident happens within 30 seconds of the beginning or end of a clip.
MICRO SD MEMORY CARD
The device comes with a Micro SD memory card. To remove the SD card, press firmly on
the SD card to push it further into the slot. There will be a click and the SD card will pop out
on release. Extract the card and replace as necessary by inserting a card into the slot and
pressing until it locks in place. This camera is compatible with Micro SD cards up to 128GB.
Please be sure to format the card in-camera before use. Class 10 high-endurance cards from
reputable brands are recommended for constant video recording of a dash camera.
VOLUME ADJUST
Models with LCD displays allow the user to select “Volume” in the setting menu to and adjust
volume of notifications and voice announcements. Both products with LCD displays and
without allow for volume adjustment using the Drive Smarter Mobile App.
VOICE ANNOUNCEMENTS
Your M2 will use voice announcements to give you important camera system information
when your SD card is full or an impact is detected.
9 10
Longer Carriage Bolt -
Included with M2
EZ Mag Mount
™
-
Included with your detector
Escort M2
Dash Cam
Attach ESCORT M2 to EZ Mag Mount
™
Remove your detector from the sticky mount and attach the M2 as shown below.
Washers Included with M2
Sticky Cup Mount Thumb Screw -
Included with your detector
Remove Detector from Windshield and Detach EZ Mag Mount
™
1
Attach ESCORT M2 to Mount
2
Warning: Tighten Thumb Screw firmly to ensure stable video recordings
Attach radar/laser detector to
EZ Mag Mount
™
with M2 installed
3
4
Flip Tab Down
Connect M2 power cable
to radar/laser detector
To 12V Power Source
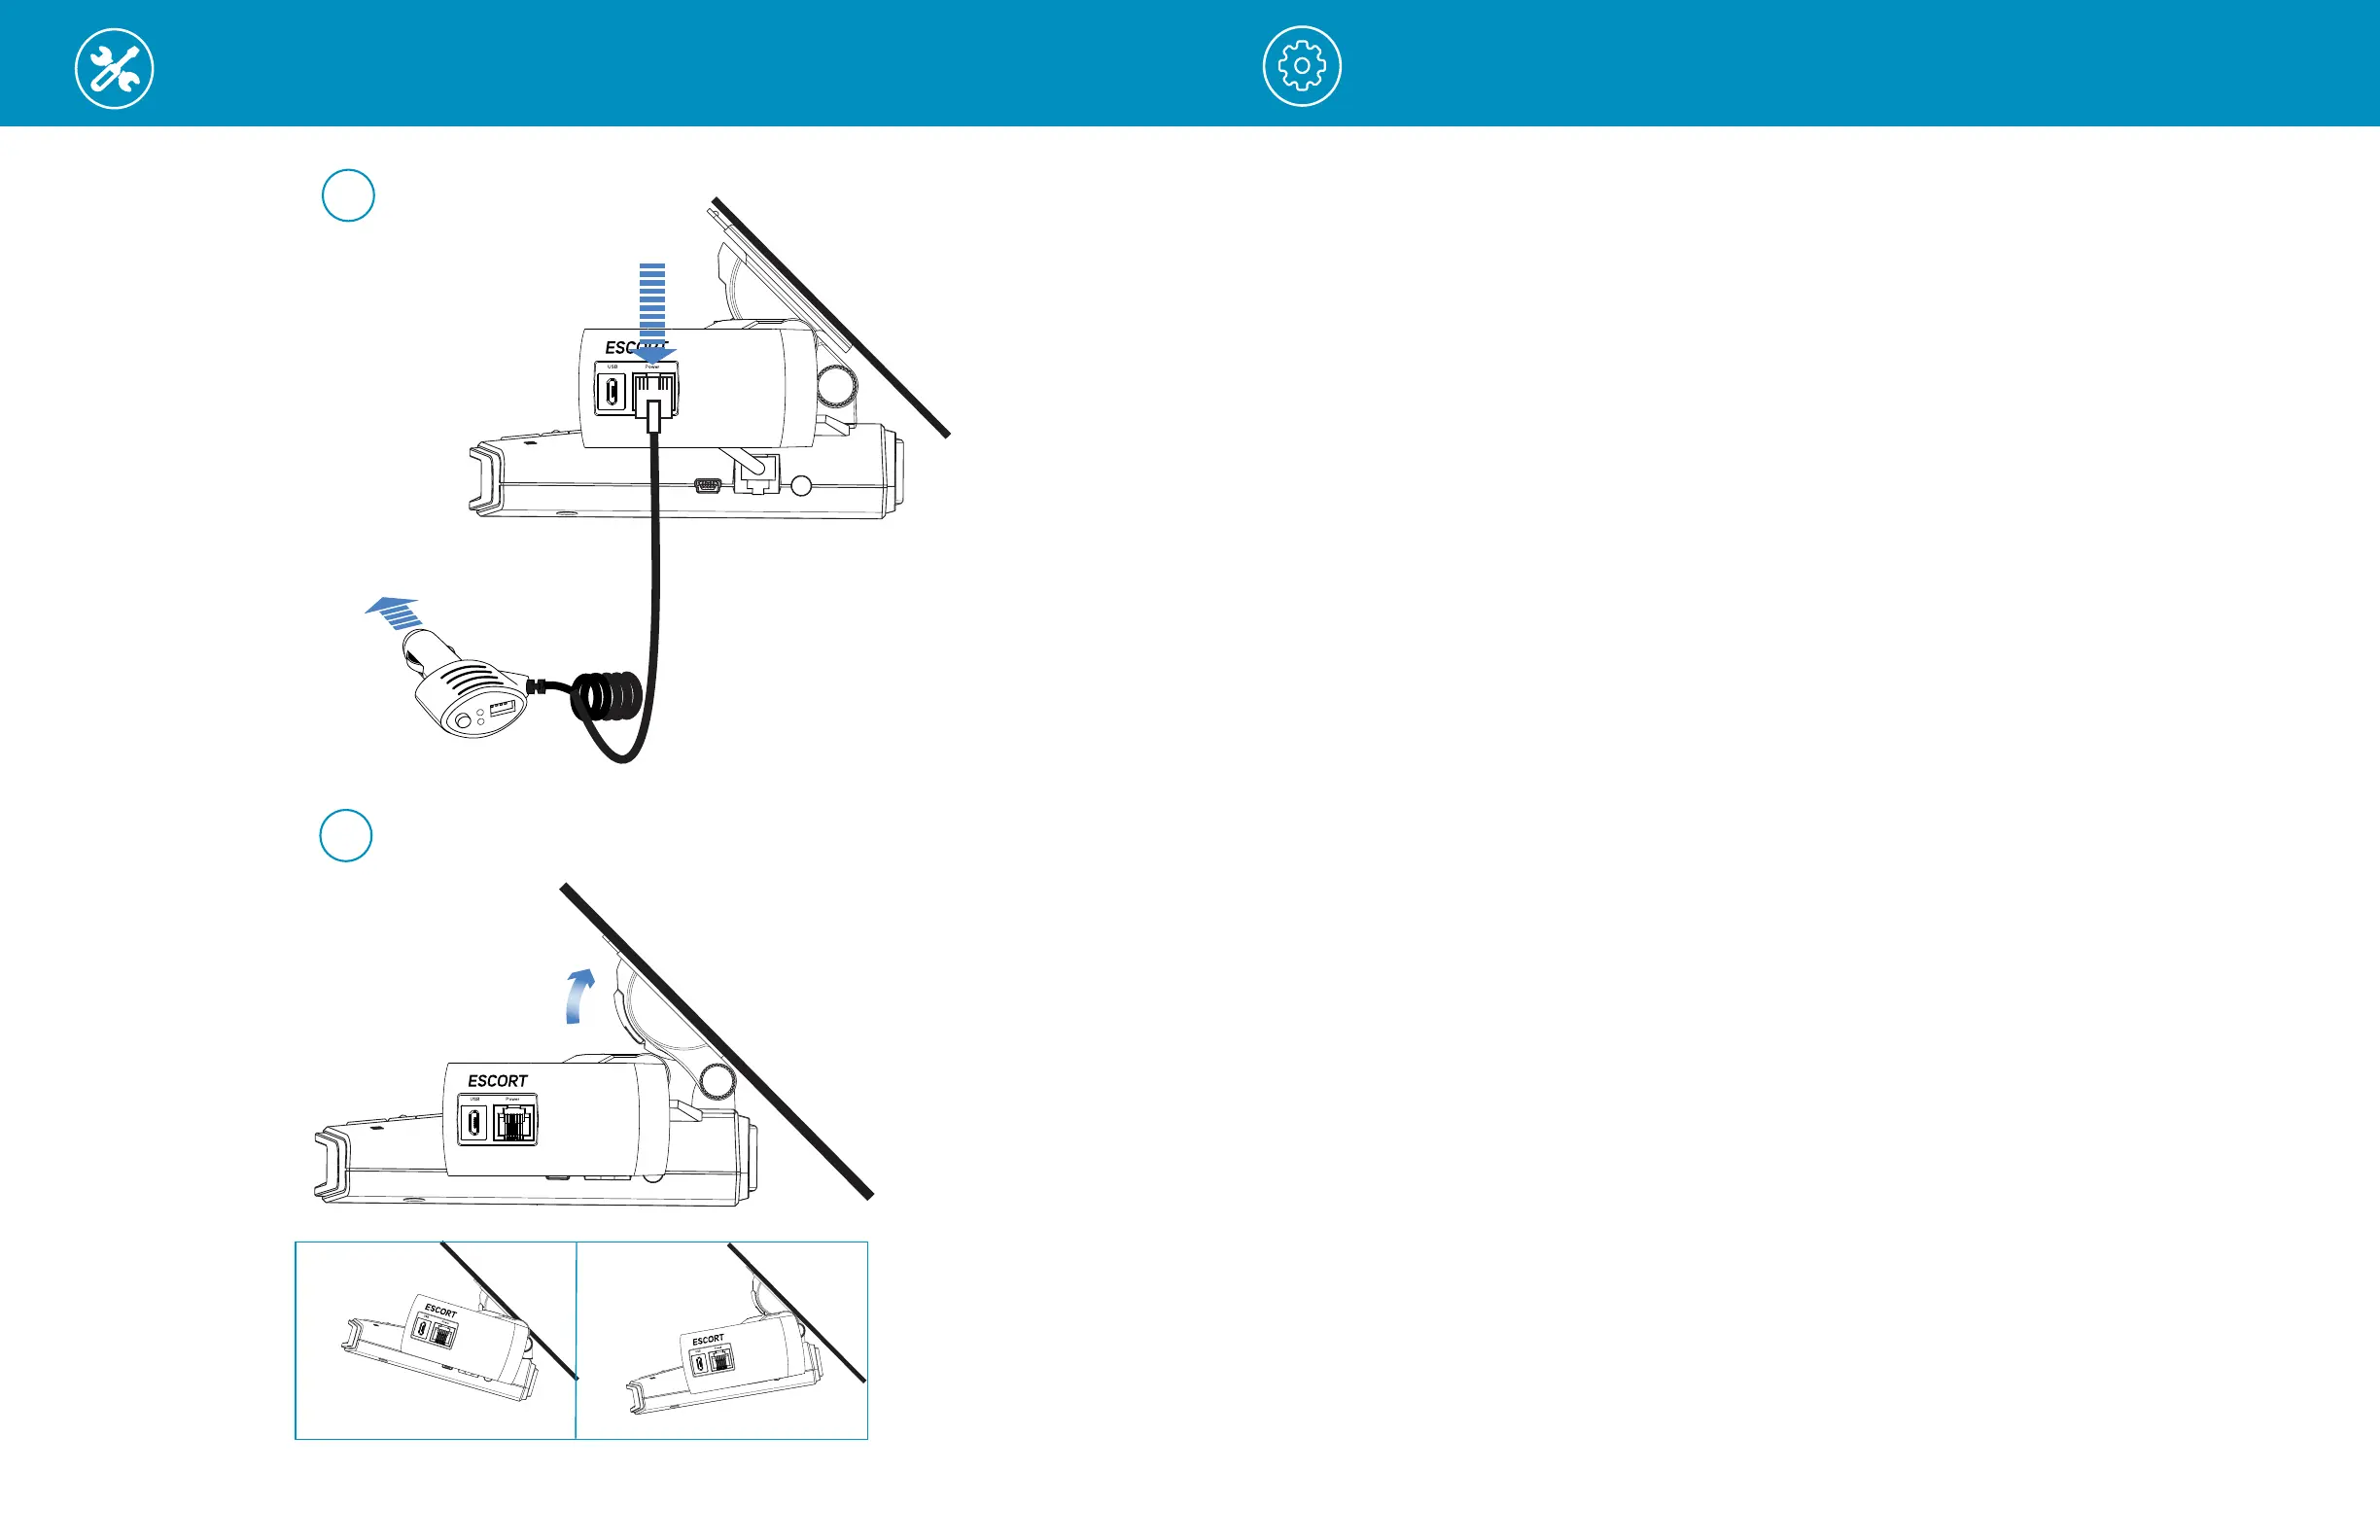
5
Connect Smart Cord to
M2 and 12V power source
Windshield
6
Flip Tab Up
Incorrect
position
Incorrect
position
Mount to windshield, adjust radar/camera
angle and tighten assembly screws
Longer Carriage Bolt -
Included with M2
EZ Mag Mount
™
-
Included with your detector
Escort M2
Dash Cam
Attach ESCORT M2 to EZ Mag Mount
™
Remove your detector from the sticky mount and attach the M2 as shown below.
Washers Included with M2
Sticky Cup Mount Thumb Screw -
Included with your detector
Remove Detector from Windshield and Detach EZ Mag Mount
™
1
Attach ESCORT M2 to Mount
2
Warning: Tighten Thumb Screw firmly to ensure stable video recordings
Attach radar/laser detector to
EZ Mag Mount
™
with M2 installed
3
4
Flip Tab Down
Connect M2 power cable
to radar/laser detector
To 12V Power Source
5
Connect Smart Cord to
M2 and 12V power source
Windshield
6
Flip Tab Up
Incorrect
position
Incorrect
position
Mount to windshield, adjust radar/camera
angle and tighten assembly screws