ESI Amber i1
5
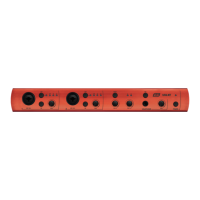
11. Power LED. Shows if the unit has power.
12. Selected Input. Shows which input is currently selected (Line, Microphone, Hi-Z or
Microphone and Hi-Z both).
13. +48V LED. Shows if phantom power is enabled.
14. Input Selection Switch. Allows you to select the active input signal (shown by LED).
15. Input Monitoring Knob. Allows you to listen to the input signal (left), the playback signal
(right) or a mix of both (middle).
16. Master Knob. Changes the master output level.
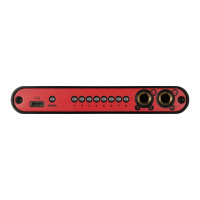
17. Headphones Gain. Changes the output level for the headphones connector.
18. Headphone Output. Connects to headphones with 1/4" connector.
2. Installation
2.1 System Recommendation
Amber i1 is not simply a standard digital audio interface, but a high-resolution device capable of
advanced processing of audio content. Even though Amber i1 is built to have low-CPU resource
dependability, system specifications play a key part in its performance. Systems with more advanced
components are generally recommended.
Minimum System Requirements
PC
-
Windows 10 or 11 (32- and 64-bit) operating system
-
Intel CPU (or 100% compatible)
-
1 available USB 2.0 or USB 3.1 port ("type A" with the included cable or "type C" with an optional
USB-C to USB-C cable)
Mac
-
OS X / macOS 10.9 or higher
-
Intel or 'Apple Silicon' M1 / M2 CPU
-
1 available USB 2.0 or USB 3.1 port ("type A" with the included cable or "type C" with an optional
USB-C to USB-C cable)
2.2 Hardware Installation
Amber i1 is directly connected to an available USB port of your computer. The connection to your
computer is done either via a so-called "type A" or a "type C" port. For the default and more common
connector ("type A"), a cable is included. For "type C" a different cable or an adapter is needed (not
included). Connect one end of the USB cable with Amber i1 and the other one to the USB port of
your computer.
USB "type A" port of a computer USB "type C" port of a computer