5
Check for parts online at www.GetEskimo.com or call 800-345-6007
Operator’s Manual
Eskimo E40™ Electric Ice Auger
To Assemble the Auger to the Powerhead
1. Use the hex 3/16” wrench on the powerhead to remove
the bolt from the stem of the auger.
2. Insert the output shaft of the powerhead into the stem of
the auger and align the hole in the stem with the hole in
the output shaft. SEE FIGURE 2
3. Replace the bolt in the stem of the auger and tighten
rmly with the included 3/16” hex wrench.
NOTE: There may still be some slop in the connection
between the output shaft and the auger. This is normal.
Optional:
Apply a small amount of oil or grease to the output shaft before
assembly to aid in disassembly at a later date.
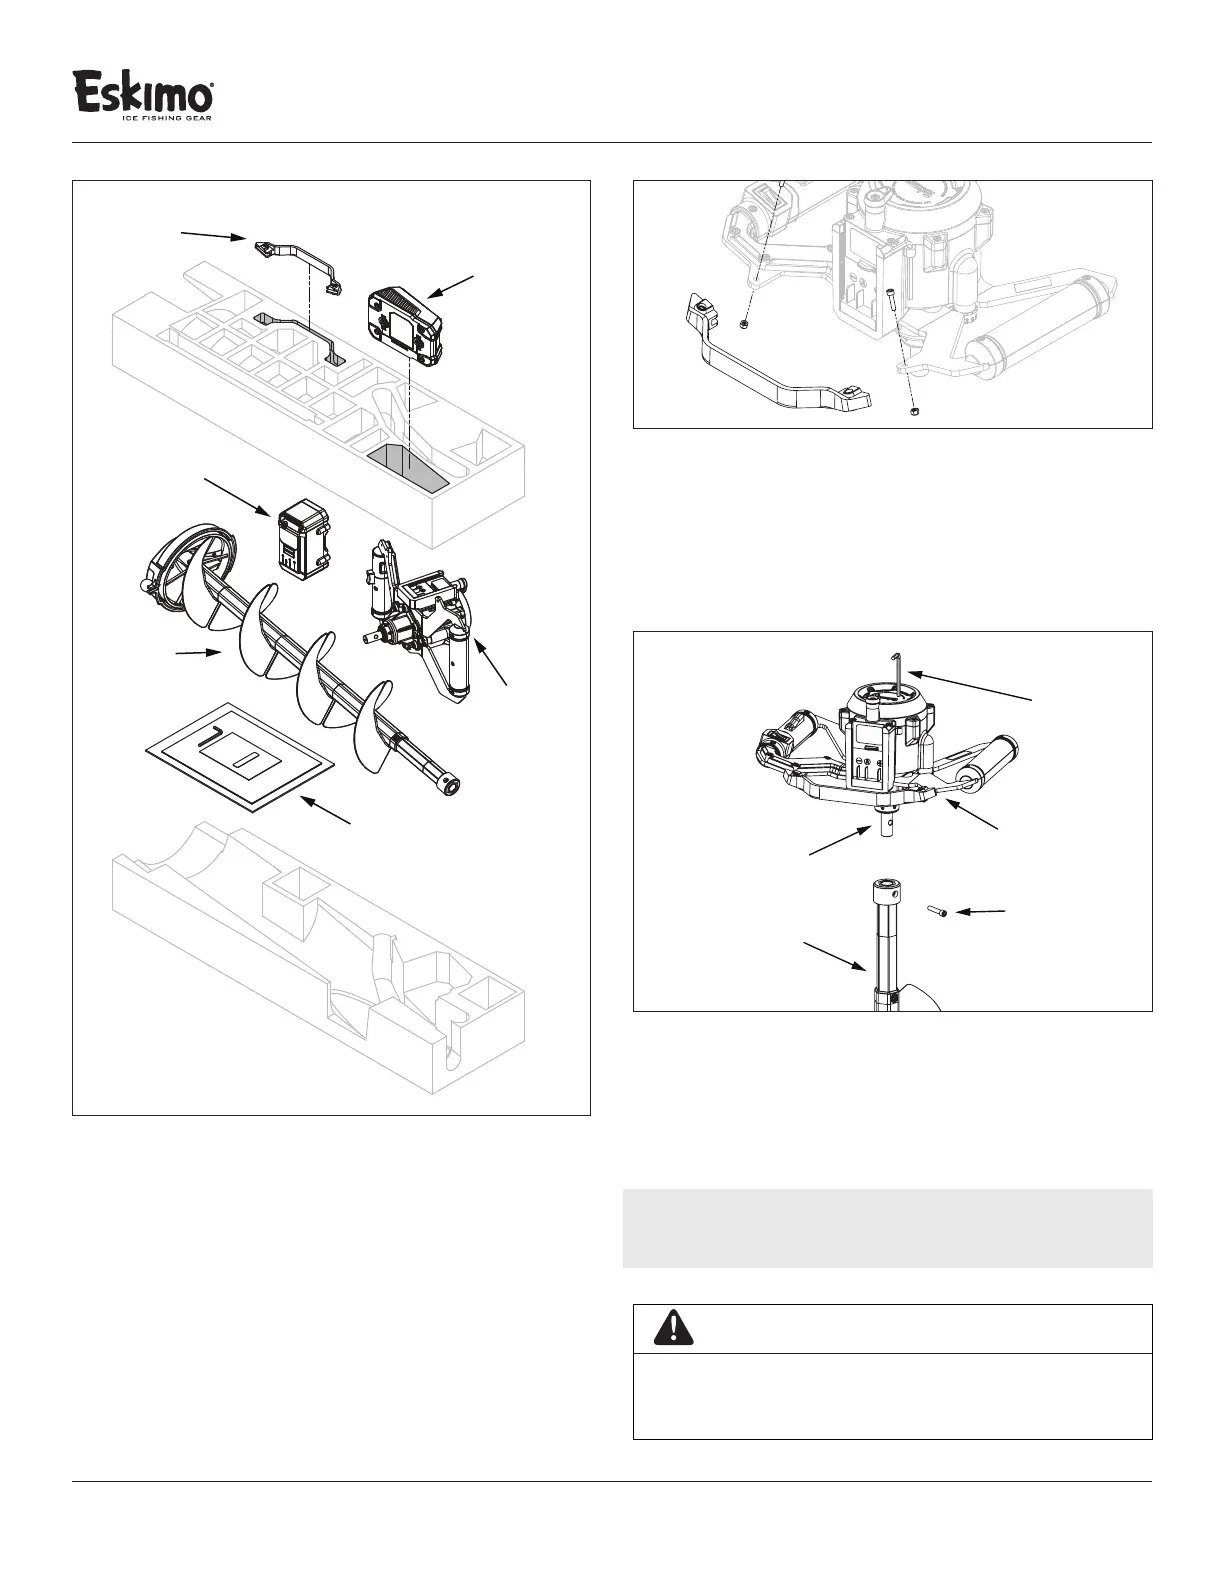
UNPACKING AND ASSEMBLY
NOTE: Make sure to remove all items from foam packaging.
To Assemble the Battery Guard to the Powerhead
1. Remove the small parts bag containing (1) 3mm hex
wrench, (2) M4 nuts, and (2) M4 bolts.
2. Slide the battery guard into place and secure it with the
included hardware. SEE FIGURE 1
FIGURE 1
POWERHEAD
DRIVESHAFT
AUGER
BOLT
HEX
WRENCH
FIGURE 2
FOAM PACKAGING
FOAM PACKAGING
BATTERY
CHARGER
E40
POWERHEAD
PARTS
BAG
LITHIUM
BATTERY
BATTERY
GUARD
AUGER
IMPORTANT
BATTERY MUST BE FULLY CHARGED BEFORE
FIRST USE. IT IS SHIPPED IN A PARTIALLY
CHARGED STATE.