Check for parts online at www.GetEskimo.com or call 800-345-6007
6
Operator’s Manual
Eskimo E40™ Electric Ice Auger
OPERATION
Eskimo E40 models feature a variable speed trigger. Speed can
be adjusted by the amount of pressure on the switch.
1. Make sure your footing is secure and that you have the
unit in the vertical position rmly in your hands.
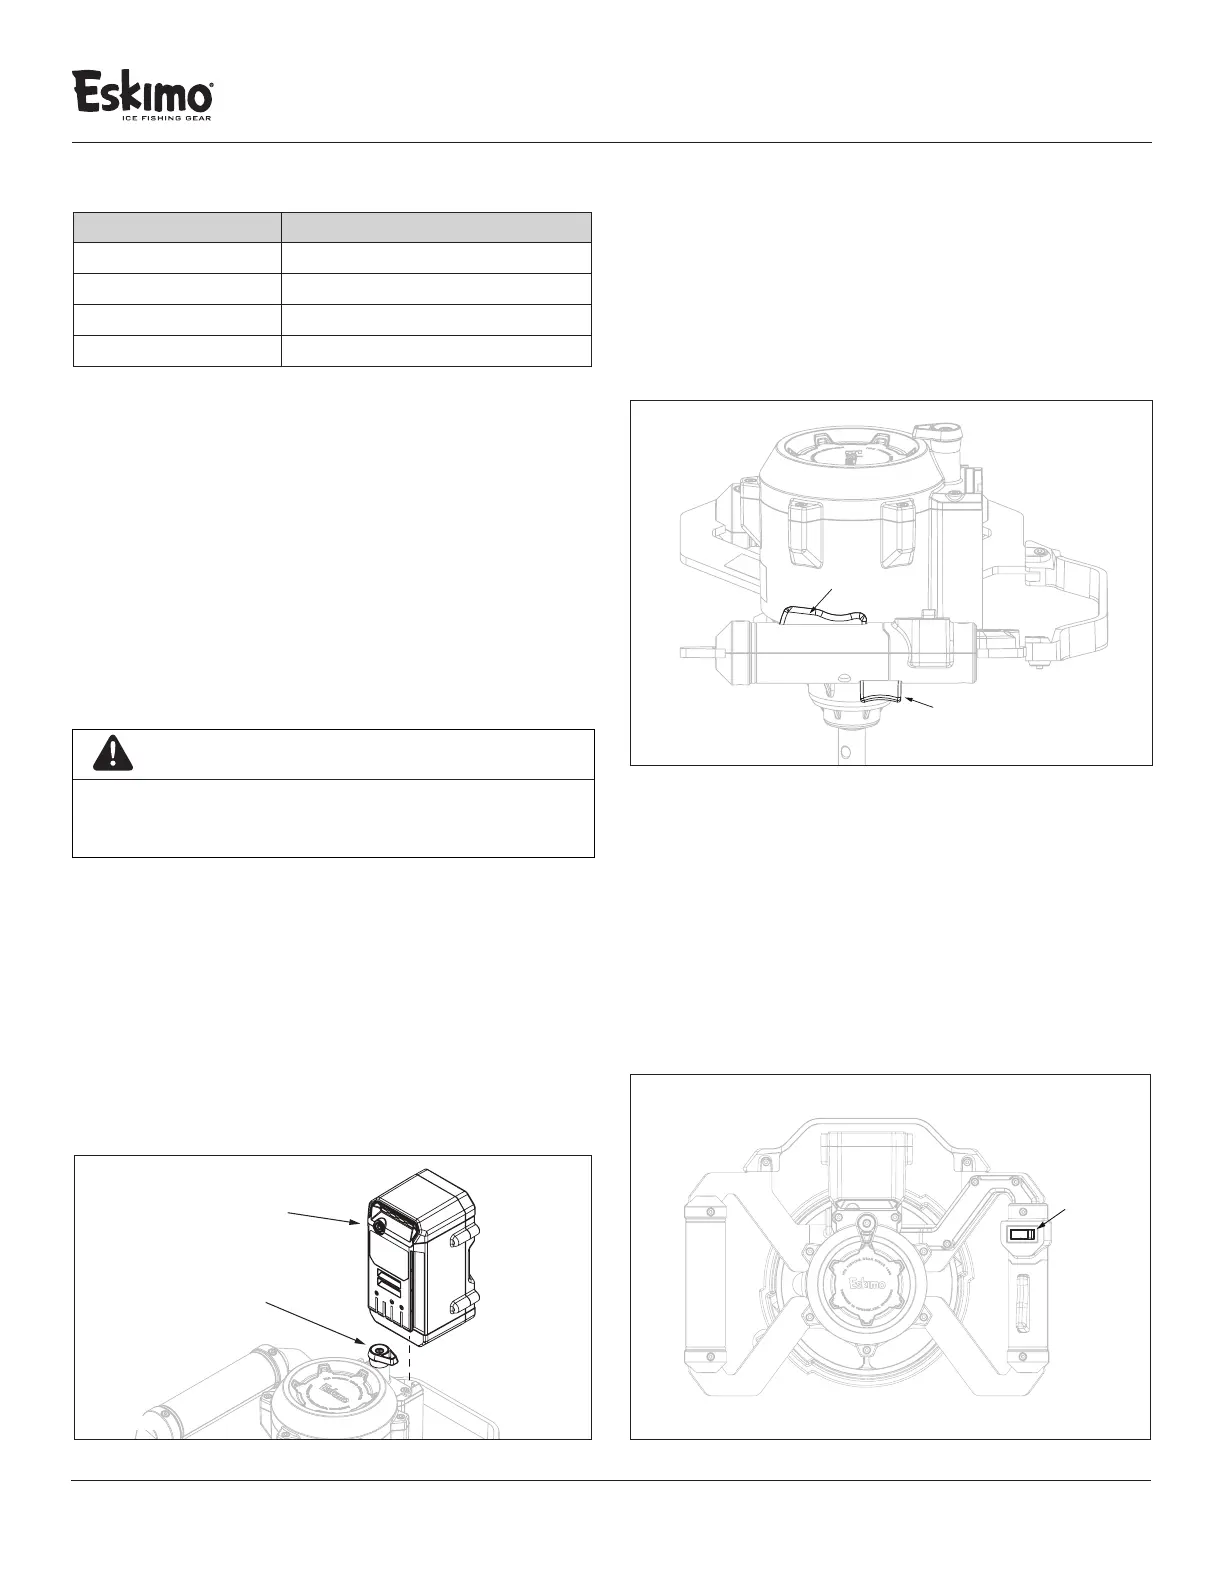
2. Depress the lock lever, then squeeze the trigger and the
auger will start drilling. SEE FIGURE 4
3. To stop the auger, release the trigger.
4. When the auger is not in use, remove the battery.
NOTE: For best results on the ice, remove the battery
and put it in a warm place while you’re shing.
Reverse Switch Operation
To use reverse operation function to ush hole of unwanted
debris do as follows: SEE FIGURE 5
LOCK
LEVER
TRIGGER
FIGURE 4
REVERSE
SWITCH
FIGURE 5
To Charge the Battery for First Use
1. Connect the charger to a standard 120-volt outlet;
a red light should appear on the charger. Always
connect charger to standard 120-volt wall outlet
before inserting battery.
2. Charge the battery until the light on the charger
turns solid green.
3. To disconnect the battery, remove the plug from the
wall outlet then disconnect the battery from charger.
NOTE: Do not leave the battery on the charger after the
charge is complete. Unplug the charger from the wall
and remove the battery.
To Install the Battery
1. Turn the battery lock lever counterclockwise, to the
unlocked position.
2. Slide the battery onto the powerhead until it is fully seated.
3. Turn the battery lock lever clockwise, to the
locked position.
NOTE: The battery lock lever must be in the unlocked
position before the battery can be slid onto the
powerhead. SEE FIGURE 3
IMPORTANT
DO NOT LEAVE BATTERY ON POWERHEAD
WHEN AUGER IS NOT IN USE. ALWAYS DETATCH
BATTERY WHEN NOT USING THE ICE AUGER.
LITHIUM
BATTERY
BATTERY
LOCK
LEVER
FIGURE 3
Charger Indicator Lights and Meaning
ACTION/COLOR MEANING
Flashing green Battery charging
Solid green Battery fully-charged
Flashing red Battery too hot / Battery too cold
Solid red Powered on