DEAR PARENTS
Congratulations on your purchase of the 3 in 1 bedside crib of the company
BDG PRODUKCJA. Your child will most certainly sleep feeling safe and comfortable,
and will enjoy it.
IMPORTANT - KEEP FOR FUTURE
REFERENCE: READ CAREFULLY.
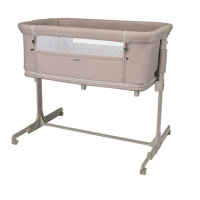
1. ELEMENTS:
1 - mattress, 2 – upholstery , 3 - safety bar, 4 - height adjustment button, 5 - plastic handle
of the crib, 6 - floor, 7 - support, 8 - telescope leg, 9 - legs connecting element,
10 – wheel with a locking element, 11 - assembly tape – 2 pcs, 12 - bottom with supports
2. BABY COT
Connect telescopic legs using legs connecting element sliding it into side openings
in the telescope legs. Make sure the locking mechanisms at the ends of the connecting
element prevent it from accidental sliding out.
3. Slide both supports into the openings on the upper part of telescopic legs. Make sure
the locking mechanism at the ends of the supports prevent them from accidental sliding out.
4. NOTE! Window of the baby cot (the upper exit) should be on the same side
as telescopic legs (which is the legs whose length can be adjusted).
5. M ake sure the bottom is properly assembled in the baby cot and that it is positioned
at the upper level. If not, lift the bottom of the baby cot to the upper level, zip both external
fixing zippers (1) and secure their ends with buckles (2) to prevent from accidental unzipping.
6. A ssemble the bottom inside the baby cot together with supports and secure the ending
of its zipper with a metal securing ring. Place the mattress inside the baby cot.
7. T o change the height of the baby cot, simultaneously lift both buttons of the height
adjustment located on its shorter sides and set the baby cot to a desired position.
NOTE! Both sides of the baby cot should be on the same height.
8. NOTE! If the baby cot is not assembled to the adult bed, the securing bar should be
always assembled to the frame of the baby cot (in the upper position)!
9. BEDSIDE CRIB
10. Disassemble the securing bar releasing the locking mechanisms from the endings
of both zippers and unzip them.
11. Move the locking mechanism of the securing bar inside the crib and at the same time
lift the bumper bar sliding it up from the guide. Repeat the steps on the other side of
the safety bar.
12. R oll down the securing bar together with the upholstery and insert its plastic endings
in rubbers on the lower part of the window (exit).
16-17