ETC Service Note
Congo™ jr Master Wing Main Board Replacement
Congo™ jr Master Wing LCD Replacement Page 52 Electronic Theatre Controls, Inc.
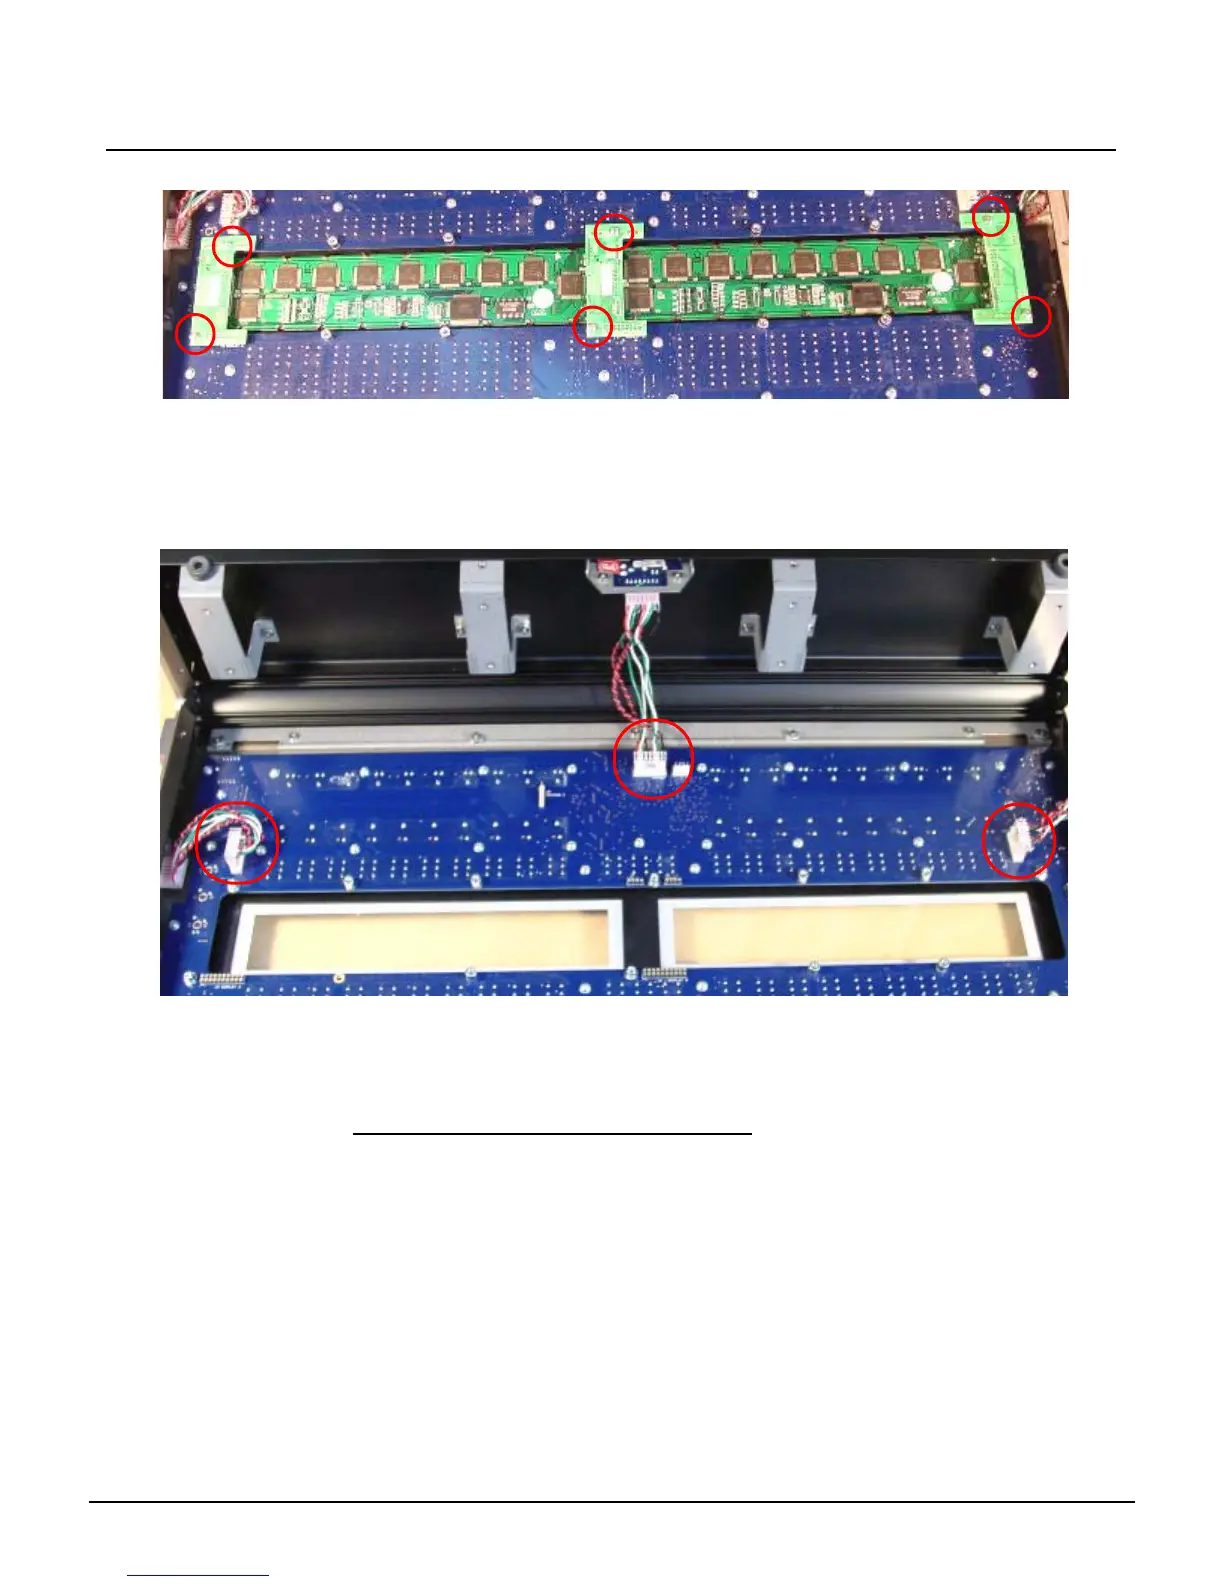
Step 7: Remove the 6 screws holding the LCD Jumper board in-place.
Step 8: Gently lift up all 3 Master LCD jumper boards; removing all the pins from each socket.
Step 9: Lift both LCD Screens from the center and gently lift the screens away from the
master wing.
Step 10: Set the pair of LCD screens aside
Step 11: Remove the J9, J12, and J8 headers from the Master Wing Main Board.
Step 12: Remove all 50 #1 Phillips head screws from the mainboard.
Step 13: Swap out the Master Wing main board for the new board.
Step 14: Attach all 50 #1 Phillips head screws back into the master wing.
Step 15: Re-connect each of the J9, J12, and J8 headers at the master wing main board.
Note the cable orientation pictured above.
Step 16: Place the 2 screens back into the Master Wing. Line up all of the pins on each of the
3 LCD jumper boards.
Step 17: Once the pins are aligned with the Master Wing main board, gently press each board
into the socket.
Step 18: Secure each of the 6 screws back into the LCD jumper board, connecting them to the
standoffs.
Step 19: Place each of the LCD pressure plates back over the LCD Screens and place all 8
screws back into the appropriate holes.
Step 20: Place the Master Wing bottom plate over the back side of the Master Wing face panel.
Re-attach and tighten all 23 Screws.
Step 21: Connect the Master Wing to the console and run the face panel diagnostics tests to
verify proper LCD, fader, and button operations.
J9
Right Fader
J12
12v/USB
J8
Left Fader