4930638-02 - Page 6
Care and Maintenance
Cleaning After Use
Clean and disinfect your tanning bed’s bench and canopy after each
use. Use a non-abrasive disinfectant cleaner that does not contain
ammonia or ammonia derivatives. Ammonia may damage the acrylic
shield. Spray the acrylic lightly with disinfectant and wipe dry with a
clean soft cloth. Wipe the canopy grill with a soft cloth slightly damp-
ened with disinfectant, then wipe dry.
Thorough Periodic Cleaning
The cooling fans draw air through the bed and will cause a dust build-
up on the lamps and reectors. When a dust buildup is observed, it is
necessary to thoroughly clean the inside of the bench and canopy.
1 Remove the acrylic shield, metal grill and lamps.
2 With a soft cloth, wipe the entire length of each lamp.
3 Clean both sides of the acrylic shield and grill with a non-ammonia
disinfectant cleaner.
4 Wipe the reectors with a clean damp cloth.
5 Re-install the lamps and acrylic shields.
Mechanical Inspection
Inspect the unit’s mechanical integrity every 400-500 hours of use.
• Inspect the unit’s fasteners verifying that all are rmly in place. Pay
particular attention to the hinge bolts.
• Inspect gas springs for signs of wear. Replace gas springs that will not
hold the canopy in the full open position when raised.
• Inspect the AC power cord and its connections.
• Inspect the acrylic. Replace if broken, cracked or badly scratched.
Removing/Replacing Acrylic Shields
The acrylic shields are secured in place by hinged proles which run
the length of the bed, both front and back. Simply pry up on the inside
edge of the prole until it releases its latching action (see gure below).
Continue to pry up the prole across its entire length until it swings
back freely. Repeat for the other prole. The long edges of the acrylic
shield are now exposed. Standing in front of the sunbed, grasp the long
exposed edge of the acrylic and carefully slide it toward you until it is
removed.
After changing the lamps, replace the acrylic shields by reversing the
above directions. Close the hinged prole by pushing it back into place
until it snaps tight.
PROFILE
Start pulling from the
middle of the prole!
CAUTION
Be careful. The edges of the
acrylic shield may be sharp.
Removing/Replacing Lamps
To be assured of maximum tanning effectiveness, change lamps after
approximately 500-700 hours of use. Tanning will continue after this
time but at a slower rate. To ensure trouble-free operation of your sun-
bed, replace the lamp starters whenever the lamps are replaced. We
recommend using the lamps specied below. Use of uncertied lamps
is a violation of Federal regulations and may void your warranty.
1 Grasp a lamp at one end and at the middle, then turn the lamp a
quarter turn. The lamp may then be gently removed from its holder.
2 To reinstall lamp, insert pins on the ends of the lamp into the slots on
top of the lamp holder and turn the lamp a quarter turn.
The following lamps have been certied for use in the 24S series:
ETS ELITE Select Model F71-T12-100W BP (Full length lamps)
ETS ELITE Model F59-T12-80W BP (Short lamps in 24SF)
Heraeus E400 HPT
(Facial Unit Lamps in 24SF)
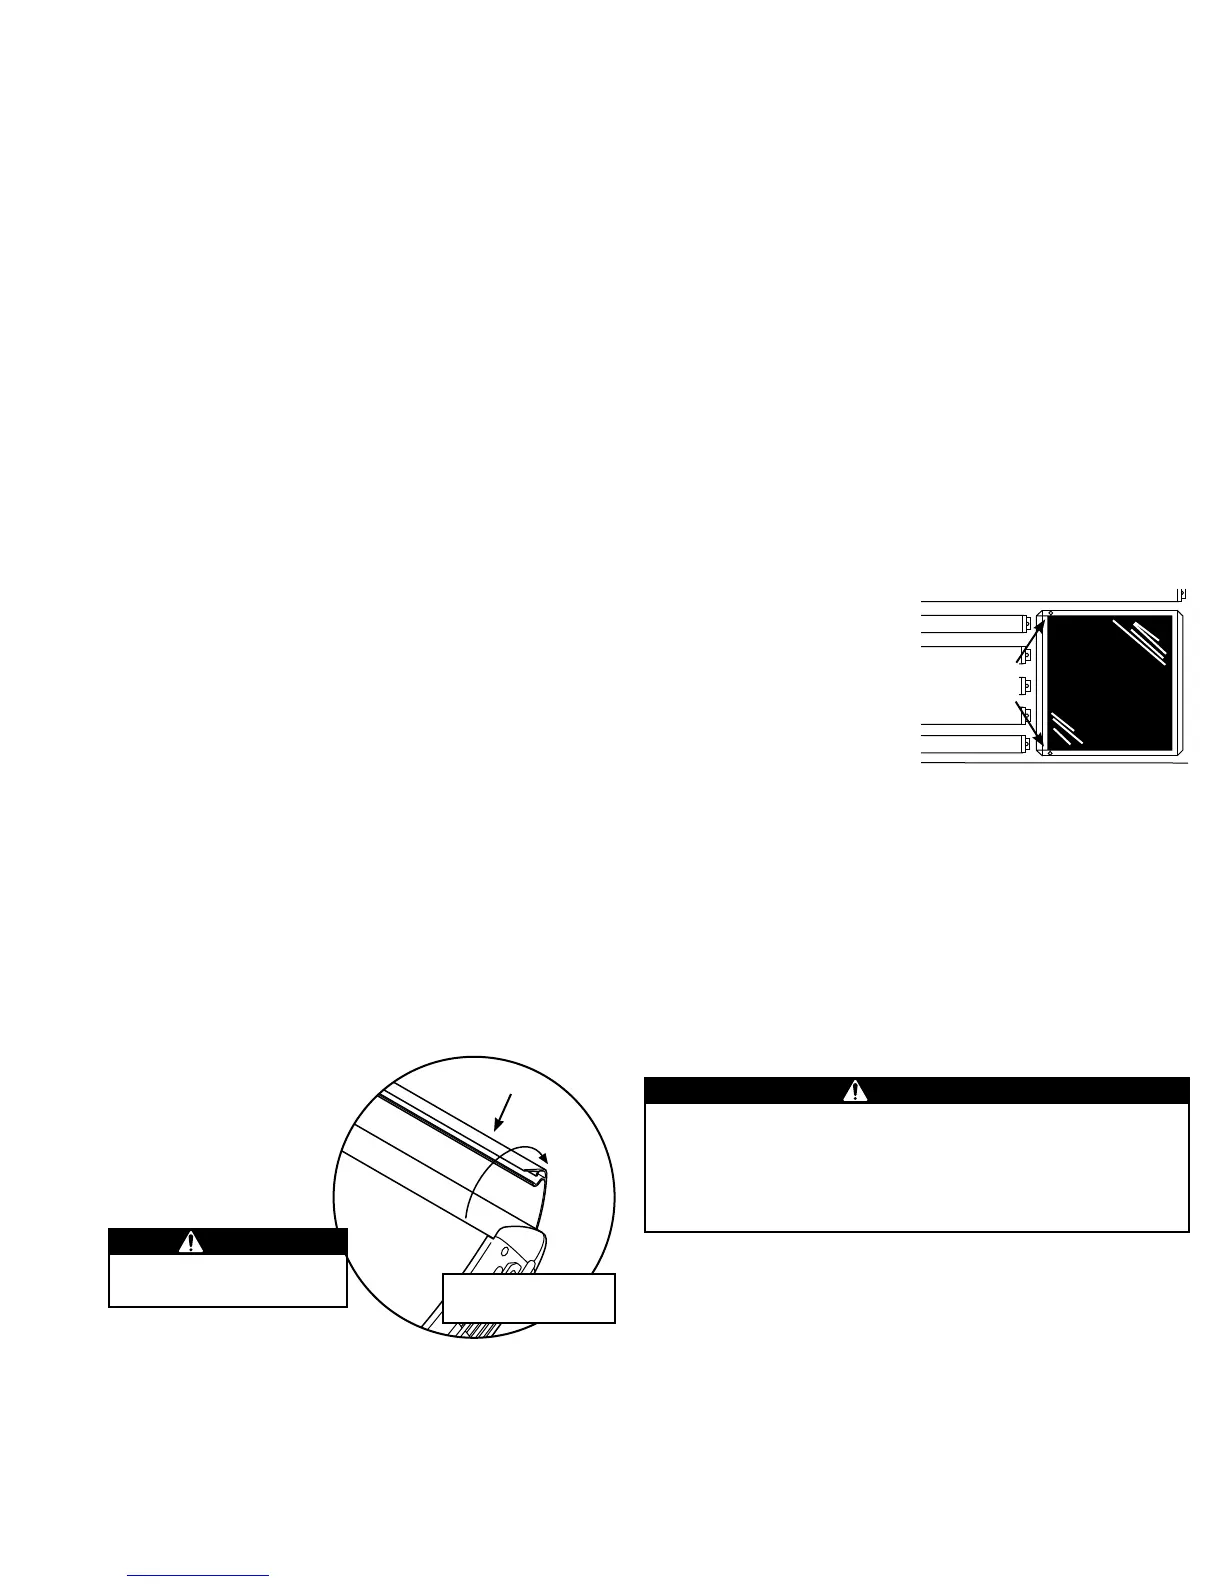
Removing/Replacing Face Tanner Lamps
After removing the canopy acrylic shield, replace the face tanner lamp
as follows:
Step 1 Support the face tanner
assembly with your hand
while unscrewing the two
retaining screws. The face
tanner glass casing will
swing downward.
Step 2 The lamp can now be exchanged. The lamp holders are
equipped with spring contacts which enable the lamp to be
removed easily. Remove the old lamp and discard. Install the
new lamp, using a clean cloth or paper towel. Ensure that the
lamp is rmly seated in the lamp holders.
Note! Never take hold of the lamp such that your ngers are in contact
with the lamp glass. Finger oils will greatly reduce the lamp’s opera-
tional life.
Step 3 Gently close the face tanner glass casing and lock it closed
with the screws. Ensure that the screws rmly secure the glass
casing.
RETAINING
SCREWS
DANGER
Unltered light from face tanner can cause severe burns.
Never turn sunbed on while face tanner is disassembled or when
glass lters are removed.
Immediately discontinue use of this equipment if face tanner glass
is broken or any unltered light can be seen escaping face tanner
assembly.
 Loading...