Do you have a question about the EUROSTER 4040 Smart and is the answer not in the manual?
Details the physical parts and controls on the thermostat's main unit.
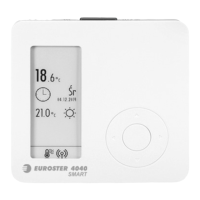
Describes the information and indicators shown on the thermostat's screen.
Essential safety precautions and warnings to follow before and during installation.
Guidelines for choosing the optimal placement of the thermostat for accurate readings.
Instructions for correctly installing the Wi-Fi receiver unit.
Procedure for powering the thermostat using batteries and when to replace them.
Illustrative diagrams showing typical connection setups for the thermostat and receiver.
Procedure to turn off the thermostat and its temporary standby state.
Enables a power-saving mode to extend battery life during heating operation.
Temporarily change the set temperature without altering the programmed schedule.
How to adjust the comfort and economical temperature settings.
Guide to programming daily temperature schedules for the entire week.
Maintains a fixed temperature, overriding the weekly program.
Sets a specific temperature for periods when the property is unoccupied.
Access and configure advanced settings like date, language, and interlock.
Setting the correct date and time for accurate scheduling and operation.
Choosing the display language for weekdays.
Configuring heating/cooling algorithms for precise temperature maintenance.
Enables heating to start earlier to reach the target temperature on time.
Securing settings with a four-digit code to prevent unauthorized changes.
Setting up the thermostat for air conditioning operation.
Choosing internal, external, or dual sensor operation and correction.
Accessing the Wi-Fi module's MAC address.
Establishing radio connection between thermostat and receiver.
Checking system parameters like receiver operation and signal strength.
Restoring the thermostat to its original factory default configuration.
Procedure for pairing the thermostat with the RX Smart receiver.
Choosing between normally open (NO) and normally closed (NC) output modes.
How to interpret signals indicating the strength of the radio connection.
Resolving issues related to lost communication between thermostat and receiver.
Operating the heating device manually via the receiver's MAN function.
The Euroster 4040 Smart is a wireless, programmable thermostat designed for controlling various heating and air-conditioning devices, offering remote control capabilities via a smartphone or tablet. Manufactured by P.H.P.U. AS in Poland, this device aims to provide precise temperature management and energy efficiency for living and utility rooms.
The Euroster 4040 Smart serves as a central control unit for CH boilers, other heating system components, electrical equipment, floor heating, and air-conditioning systems. It operates wirelessly, eliminating the need for cable connections between the thermostat and the controlled device. The thermostat features built-in sensors for accurate temperature read-out and programming with a precision of 0.1 °C.
It supports two temperature levels: comfort (day) and economical (night), both adjustable within a range of 5 °C to 35 °C. The thermostat is programmable in seven-day cycles with a 0.5-hour accuracy, allowing for up to 48 temperature changes within 24 hours. Different time ranges can be programmed for each day of the week.
A key feature is its remote control capability, enabling users to manage the thermostat from anywhere in the world via dedicated mobile applications for iOS and Android. These applications are available on Google Play Store and App Store, with configuration and operation manuals accessible online.
The device utilizes integrated Wi-Fi, eliminating the need for external gateways, and employs bidirectional radio communication for high operational reliability and resistance to interference. It provides information on both radio and Wi-Fi signal strength.
| Brand | EUROSTER |
|---|---|
| Model | 4040 Smart |
| Category | Thermostat |
| Language | English |