5
Before cleaning your oven, or performing maintenance, disconnect it from the power supply.
To extend the life of your oven, it must be cleaned frequently, keeping in mind that:
• the enameled or stainless steel parts should be washed with lukewarm water without using
any abrasive powders or corrosive substances which could ruin them ;Stainless steel could
get stained .If these stains are difficult to remove, use special products available on the
market. After cleaning, it is advisable to rinse thoroughly and dry.
• the inside of the oven should preferably be cleaned immediately after use ,when it is still
warm ,with hot water and soap ;The soap should be rinsed away and the interior dried
thoroughly. Avoid using abrasive detergents (for example cleaning powders, etc) and
abrasive sponges for dishes or acids (such as lime scale –remover, etc…) as these could
damage the enamel. If the grease spots and dirt are particularly tough to remove, use a
special product for oven cleaning, following the instructions provided on the packet. Never
use a steam cleaner for cleaning inside of oven.
• if you use your oven for an extended period of time, condensation may form. Dry it using a
soft cloth.
• there is a rubber seal surrounding the oven opening which guarantees its perfect
functioning. Check the condition of this seal on a regular basis. If necessary, clean it and
avoid using abrasive products or objects to do so. Should it become damaged, please
contacts
• never line the oven bottom with aluminum foil ,as the consequent accumulation of heat
could compromise the cooking and even damage the enamel .
• clean the glass door using non-abrasive products or sponges and dry it with a soft cloth .
For a more thorough clean, you can remove the oven door. Choose the remove and
assemble method. Proceed as follows:
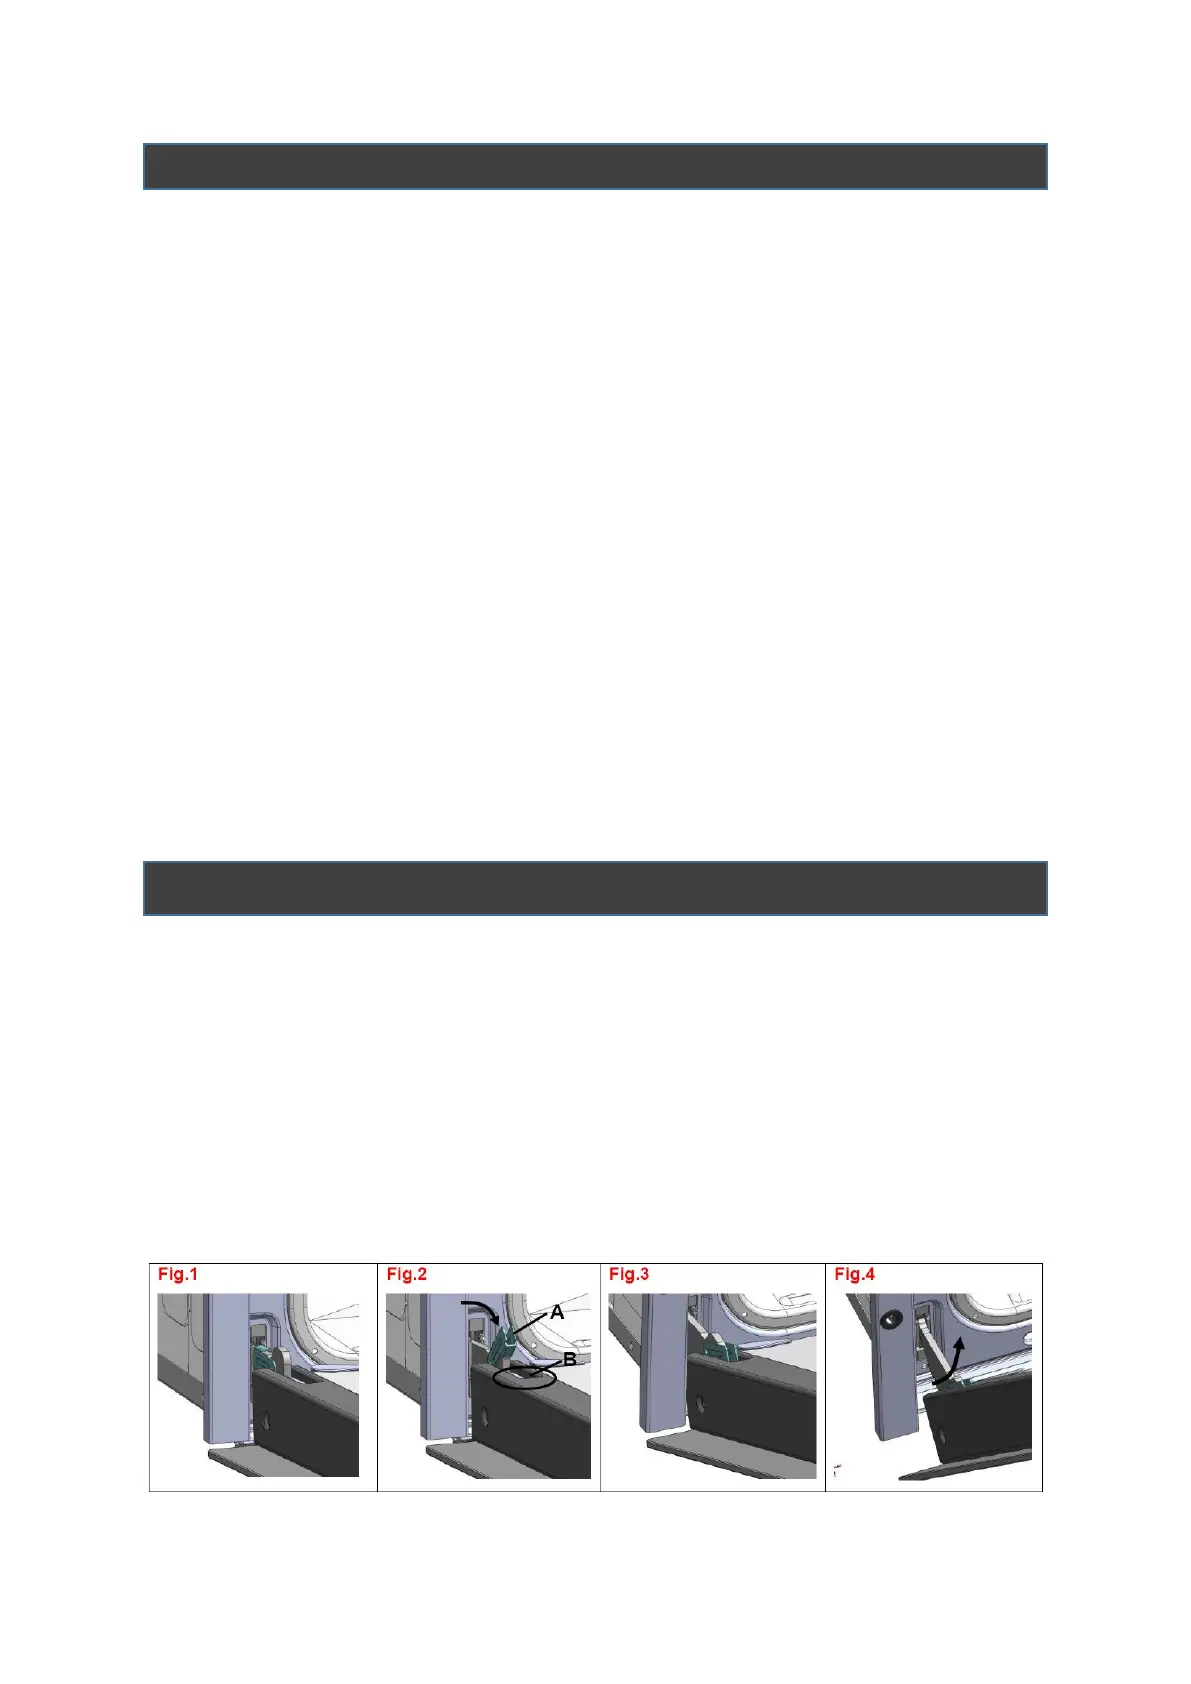
Oven door structures 1 remove and assemble procedure:
· Open the door to the full extent(fig.1);
· Open the lever A completely on the left and right hinges(fig.2);
· Hold the door as shown in fig.3
· Gently close the door(fig.3)until left and right hinge levers A are hooked to part B of the
door(fig.4).
· withdraw the hinge hooks from their location following arrow C(fig.4);
· Rest the door on a soft surface;
· To replace the door, repeat the above steps in reverse order.
 Loading...