STEP 2
:
ATTACH FRONT FENDER
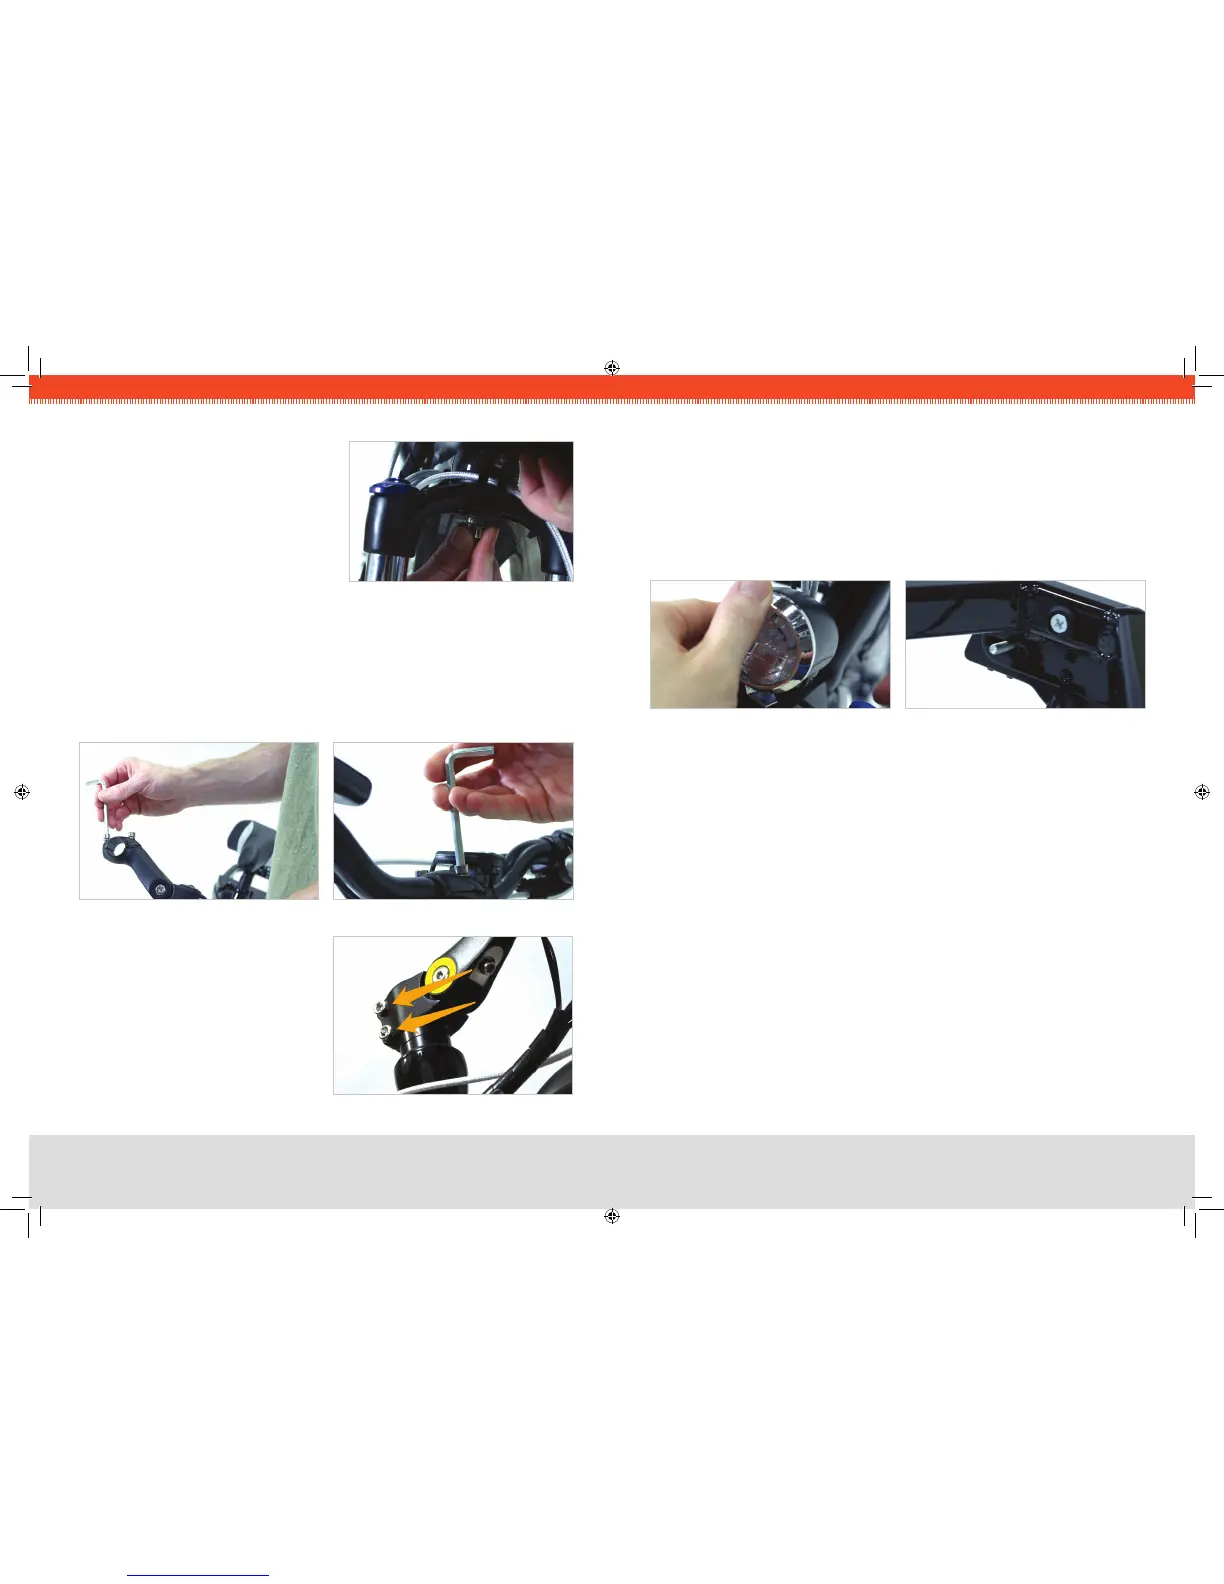
Locate the special threaded nut on the 1.
underside of the fork that has been
installed at the factory.
Using the wrench and bolt provided, 2.
install the fender from the underside of
the fork.
FIG 2. FENDER BOLT
STEP 3
:
ATTACH HANDLEBARS
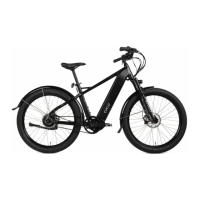
Remove the two bolts that hold the handlebar clamping bracket on. 1.
While taking care to keep the wires and cables as straight as possible, place the center 2.
of the handlebars into the bracket and replace the upper portion of the bracket.
Tighten the bolts evenly so there is equal space at the front and rear of the bracket. 3.
Firmly tighten both of the bolts.
FIG 4. BARS IN CLAMPING BRACKETFIG 3. CLAMPING BRACKET
STEP 4
:
INSTALL HEADLIGHT
Attach the headlight to the front fender bracket, taking care to run the wires as cleanly 1.
as possible.
Remove the single bolt from the light, keeping the nut in place. 2.
Install the light on the bracket located on the front fender, insert the bolt, and tighten 3.
securely.
STEP 5
:
INSTALL TAIL LIGHT
Remove the nuts and washers from the light, and install the bolt studs through the 1.
bracket at the rear of the bicycle.
Make sure the wire is not caught between the light and the bracket. Instead, route 2.
the wire over the bottom portion of the tail light bracket. Install the at washer, the
split washer, and the nut (in that order) onto each bolt, and tighten with the wrench
provided. Do not over-tighten.
STEP 6
:
CHECK BRAKE INSTALLATION
Follow each brake cable, starting at the brake lever. Make sure that the brake housing 1.
(the sheathing that the cable runs through) is fully seated into the cylindrical hole at
the brake lever, as shown in Fig. 8 on Page 22.
Fig. 9 shows a dislodged housing, which occasionally occurs during shipping and
handling.
Check the housing at the brake caliper end as well — it also should be seated into 2.
the hole in the brake.
Repeat for the other brake.3.
FIG 6. HEADLIGHT ATTACHMENT
FIG 7. TAIL LIGHT BRACKET
FIG 5. STEM CLAMP BOLTS
Loosen the two bolts that clamp the 4.
handlebar stem to the steer tube, and
align the handlebars with the front
wheel.
Firmly re-tighten the two bolts. Note: 5.
Do not loosen the bolt located in the
top-center of the metal cap.