STEP 7
:
INSTALL PEDALS
Keep in mind that the left and right pedals are threaded differently, and it is crucial that
they are installed on the correct side of the bicycle. For this reason, they are marked “L”
and “R” with stickers at the factory.
Locate the right-side pedal (marked with an “R”).1.
Thread the “R” pedal clockwise onto the drive-side crank (side of the bike with gears).2.
Tighten the “R” pedal clockwise with a 15 mm wrench or the wrench provided.3.
Locate the left-side pedal (marked with an “L”).4.
Thread the “L” pedal 5. CouNter-CloCKWiSe* onto the non-drive-side crank (side of
the bike without gears).
Tighten the “L” pedal 6. CouNter-CloCKWiSe with a 15 mm wrench or the wrench
provided.
*NOTE
:
The left and right pedals are not interchangeable.
The left (“L”) pedal and crank are reVerSe-tHreaDeD so that the pedal will not come
loose while riding. To tiGHteN the left pedal, turn CouNter-CloCKWiSe.
To looSeN it, turn CloCKWiSe.
STEP 8
:
INSTALL & CONNECT BATTERY
Once the battery has been fully 1.
charged (see section “Battery Care and
Maintenance” on Page 8), simply lower it
straight down into the frame. Fully push
the large, three-pronged plug on the
right side of the bicycle into the socket
in the battery.
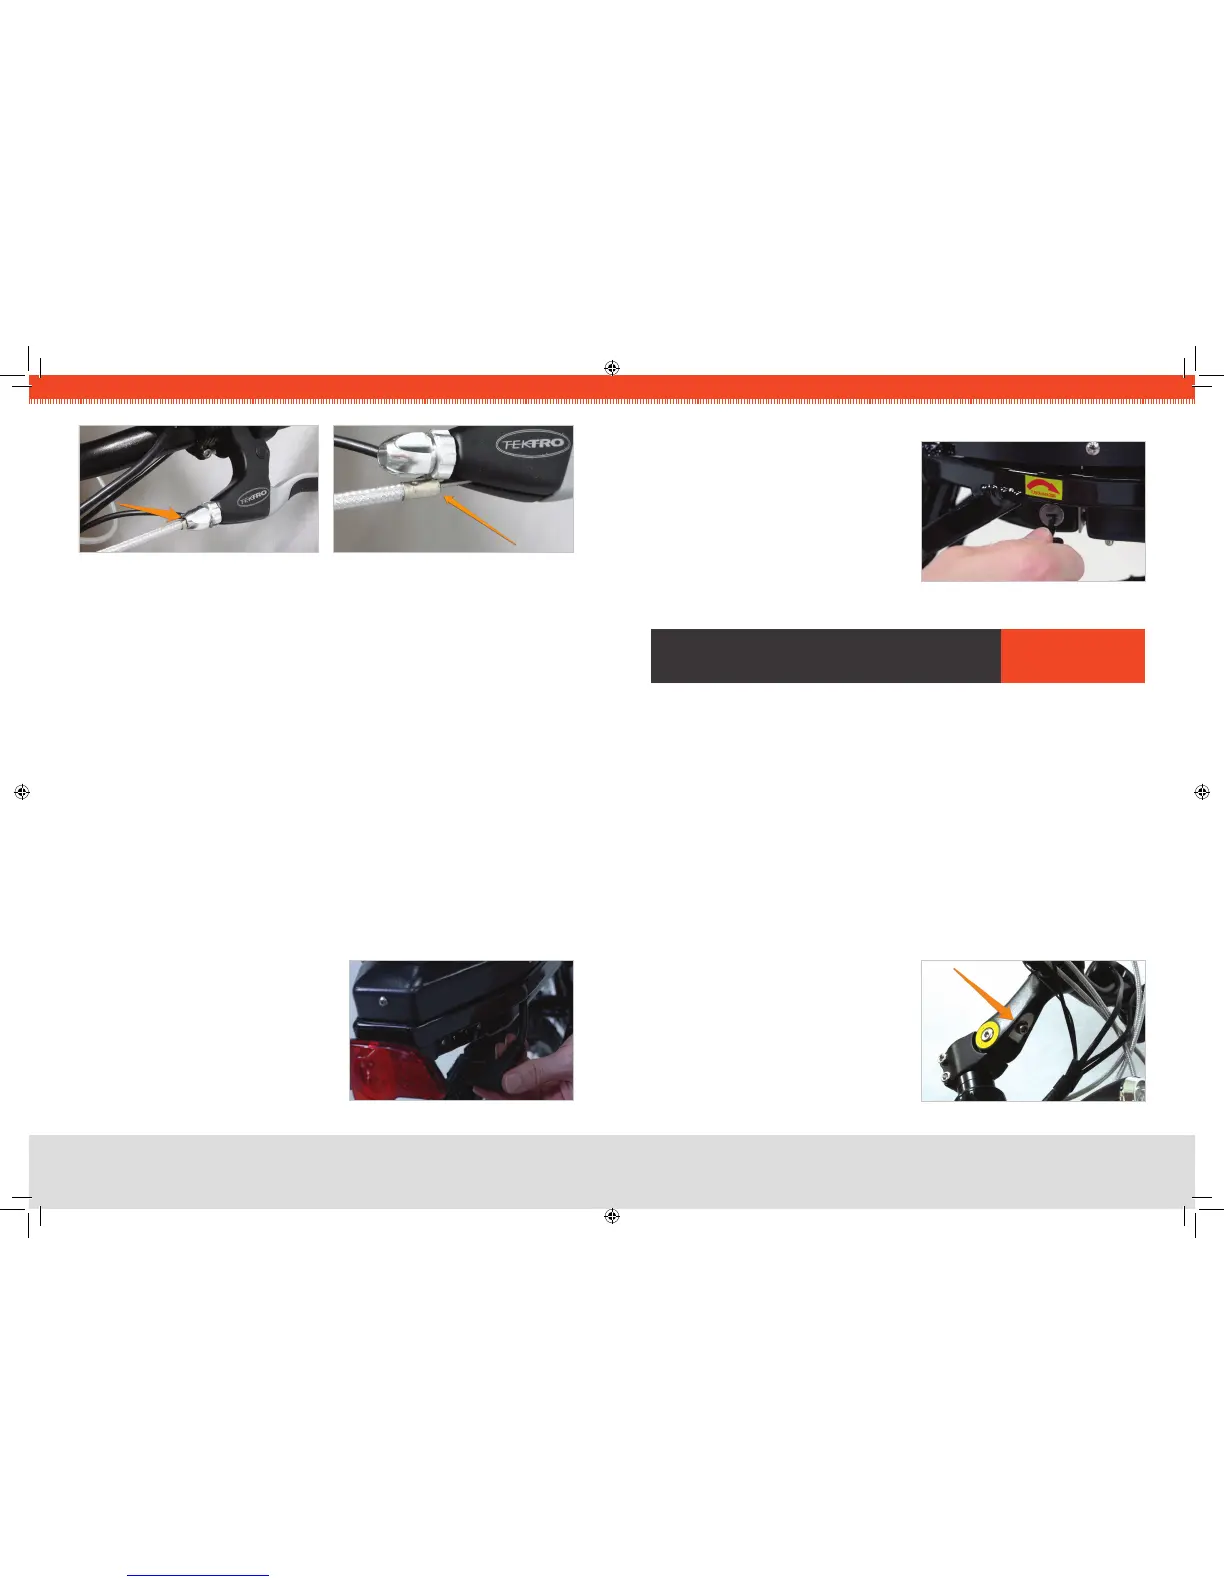
FIG 10. BATTERY SOCKET
FIG 8. CORRECT BRAKE HOUSING FIG 9. INCORRECT HOUSING
Using your key, lock the battery — this 2.
will help stabilize it when riding and also
provide some anti-theft security. The lock
is located on the left side of the battery
case.
FIG 11. KEY LOCK
FIT aDJusTMenTs aurOra
Many parts of your new EVELO Electric Bicycle can be
customized for a personalized t.
Seat Adjustment
The seat is easily adjusted up or down by ipping the quick-release lever that clamps
the post into the bike. Note that there is a “minimum insertion line” stamped on the seat
post that must be adhered to for safety’s sake. (If you need your seat to be higher than
permitted with the stock seat post, please contact us.)
The seat can also be moved forward and backward by loosening the single bolt on the
underside of the seat. Since it slides on its rails, there is no need to remove the bolt — just
loosen it, adjust, and rmly re-tighten. Loosening this bolt also lets you change the angle
of the seat up or down a bit. Again, be sure to re-tighten it rmly if you loosen it to change
the seat position in any way.
Stem Adjustment
To adjust the handlebars to a customized height:
Loosen the bolt indicated by the arrow in 1.
Fig. 12. Access this bolt from underneath
the handlebars.
FIG 12. STEM CLAMP BOLT
 Loading...