Now pivot the assembly to a 90-degree angle. Place the long end of the Allen wrench 2.
into the stem and turn it so that the wedge-shaped nut at the lower end comes up
slightly.
Place the black decorative cap over the large chrome nuts on the frame (above the 3.
fork) and slide the wedge-bolt end of the stem into the fork’s steerer tube.
FIG 4. LUNA WEDGE BOLT FIG 5. WEDGE NUT INSERTION
Make sure it is inserted at least as far as the “minimum insertion line” marked on 4.
the stem. Align the handlebars so they are square to the front wheel, and tighten the
wedge bolt with the long end of the Allen wrench until it is VERY tight.
Next, re-tighten the silver Allen bolt you loosened initially.5.
Rotate the handlebars up and into position, taking care to ensure they are centered in 6.
the clamp, and then press the clamp lever down until it clicks.
STEP 4
:
CHECK BRAKE INSTALLATION
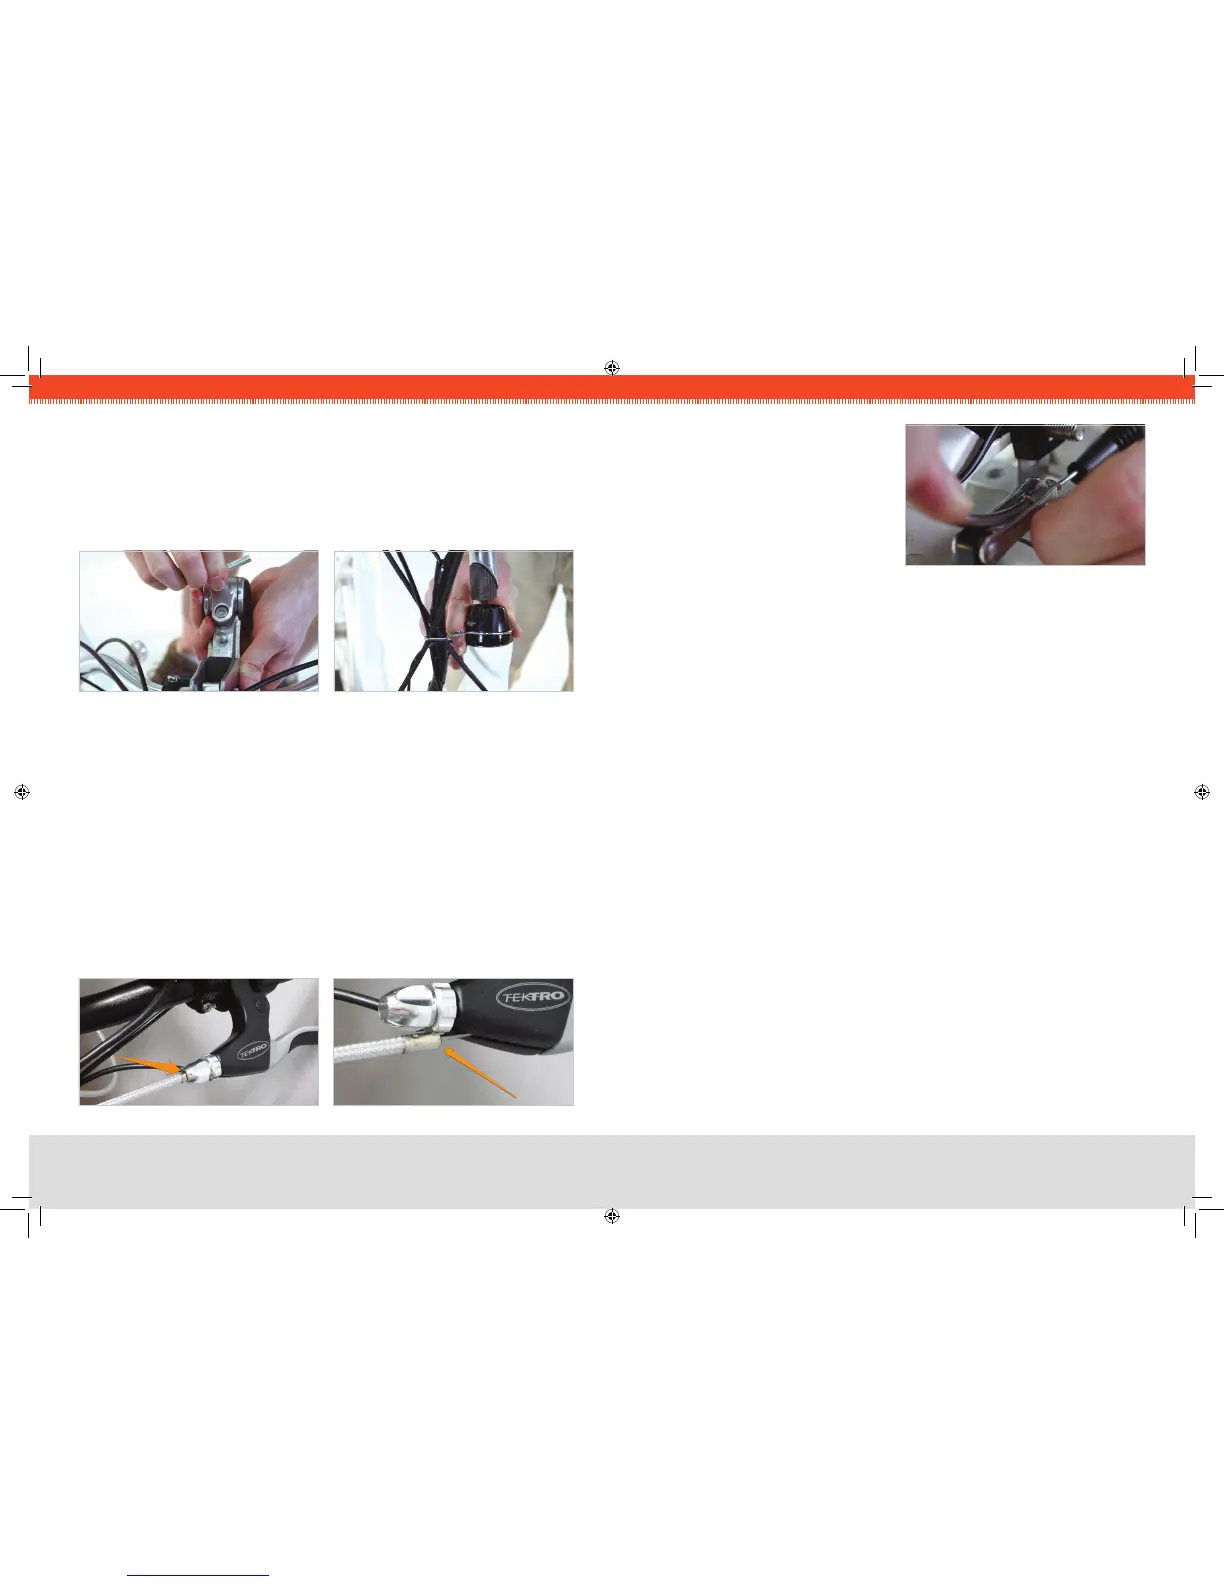
Follow each brake cable, starting at the brake lever. Make sure that the brake housing 1.
(the sheathing that the cable runs through) is fully seated into the cylindrical hole
at the brake lever, as shown in the rst photo below. The second photo shows a
dislodged housing, which occasionally occurs during shipping and handling.
FIG 6. CORRECT BRAKE HOUSING FIG 7. INCORRECT HOUSING
STEP 5
:
INSTALL PEDALS
Keep in mind that the left and right pedals are threaded differently, and it is crucial that they
are installed on the correct side of the bicycle. For this reason, they are marked “L” and “R”
with stickers at the factory.
Locate the right-side pedal (marked with an “R”).1.
Thread the “R” pedal clockwise onto the drive-side crank (side of the bike with gears).2.
Tighten the “R” pedal clockwise with a 15 mm wrench or the wrench provided.3.
Locate the left-side pedal (marked with an “L”).4.
Thread the “L” pedal 5. CouNter-CloCKWiSe* onto the non-drive-side crank (side of
the bike without gears).
Tighten the “L” pedal 6. CouNter-CloCKWiSe with a 15 mm wrench or the wrench
provided.
*NOTE
:
The left and right pedals are not interchangeable.
The left (“L”) pedal and crank are reVerSe-tHreaDeD so that the pedal will not come
loose while riding. To tiGHteN the left pedal, turn CouNter-CloCKWiSe.
To looSeN it, turn CloCKWiSe.
STEP 6
:
INSTALL SEAT
Simply slide the seat into the seat-tube on the bike, and tighten the clamp to secure it.1.
If necessary, open the lever, tighten the nut a few turns, and re-clamp the lever to get 2.
it properly tight. Note that there is a “minimum insertion line” marked on the post that
must be adhered to for safety’s sake.
Now that the front wheel is on, 2.
squeeze the brake arms together near
the rim, and replace the cable back
into the cradle you removed it from
earlier.
Test that the brakes move inward 3.
when you squeeze the left brake lever.
FIG 8. INSTALL BRAKE CABLE
 Loading...