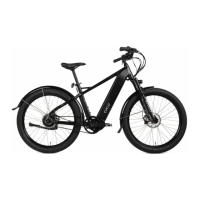
Using your key, lock the battery — this 2.
will help stabilize it when riding and also
provide some anti-theft security. The lock
is located on the left side of the battery
case.
FIG 11. KEY LOCK
FIT aDJusTMenTs arIes
Many parts of your new EVELO Electric Bicycle can be
customized for a personalized t.
Seat Adjustment
The seat is easily adjusted up or down by ipping the quick-release lever that clamps
the post into the bike. Note that there is a “minimum insertion line” stamped on the seat
post that must be adhered to for safety’s sake. (If you need your seat to be higher than
permitted with the stock seat post, please contact us.)
The seat can also be moved forward and backward by loosening the single bolt on the
underside of the seat. Since it slides on its rails, there is no need to remove the bolt — just
loosen it, adjust, and rmly re-tighten. Loosening this bolt also lets you change the angle
of the seat up or down a bit. Again, be sure to re-tighten it rmly if you loosen it to change
the seat position in any way.
Stem Adjustment
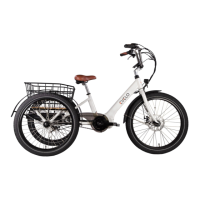
To adjust the handlebars to a customized height:
Loosen the bolt indicated by the arrow in 1.
Fig. 12. Access this bolt from underneath
the handlebars.
FIG 12. STEM CLAMP BOLT
Next, slightly loosen the bolts on either side. 2.
Once you have loosened all three bolts, 3.
move the stem to the desired height.
Re-tighten the two side bolts rst, ensuring 4.
they are tightened very well.
Finish by re-tightening the rst bolt located 5.
under the handlebars (the one indicated by
the arrow in Fig. 12).
Depending on how much you moved the stem, you may want to rotate the 6.
handlebars themselves, especially if you need to correct the angle of the brake levers.
Just loosen the two bolts that clamp the handlebar, rotate it to the desired position,
and re-tighten the bolts. (This is described in the section, “Attach Handlebars” on
Page 13.)
Double-check all bolts to make sure they are tight.7.
Front Shock
Please consult the manual provided by the manufacturer.
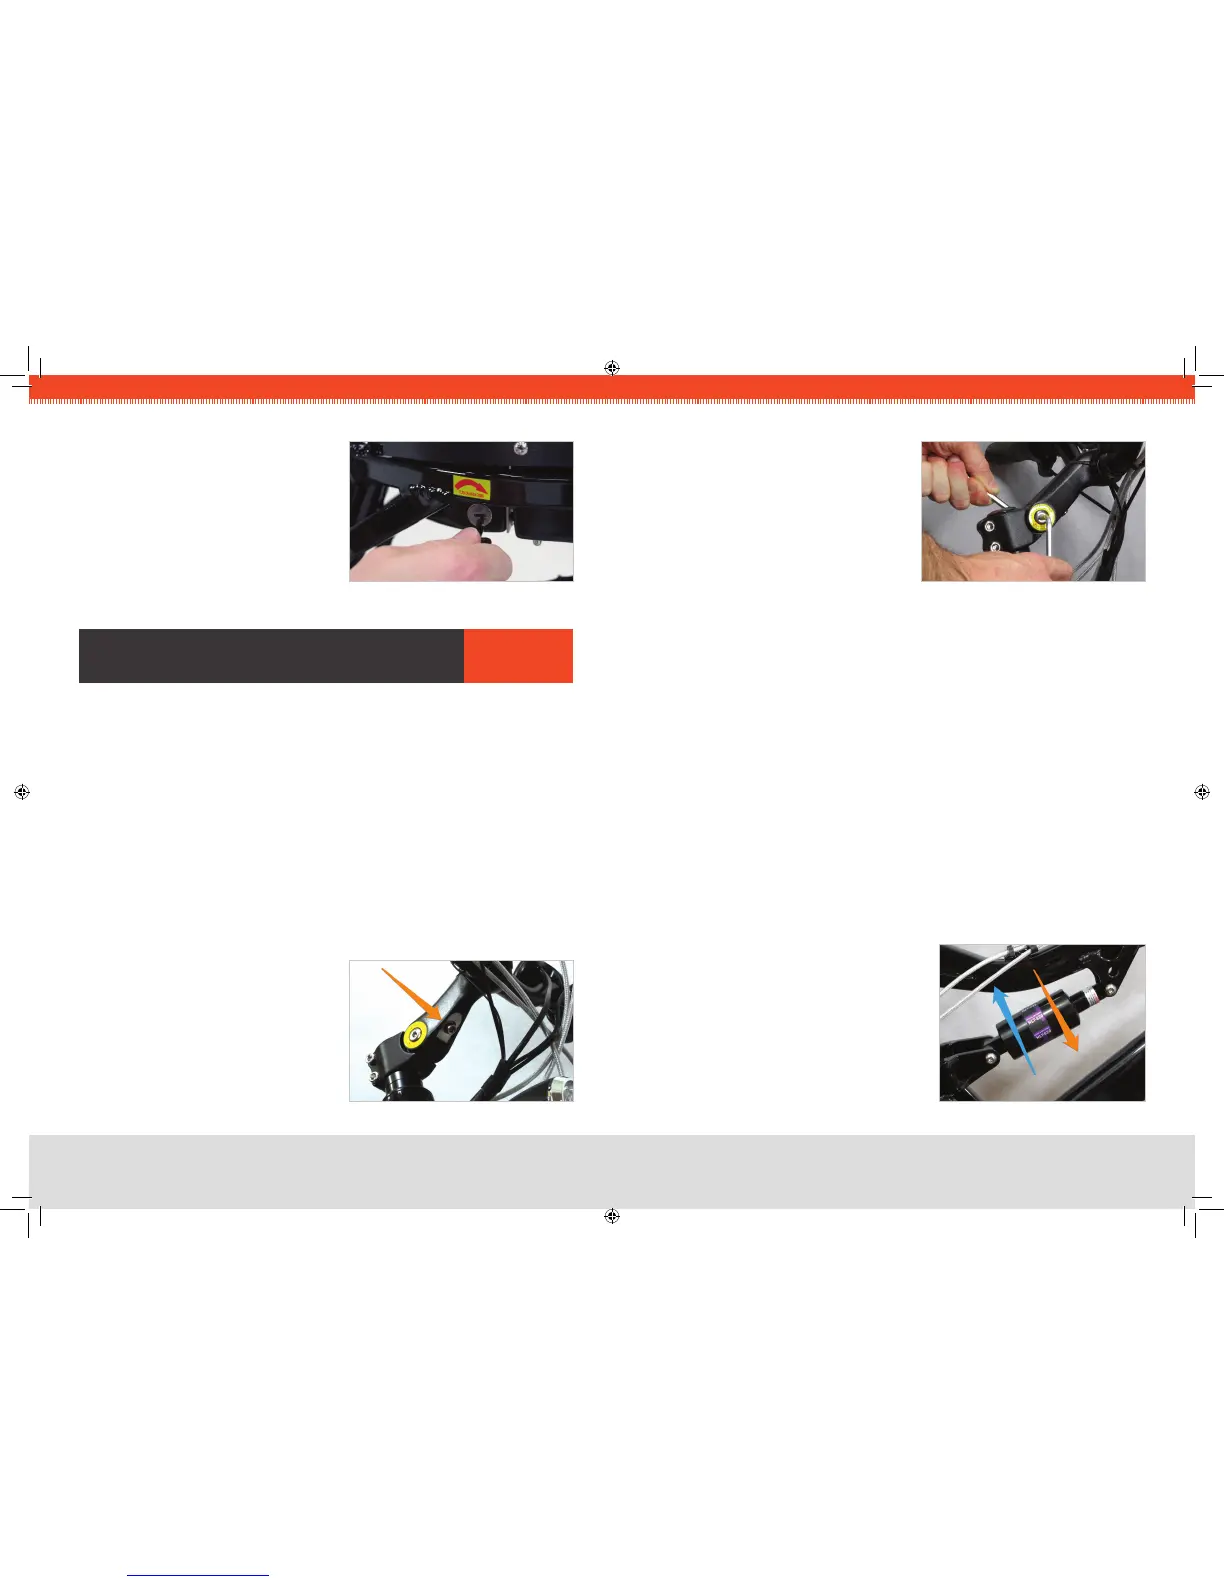
Rear Shock
To make the ride rmer and lower the frame slightly, grasp the barrel of the shock and
rotate in the direction of the Orange arrow (shown in Fig. 14) to compress the internal
spring. Alternatively, rotate in the direction of the Blue arrow to relax the spring, which will
increase the “travel” of the shock and soften the ride, raising the frame slightly.
Tire Inflation
The tires have a range of recommended ination
of 40-65 psi. This range is also indicated on
the sidewall of the tire. Lower pressure will give
a softer ride. A higher pressure will provide
a rmer ride, but will give the best range per
charge.
FIG 13. TWO OPPOSING BOLTS
FIG 14. REAR SHOCK ADJUST
 Loading...