STEP 4
:
INSTALL HEADLIGHT
Attach the headlight to the front fender bracket, taking care to run the wires as cleanly 1.
as possible.
Remove the single bolt from the light, keeping the nut in place. 2.
Install the light on the bracket located on the front fender, insert the bolt, and tighten 3.
securely.
STEP 5
:
INSTALL TAIL LIGHT
Remove the nuts and washers from the light, and install the bolt studs through the 1.
bracket at the rear of the bicycle.
Make sure the wire is not caught between the light and the bracket. Instead, route 2.
the wire over the bottom portion of the tail light bracket. Install the at washer, the
split washer, and the nut (in that order) onto each bolt, and tighten with the wrench
provided. Do not over-tighten.
STEP 6
:
CHECK BRAKE INSTALLATION
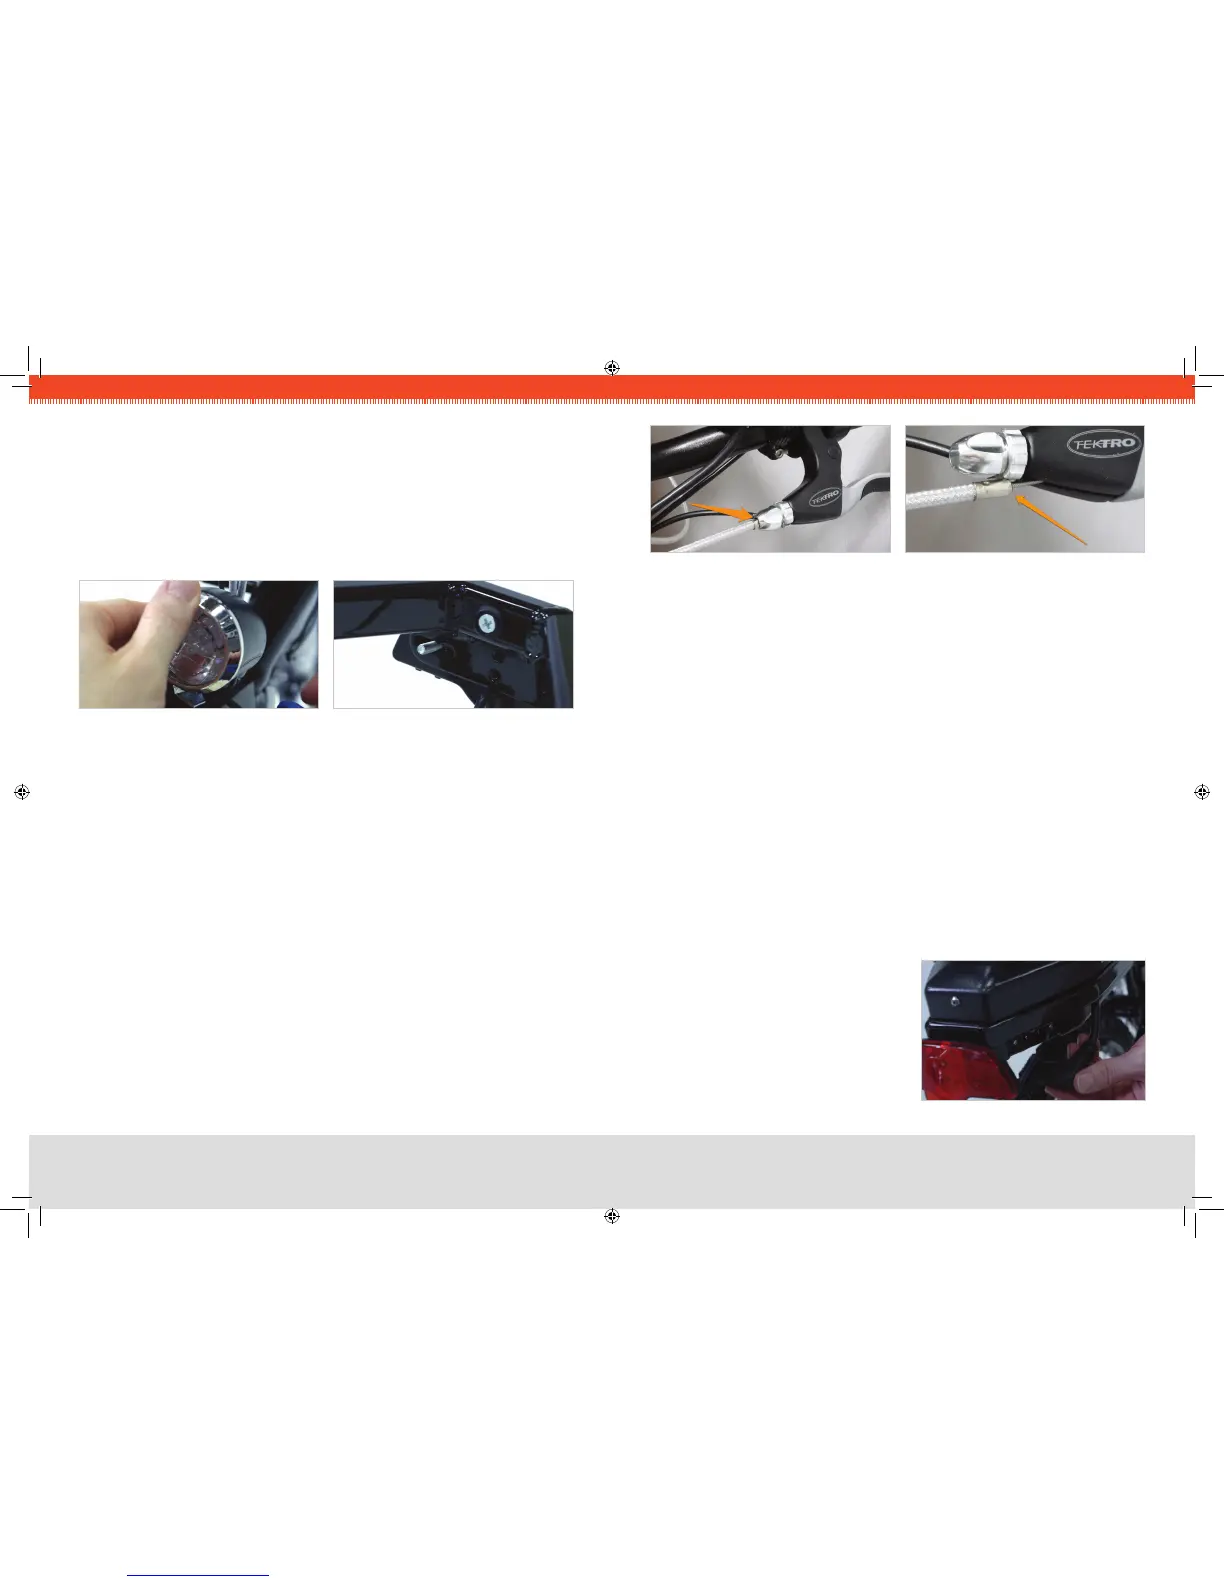
Follow each brake cable, starting at the brake lever. Make sure that the brake housing 1.
(the sheathing that the cable runs through) is fully seated into the cylindrical hole at
the brake lever, as shown in Fig. 8 on the next page.
Fig. 9 shows a dislodged housing, which occasionally occurs during shipping and
handling.
Check the housing at the brake caliper end as well — it also should be seated into 2.
the hole in the brake.
Repeat for the other brake.3.
FIG 6. HEADLIGHT ATTACHMENT
FIG 7. TAIL LIGHT BRACKET
STEP 7
:
INSTALL PEDALS
Keep in mind that the left and right pedals are threaded differently, and it is crucial that
they are installed on the correct side of the bicycle. For this reason, they are marked “L”
and “R” with stickers at the factory.
Locate the right-side pedal (marked with an “R”).1.
Thread the “R” pedal clockwise onto the drive-side crank (side of the bike with gears).2.
Tighten the “R” pedal clockwise with a 15 mm wrench or the wrench provided.3.
Locate the left-side pedal (marked with an “L”).4.
Thread the “L” pedal 5. CouNter-CloCKWiSe* onto the non-drive-side crank (side of
the bike without gears).
Tighten the “L” pedal 6. CouNter-CloCKWiSe with a 15 mm wrench or the wrench
provided.
*NOTE
:
The left and right pedals are not interchangeable.
The left (“L”) pedal and crank are reVerSe-tHreaDeD so that the pedal will not come
loose while riding. To tiGHteN the left pedal, turn CouNter-CloCKWiSe.
To looSeN it, turn CloCKWiSe.
STEP 8
:
INSTALL & CONNECT BATTERY
Once the battery has been fully 1.
charged (see section “Battery Care and
Maintenance” on Page 8), simply lower it
straight down into the frame. Fully push
the large, three-pronged plug on the
right side of the bicycle into the socket
in the battery.
FIG 10. BATTERY SOCKET
FIG 8. CORRECT BRAKE HOUSING FIG 9. INCORRECT HOUSING
 Loading...