Do you have a question about the Everdure HPE221W and is the answer not in the manual?
Essential warnings regarding electric shock, water proximity, and cord damage.
Identifies and describes each button and indicator on the control panel.
Initial steps for setting up and powering on the heater.
Procedure to prevent unauthorized access to heater controls.
How to turn the heater on and off using the main power switch.
Instructions for setting the current time and day on the heater.
Adjusting the low (economy) and high (comfort) temperature settings.
Choosing from preset or user-defined heating programs.
Details of available preset programs (P1-P9, CF, CE, CC, UP).
Instructions for attaching the wheels for mobile use.
Steps for securely fixing the heater to a wall.
Procedure to reset the heater after an overheat shutdown.
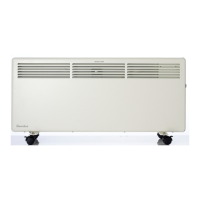
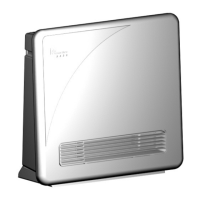
This document provides operation, maintenance, and safety instructions for Everdure Panel Convection Heaters, specifically models HPE221W and HPE151W. These heaters are designed for indoor domestic use and can be either wall-mounted or used with supplied castors for portability.
The Everdure Panel Convection Heaters are designed to provide warmth through convection heating. They feature a control panel that allows users to manage various settings, including temperature, time, day, and programming. The heaters offer two main temperature settings: "economy" (low) and "comfort" (high), which are preset but adjustable. A key feature is the ability to set programs, with 12 preset options and one user-programmable option, allowing for customized heating schedules throughout the week. These programs can vary temperature settings from low to high at different times of the day and week, adapting to user preferences and energy-saving needs. The heater also includes a frost protection program, which maintains a minimum temperature of 5 degrees Celsius.
Getting Started: Upon unpacking, users should unwrap the cord and prepare the heater for use. If using castors, the heater should be turned upside down on a protective surface, and the castor brackets should be attached to the base using the supplied screws. For wall mounting, the castors should not be fitted. The mounting bracket needs to be detached from the rear of the heater, fixed to the wall, and then the heater is carefully placed onto the hooks of the bracket. It is crucial to ensure the heater is level, securely fixed, and at the correct height, maintaining at least 150mm clearance from any side, bottom, or top barriers to prevent overheating.
Control Panel Operation: The control panel is accessed by removing a plastic cover with a small Philips screwdriver. This cover should be replaced after any adjustments to protect the LCD display and prevent children from accessing controls. The LCD display flashes when a function is accessed, and if no button is pressed within 5 seconds, the heater reverts to its operating mode.
Locking the Control Panel: For safety and to prevent unintended changes, the control panel can be locked electronically by simultaneously pressing the "up" and "down" buttons until a lock symbol appears. This disables all function buttons except the main power switch. Repeating the sequence unlocks the panel. Replacing the plastic cover also acts as a locking mechanism.
Main Power Switch: Located to the right of the control unit, the main power switch enables or disables all heater functions when the unit is plugged into the mains.
Setting Time and Day: After connecting or reconnecting to the mains, the current time and day must be set. This involves pressing the "timer select" button to cycle through day, hour, and minute settings, using the "up" and "down" buttons to adjust each value.
Setting Temperatures: The heater has "economy" (low, preset to 17°C) and "comfort" (high, preset to 22°C) temperature settings. These can be adjusted by pressing the "temperature select" button and using the "up" and "down" buttons to select desired temperatures within specified ranges (9°C to 30°C for high, and 5°C to 26°C for low).
Setting a Program: Users can choose from 12 preset programs or create a user-defined program. To select a preset program, press the "program select" button, and use the "up" and "down" buttons to cycle through the options. Once selected, press "program select" again to confirm. Indicator lights (green for economy, red for comfort, yellow for heating) show the current operating status.
Setting a User Program (UP): The user program offers the most flexibility. After selecting "UP" from the program options, the programming button is pressed to display Monday's 24-hour program, divided into 12-hour blocks. Users can set each block to either low (down button) or high (up button) temperature. The program automatically moves to the next block. After setting all blocks for a day, pressing the "timer select" button locks that day's program, and the display moves to the next day. This sequence is repeated for all 7 days. If no button is pressed for 5 seconds during block programming, the user program will be lost. A "copy" function (button 7) allows users to copy a full day's program to subsequent days, followed by pressing "timer select" (button 8) to lock it.
Safety Features: The heater includes a thermal overload protector that automatically shuts off the unit if it overheats. To reset the heater after an overheat event, unplug it, allow it to cool for 45 minutes, and then turn it on again.
Cleaning: Before cleaning, always unplug the heater and ensure it is completely disconnected from the power source. The exterior body can be cleaned with a soft, damp cloth, ensuring the heater is completely dry before reconnecting to mains supply. A vacuum cleaner can be used to clean dust and fluff from the air inlets and outlets. For wall-mounted units, the mounting clips can be disconnected to rotate the heater slightly forward for cleaning behind it, but this should be done with two people, and the unit must be properly resecured afterward.
Important Cleaning Precautions: Do not use gasoline, benzene, thinner, harsh cleaners, alcohol, or solvents, as these can damage the heater.
Storage: When not in use, the heater should be stored in its original packaging in a cool, dry place, along with these instructions.
General Safety and Usage Advice: It is recommended to connect the heater to a power outlet with a separate 10 amp circuit to avoid overloading household fuses. If the fuse trips, it's often due to other high-power appliances being used simultaneously; users should adjust usage accordingly. If the heater does not work, users should check power availability, plug connection, temperature settings, and ensure the thermal cut-out has not activated. Users are advised not to attempt to repair the heater themselves and to contact Everdure Service for assistance if difficulties persist.
| Model | HPE221W |
|---|---|
| Heating Power | 2200W |
| Voltage | 220-240V |
| Frequency | 50Hz |
| Thermostat | Adjustable |
| Safety Features | Overheat protection |
| Color | White |
| Timer | Yes, 24-hour |
| Mounting Option | Wall mountable or Free standing |
| Heater Type | Panel Heater |