44
www.evolutionpowertools.com
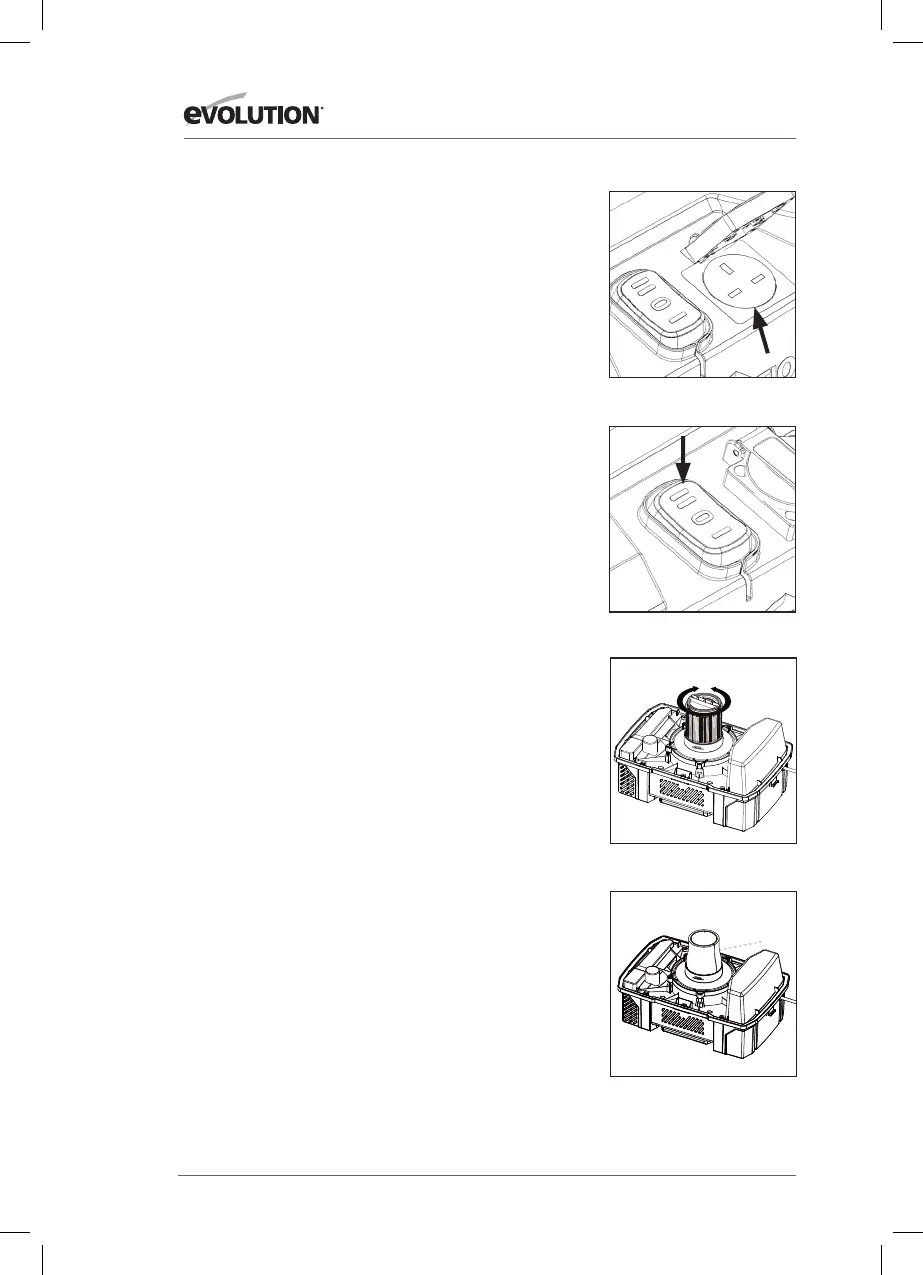
FIG. 1
FIG. 4
FIG. 3
INSTRUCTIONS D’UTILISATION
AVERTISSEMENT: Pour réduire le risque d’incendie ou
d’explosion, n’utilisez pas cet aspirateur dans des zones avec
des gaz inflammables, des vapeurs ou de la poussière explosive
dans l’air. Les gaz ou vapeurs inflammables comprennent, mais
sans s’y limiter: les liquides à briquet, les nettoyants de type
solvant, les peintures à l’huile, l’essence, l’alcool ou les aérosols.
Les poussières explosives comprennent, mais sans s’y limiter:
le charbon, le magnésium, l’aluminium et la poudre de grain
ou de pistolet. N’aspirez pas de poussière explosive, de liquides
inflammables ou combustibles ou de cendres chaudes. N’utilisez
pas cet aspirateur comme pulvérisateur pour tout liquide
inflammable ou combustible. Pour réduire les risques pour la
santé liés aux vapeurs ou aux poussières, n’aspirez pas de matières
toxiques.
ATTENTION : Pour réduire le risque de dommages auditifs,
portez des protections auditives lorsque vous utilisez l’aspirateur
pendant de longues heures ou lorsque vous l’utilisez dans une
zone bruyante. Cet aspirateur pour matériaux secs/liquides de 15
L est assemblé en usine et prêt à l’emploi lorsque vous le retirez
de l’emballage. L’appareil est prêt pour l’aspiration ou le soufflage
de matériaux secs. Après avoir branché le câble d’alimentation
sur la prise murale, mettez l’appareil sous tension en poussant
l’interrupteur de la position «O» à la position «I». Le «O» est la
position «ARRÊT» et le «I» est la position «MARCHE».
FONCTION PRISE DE FORCE
AVERTISSEMENT: Risque de blessures et de dommages!
Interrupteur de prise de force pour aspirateur automatique. Cette
fonction permet à l’aspirateur de s’allumer lorsque vous allumez
votre outil électrique, de sorte que l’appareil ne fonctionne pas
entre les coupes.
REMARQUE : La prise de courant sert uniquement à raccorder
des outils électriques à l’aspirateur. Toute autre utilisation de la
prise de courant est proscrite.
• Raccordez le tuyau à poussière ouvert de l’aspirateur au port
de poussière de votre outil électrique.
• Branchez la fiche secteur de l’outil électrique sur la prise de
la fiche de l’aspirateur sur le corps principal. (Fig. 1)
• Connectez le câble de l’aspirateur à l’interrupteur principal
sur la prise murale.
• Mettez maintenant l’interrupteur à bascule sur le réglage II -
L’aspirateur est en mode veille. (Fig. 2)
• Lorsque vous allumez votre outil électrique, l’aspirateur
démarre automatiquement et vous n’avez plus qu’à utiliser
l’outil comme prévu pour réaliser le travail.
• Lorsque vous éteignez l’outil électrique, l’aspirateur s’arrête
automatiquement.
• Le réglage II de la prise de force ne convient pas aux
transformateurs de 110V.
7
WARNING!
To reduce the risk of injury from accidental starting, unplug power cord before emptying
the dust tank.
1. Remove the power head assembly of the wet/dry vac by pulling outward on the lid
clips located on each side of the vac. Lift off the power head assembly.
2. Dump the tank contents into the proper waste disposal container.
INSTALLING ACCESSORY BRACKET
1.Push the accessory bracket (A) in the recess.
2.Secure in place using the screws (B).
A
B
WET PICK-UP
1. Remove cartridge filter and replace it with foam filter when you do wet pickups.
2. This wet/dry vac is equipped with a float mechanism which will rise automatically
to cut off the airflow when the liquid in the tank reaches a predetermined level. When
this happens, turn off vac, unplug the power cord, and empty the dust tank. You will
know that the float has shut the airflow off because the suction ceases and the motor
noise becomes higher in pitch due to increased motor speed. The liquid capacity may
vary with the rate of pickup.
EMPTY THE TANK
Foam filter
Float in raised position
FIG. 2
VERROUILLER
DÉVERROUILLER
 Loading...