57
www.evolutionpowertools.com
IT
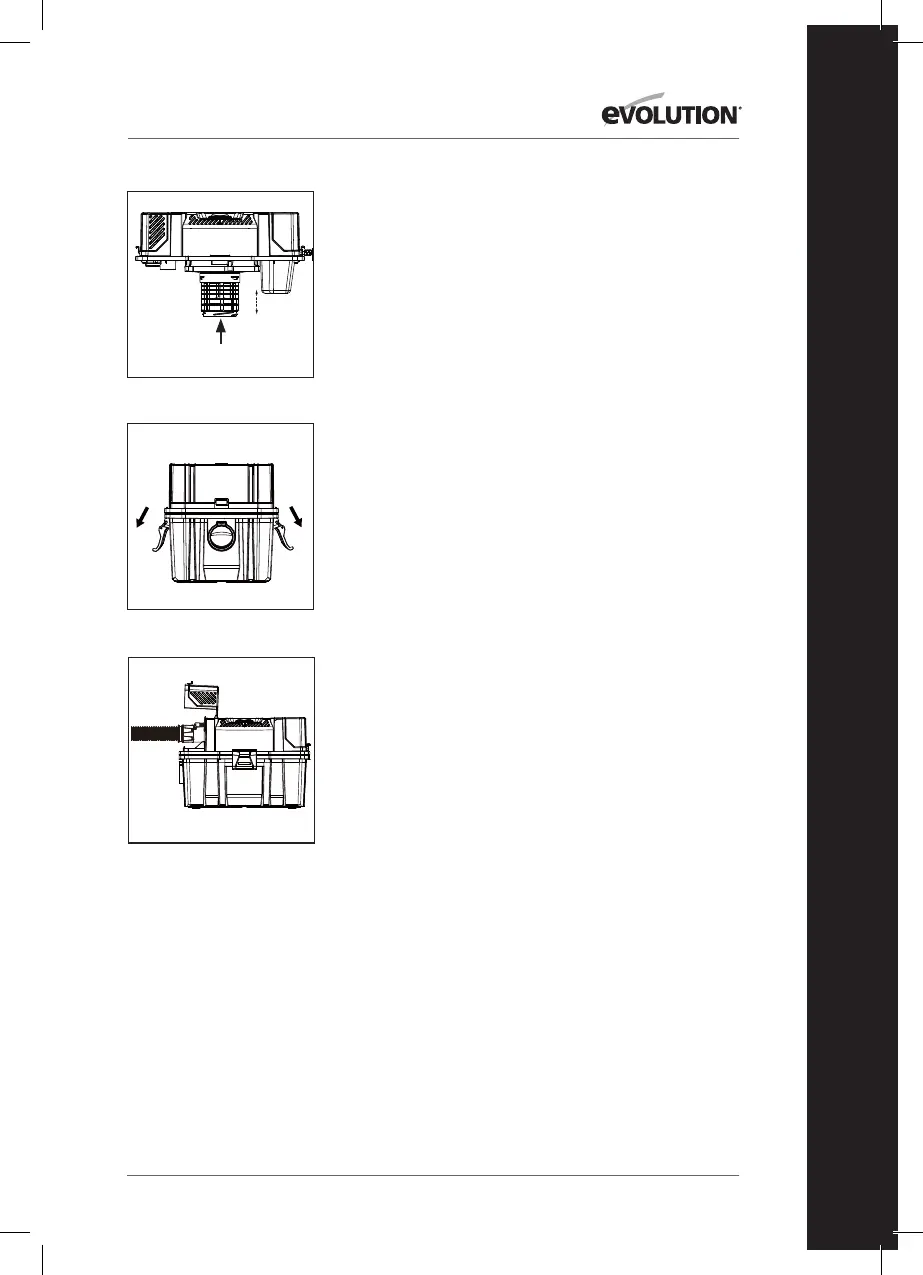
FIG. 5
FIG. 6
FIG. 7
Your vac contains a blowing feature. It has the capability to blow sawdust and other
debris. It can be used to blow dust and debris out of garages or off patios and
driveways. Follow the steps below to use your vac as a blower.
1. Locate blowing port on your vac.
2. Insert one end of the 1-1/4 in. x 6 ft. hose into the blowing port.
3. Turn vac “ON”.
8
WARNING: To reduce the risk of injury from accidental starting, unplug power
cord before changing
WARNING: To avoid injury to bystanders, keep them clear of blowing debris.
CAUTION: Wear a dust mask if blowing creates dust which might be inhaled.
CAUTION: To reduce the risk of hearing damage, wear ear protectors when
using the vac/blower for extended hours or when using it in a noisy area.
CARE AND MAINTENANCE
FILTER REPLACEMENT
WARNING!
To reduce the risk of injury from accidental starting, unplug power cord before changing
or cleaning filter.Your filter should be cleaned often to maintain peak vacuum
performance.
IMPORTANT
To avoid damage to the blower wheel and motor, always reinstall the reusable dry filter
before using the vacuum for dry pickups and always reinstall the foam filter before
using the vacuum for wet pickups.
IMPORTANT
After cleaning, check the filter for tears or small holes. Do not use a filter with holes or
tears in it. Even a small hole can cause dust to come out of your vacuum.
Replace it immediately.
NOTE
Before installing the filter on the vacuum, clean the area of the lid so that the clamp ring
will seal the bag against the lid and stop small particles from bypassing the filter bag. If
the filter is clean and not damaged, replace it on the filter cage. If it cannot be reused,
place a new filter over the filter cage.
NOTE
Clean the filter in an open area.
BLOWING OPERATION
7
WARNING!
To reduce the risk of injury from accidental starting, unplug power cord before emptying
the dust tank.
1. Remove the power head assembly of the wet/dry vac by pulling outward on the lid
clips located on each side of the vac. Lift off the power head assembly.
2. Dump the tank contents into the proper waste disposal container.
INSTALLING ACCESSORY BRACKET
1.Push the accessory bracket (A) in the recess.
2.Secure in place using the screws (B).
A
B
WET PICK-UP
1. Remove cartridge filter and replace it with foam filter when you do wet pickups.
2. This wet/dry vac is equipped with a float mechanism which will rise automatically
to cut off the airflow when the liquid in the tank reaches a predetermined level. When
this happens, turn off vac, unplug the power cord, and empty the dust tank. You will
know that the float has shut the airflow off because the suction ceases and the motor
noise becomes higher in pitch due to increased motor speed. The liquid capacity may
vary with the rate of pickup.
EMPTY THE TANK
Foam filter
Float in raised position
ASPIRAZIONE A SECCO
NOTA: Qualora nell’alloggiamento del filtro sia installato il filtro
in schiuma espansa, esso deve essere rimosso prima di installare
la cartuccia filtro. La cartuccia filtro può essere usata sia per
l’aspirazione a umido che a secco; l’installazione è
la medesima per entrambe le procedure. Nel caso di aspirazione
di grandi quantità di liquidi, si prega di fare riferimento alla
sezione “Procedura di aspirazione a umido” del presente manuale.
Utilizzare la cartuccia filtro installandola sopra l’alloggiamento del
filtro per l’aspirazione della maggior parte di materiali.
• Con la testa motrice in posizione capovolta, far slittare la
cartuccia filtro verso il basso sopra l’alloggiamento, spingere
le guarnizioni del filtro contro la testa motrice.
• Posizionare il ferma filtro sul lato superiore della cartuccia,
tenere la testa motrice con una mano, girare la manopola sul
ferma filtro in senso orario per stringere, bloccando il filtro in
posizione. (Fig. 3)
• Per rimuovere la cartuccia filtro per la pulizia, tenere
nuovamente la testa motrice e girare in senso antiorario
il ferma filtro per allentare ed estrarre, far scorrere fuori
dall’alloggiamento la cartuccia.
• Per pulire la cartuccia filtro scuotere o spazzolare via i detriti
in eccesso o sciacquare (da dentro il filtro) con acqua, far
asciugare completamente (approssimativamente 24 ore) e
reinstallare.
ASPIRAZIONE A UMIDO
• Rimuovere la cartuccia filtro e sostituirla con il filtro in
schiuma espansa quando si eseguono aspirazioni a secco.
(Fig. 4)
• Il presente aspiratore a umido/a secco è dotato di un
meccanismo galleggiante che si solleverà automaticamente
per interrompere il flusso d’aria una volta che il liquido
nel serbatoio abbia raggiunto un predeterminato livello.
Quando ciò accade, spegnere l’aspiratore, scollegare il cavo e
svuotare il serbatoio della polvere. Sarà possibile accorgersi
che il galleggiante ha interrotto il flusso d’aria perché
l’aspirazione cesserà e il rumore del motore diverrà più acuto
per la sua aumentata velocità. La capacità di liquido può
variare in base alla velocità di aspirazione. (Fig. 5)
SVUOTAMENTO DEL SERBATOIO
ATTENZIONE: Per ridurre il rischio di lesione causata da avvio
accidentale, scollegare il cavo di alimentazione prima di svuotare il
serbatoio della polvere.
• Rimuovere il gruppo testa motrice dell’aspiratore a umido/a
secco tirando verso l’esterno le chiusure del coperchio
situato su ciascun lato dell’apparecchio. Sollevare il gruppo
testa motrice. (Fig. 6)
• Svuotare il contenuto del serbatoio nell’appropriato
contenitore di smaltimento rifiuti.
OPERAZIONI DI SOFFIATURA
ATTENZIONE: Per ridurre il rischio di lesione causata da avvio
accidentale, scollegare il cavo di alimentazione prima del cambio di
modalità. Per evitare infortuni ai presenti, tenerli lontani dai detriti
soggetti a soffiatura.
GALLEGGIANTE IN
POSIZIONE SOLLEVATA

 Loading...