7
INSTALLATION METHOD:
This product has been designed to be installed into a plaster board, or exisng masonry chimney breast.
Please note that any GF2 models from the e-series range are not suitable to be installed into a exisng chimney breast.
Please seek advice from a professional, with reference to the structural integrity of the installaon site.
if the products is to be installed into a open chimney or ue, it is important that the chimney/ue is blocked o to prevent any
up/down draughts and falling debris which could restrict and alter the airow to the product.
It is also important to ensure that the product has a minimum internal clearance directly above and below the product of
100mm, this is to ensure that the product can circulate the required airow for the heater unit.
The product should never be sealed into a opening with the use of silicones or adhesives as this can also alter the airow and
hinder any further servicing of the product.
Installing Product:
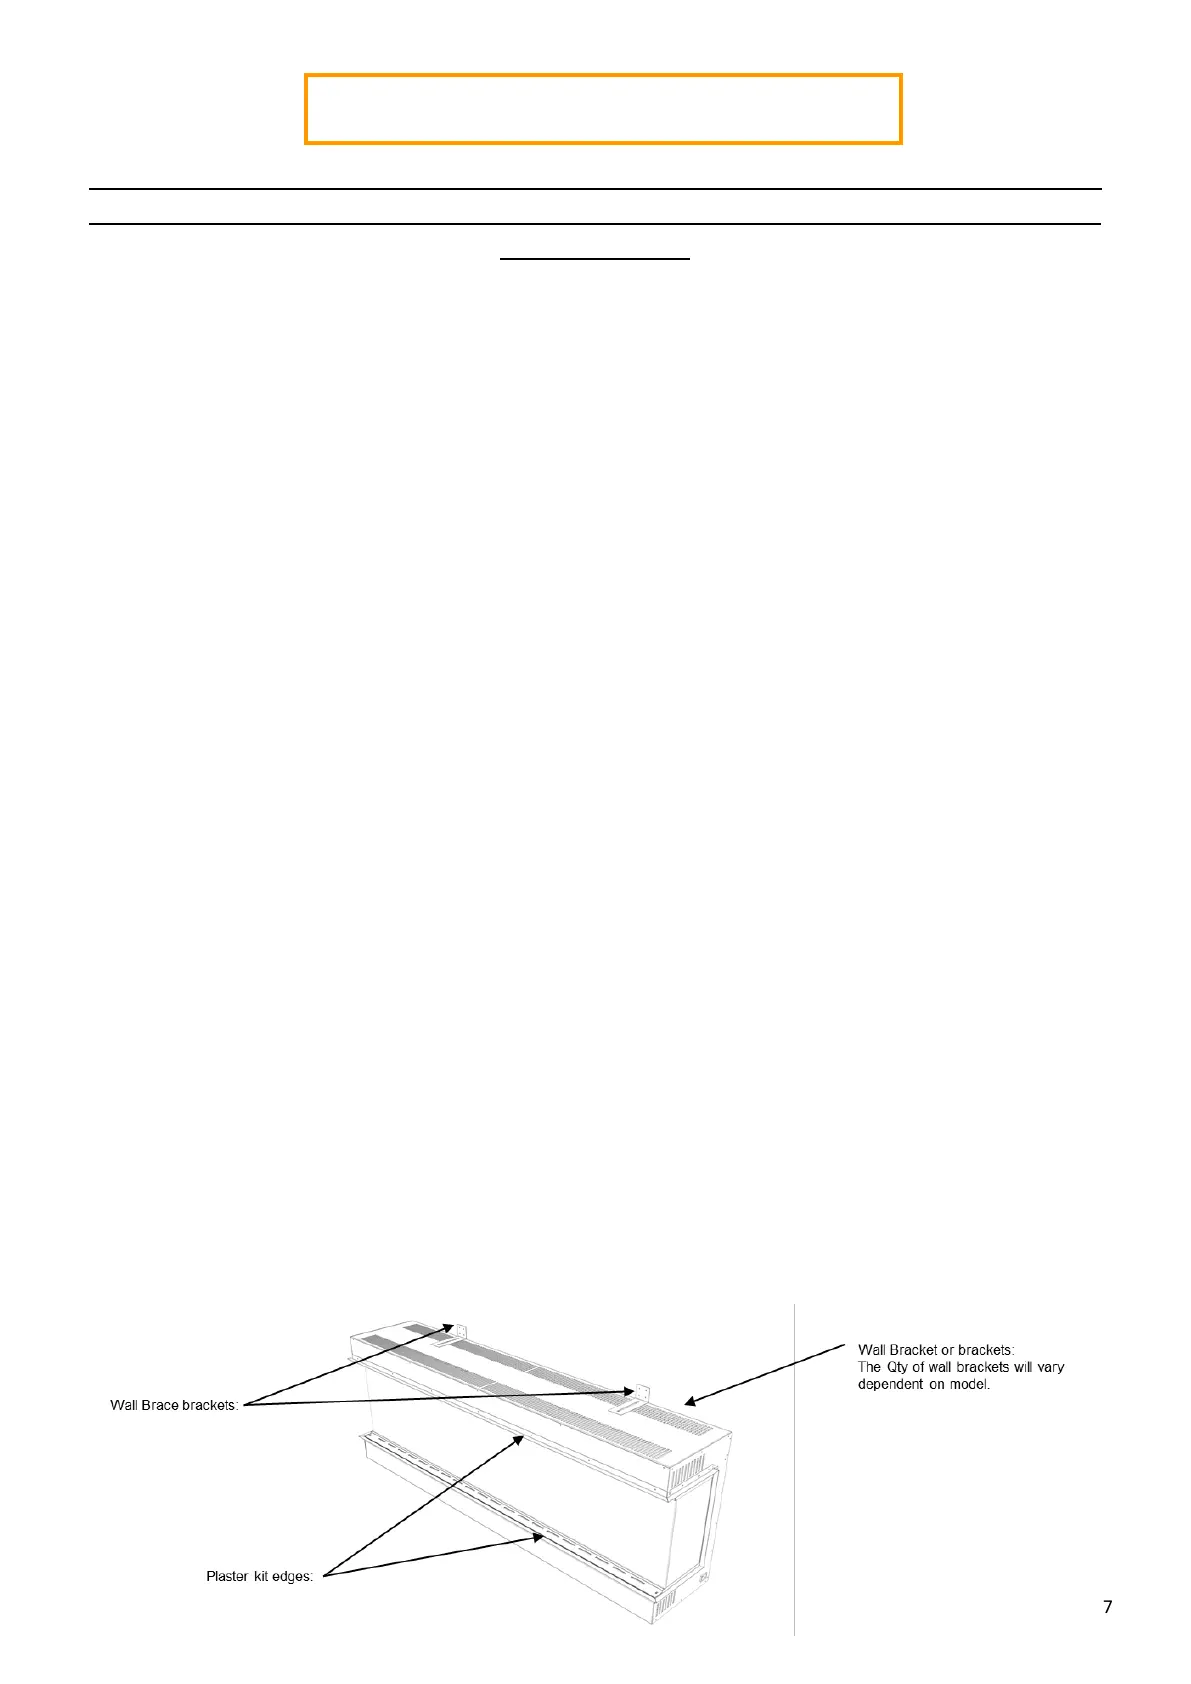
Each E-Series product is supplied complete with one or more wall mounng brackets. (Dependent on Model)
Establish the desired nished height from oor level to the boom of the plaster kit of the product.
Fix the wall bracket to the wall ensuring to use the correct hardware xings given the wall construcon, Plaster board or Solid
Wall.
Li and hook the product onto the wall bracket and secure using the wall brace brackets. Please note: It is recommended that
2 people carry out this process on all models and 3 people on the e2400. The e2400 must then be supported from the
boom of the re to provide addional support for the weight of the case.
Once the product is secured to the wall and connected to the power supply, the false construcon such as plaster board wall or
chimney breast can be formed around it.
It is important to allow for the nished face board when seng the depth of the frame construcon.
It is essenal to include header/Lintel at the required height to ensure the appliance does not support the weight of the
nished wall.
Prepare the Cut-Out in the Plaster-board or Finishing Board, and install ensuring that the plaster kit edges are ng to the
inside of the Cut-out of the board.
PLEASE NOTE: It is crucial to ensure that the product has a minimum internal clearance directly above
and below the product of 100 mm, this is to ensure that the product can circulate the required airow
for the heater unit.
PLEASE NOTE: Due to the weight of the e2400 model, it must be supported from the boom of the re.
The xing kit is supplied to keep the re at against the wall, but is not suitable to solely hold the
weight of this model . The e2400 is not suitable for ‘oang’ eect installaons.