This document describes the installation and operating manual for LED Lighted Medicine Cabinets, available in various series and sizes. These cabinets are designed to provide illuminated storage, with some models featuring additional functionalities like a clock, external storage shelves, or a night light.
Function Description:
The LED Lighted Medicine Cabinets serve as illuminated storage solutions for bathrooms or similar spaces. They integrate LED lighting, which can be controlled via touch switches on the mirror surface. Depending on the series, the cabinets offer different features:
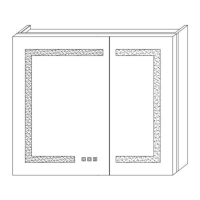
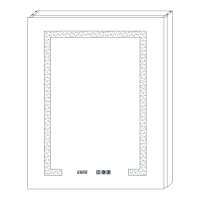
- Series 1: LED Cabinet without Clock: These are basic illuminated medicine cabinets providing storage and lighting without a clock display.
- Series 2: LED Cabinet with Clock: These cabinets include an integrated clock display on the mirror surface, in addition to the LED lighting and storage. Some models in this series also feature a UL socket with USB for charging devices.
- Series 3: LED Cabinet with external storage shelf and Night light: These models offer an additional external storage shelf beneath the main cabinet and incorporate a night light feature.
Important Technical Specifications (based on model numbers and descriptions):
The cabinets come in various dimensions (Width x Height), indicated by their model numbers:
- Series 1:
- DHMC3030V3TX: W30" x H30"
- DHMC3026V3TX: W30" x H26"
- Series 2:
- DHJSMC3630V3DKXXX: W36" x H30"
- DHMC2032V4RX / DHMC2032V4LX: W20" x H32"
- DHMC2432V6RX / DHMC2432V6LX: W24" x H32"
- DHMC3032V6TX: W30" x H32"
- DHMC4832V4TX: W48" x H32"
- Series 3:
- DHMC2028V5RX / DHMC2028V5LX: W20" x H28"
- DHMC2432V5RX / DHMC2432V5LX: W24" x H32"
- DHMC3032V5TX: W30" x H32"
- DHMC3632V5FX / DHMC3632V5FB: W36" x H32"
- DHMC4832V5FX / DHMC4832V5FB: W48" x H32"
The light source for these products is non-changeable light diodes (LEDs).
Electrical supply must be switched off at the main circuit board BEFORE installation and maintenance.
All fittings must comply with current IEE wiring regulations.
The product is suitable for indoor use only and should be positioned away from curtains and fabrics.
Some models include a UL socket with USB.
Usage Features:
The cabinets are designed for both hanging wall installation and embedded installation.
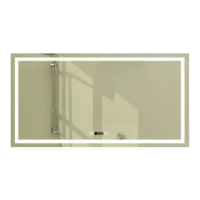
Lighting Control (Touch Switch):
The touch switch on the mirror surface provides comprehensive control over the LED lighting:
- On/Off: A short touch turns the mirror light on or off.
- Color Temperature (CCT) Adjustment: A long touch allows adjustment of color temperatures between warm white and cool white. The setting is finalized by withdrawing the finger when the desired color is reached.
- Dimming: For models with dimming functionality, a long touch adjusts the brightness. The setting is finalized by withdrawing the finger when the desired brightness is reached.
- ON/OFF Memory Function: The lighting can optionally be wired to a wall switch, retaining the last ON/OFF state.
Defogger Function (for models with defogger):
- Activation/Deactivation: Pressing the defogger button activates the anti-fog function, warming the mirror. Pressing it again deactivates it.
- Automatic Shut-off: The defogger automatically stops after 60 minutes of continuous operation to prevent damage from prolonged high temperatures.
Clock and Temperature Setting (for models with clock):
- Mode Selection: With the light off, a long touch on button 2 allows choosing between two clock and temperature modes:
- A: 12C/12F (Fahrenheit and 12-hour format)
- B: 24C/24F (Celsius and 24-hour format)
- The default mode is 12C/12F.
- Setting the Clock: With the light off, a long touch on button 1 makes the Hour flash. Short touches on buttons 1 and 2 adjust the Hour. After a few seconds, it automatically switches to Minute flash, which can then be adjusted with short touches on buttons 1 and 2. The time is saved automatically after setting.
- Clock Display: The clock displays for 5 seconds, then shifts to temperature for 2 seconds, and then returns to the clock display.
- Indoor Temperature: The cabinet automatically displays the indoor temperature via an auto-sensing temperature sensor. It is crucial NOT to cover this sensor.
- Touch Switch Blue Background Light: In default mode, the touch switches have a blue background light. A long touch on button 3 can turn this background light on or off.
Night Light (for models with night light):
- Inside Night Light: This light automatically turns on/off based on the brightness in the surroundings when the door is opened. The night light sensor should not be covered.
- External Night Light: This light automatically turns on/off based on the brightness in the surroundings when the rocker switch is kept turned on. If manual control is desired, the rocker switch should be turned off. The night light sensor should not be covered.
Installation:
The manual provides detailed instructions for both hanging wall installation and embedded installation.
- Hanging Wall Installation: Involves marking hole locations, drilling, inserting anchors, securing a Z-bar with round-head screws, installing side panels (if applicable), wiring the electrical connections (white wire for neutral, ground wire, black wire for hot, using a 3-connection cap), lifting the cabinet onto the mounting bar, and fixing a support angle at the bottom.
- Embedded Installation: Requires determining the size of the opening, wiring electrical connections, and then inserting the cabinet into the wall.
- Door Assembly: For cabinets where doors and the cabinet are packaged separately (due to weight), the doors are assembled after the cabinet is installed. This involves inserting hinges into the base, connecting doors to the cabinet, adjusting hinge screws to ensure even gaps and smooth operation, and connecting the wire on the door to the terminal on the cabinet.
- Glass Shelves: Glass shelves are inserted between layer board clips inside the cabinet. The number of shelves varies by size (2 for 30"x26"/20"x28" models, 3 for other sizes).
Maintenance Features:
- Regular Checks: Regularly check the cord, transformer, and all other parts for damage. If any part is damaged, the product should not be used.
- Safety Precautions:
- Inspect the product immediately upon receipt for damage or missing parts.
- Handle the product with care to protect glass edges.
- Ensure no hidden pipes or cables in the wall before drilling.
- Wear suitable eye protection when drilling.
- The light source (LEDs) are non-changeable; do not disassemble the product to avoid eye damage.
- Do not install the fixture in hazardous locations.
- Do not cover the mirror or the temperature sensor.
The manual emphasizes the importance of reading all instructions thoroughly for safe and correct installation and to keep the instruction manual for future reference during product operation and maintenance.