EasyManua.ls Logo

Exit Bounzy - Table of Contents

Exit Bounzy
76 pages
Print Icon
To Next Page IconTo Next Page
To Previous Page IconTo Previous Page
Loading...
17
STEP 4
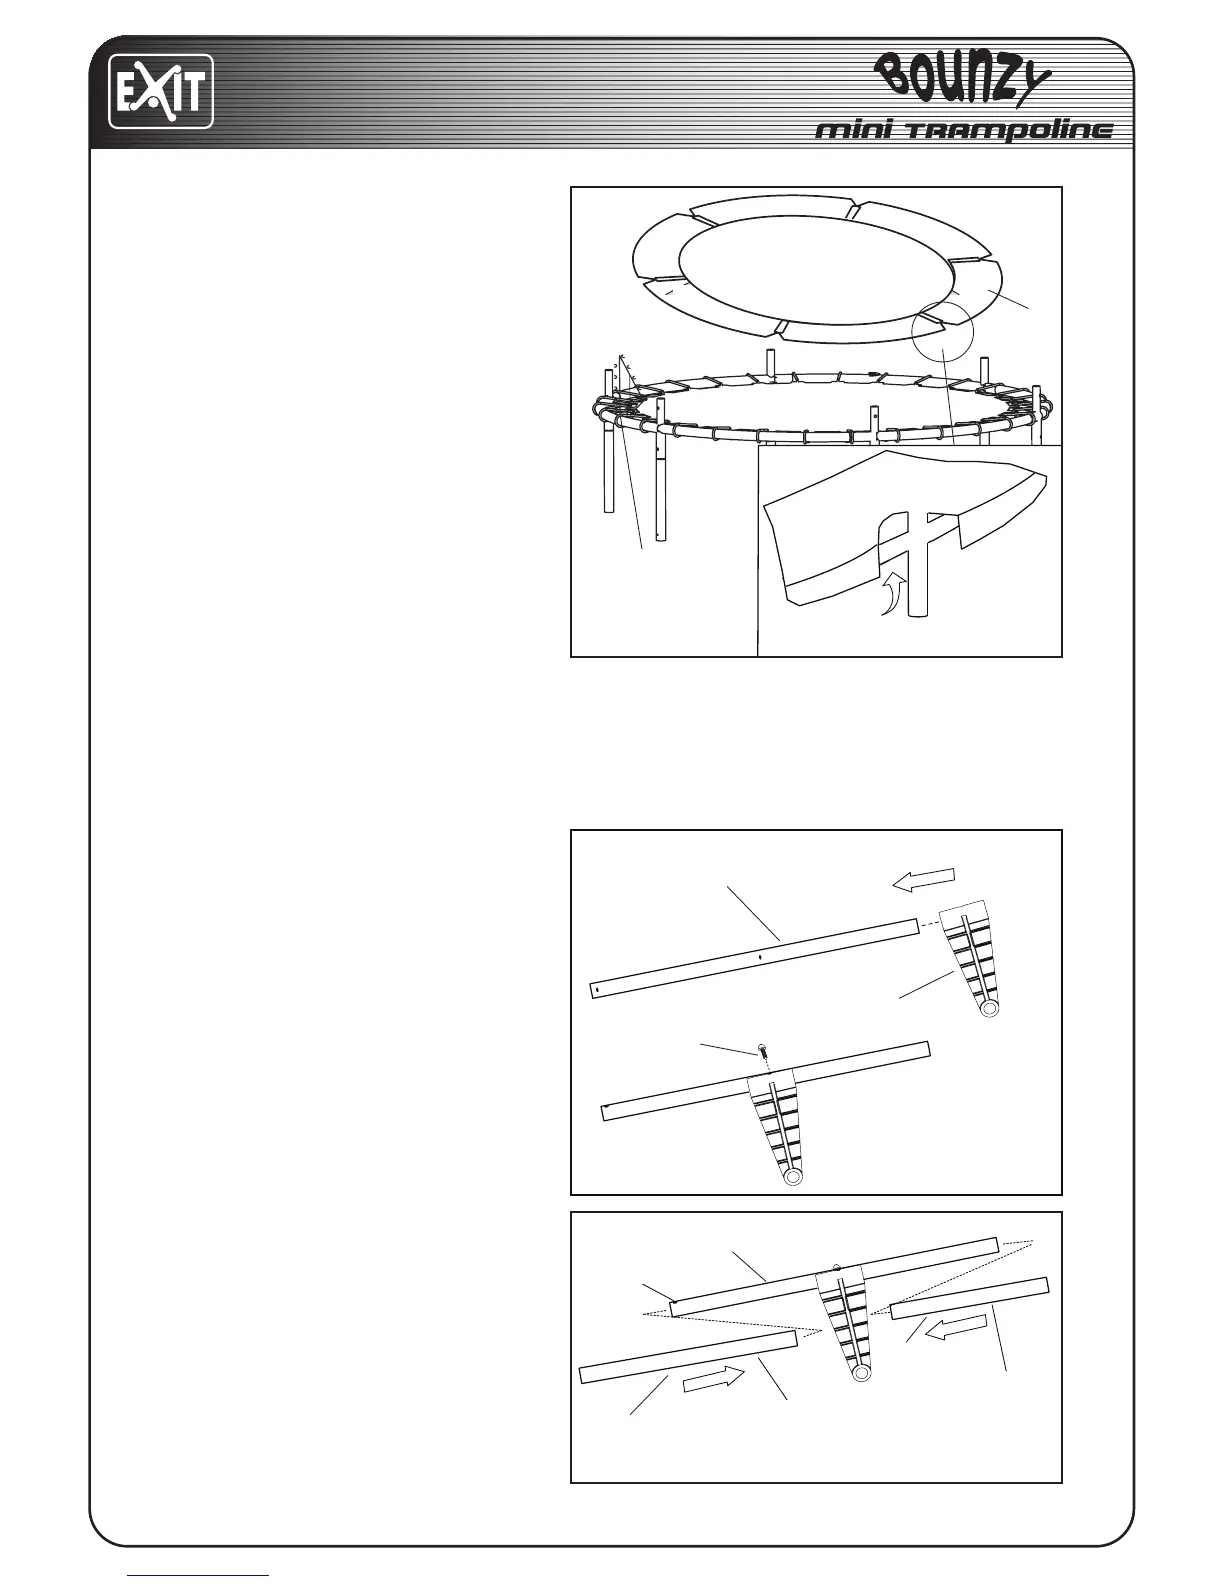
Lay the pad (5) on the frame. Adjust the
position of the pad so that the slits are
directly above the legs as shown.
STEP 5
Lay one straight tube (7) on the ground.
5.1
Sleeve a plastic beam (8) on the straight
tube (7). Tighten with one self-tapping
screw (12) using a tool.
5.2
Pull a Foam 1 490mm (9) over the straight
tube (7) from the side with a hole on the
tube.
Pull one Foam 2 510mm (10) over the
straight tube (7).
Repeat this step to assemble the remaining
foams and plastic beams.
4
5
7
7
9
10
8
12
Entrance
Einstiegsöffnung
Ingang
Ouverture
5
Hole
Loch
Gat
Trou
Foam 2
Schaumteil 2
Schuimdeel 2
Manchon 2
Foam 1
Schaumteil 1
Schuimdeel 1
Manchon 1
5.1
5.2
4
5
7
7
9
10
8
12
Entrance
Einstiegsöffnung
Ingang
Ouverture
5
Hole
Loch
Gat
Trou
Foam 2
Schaumteil 2
Schuimdeel 2
Manchon 2
Foam 1
Schaumteil 1
Schuimdeel 1
Manchon 1
5.1
5.2

Related product manuals