P
IN
mode
21
P
IN
mode
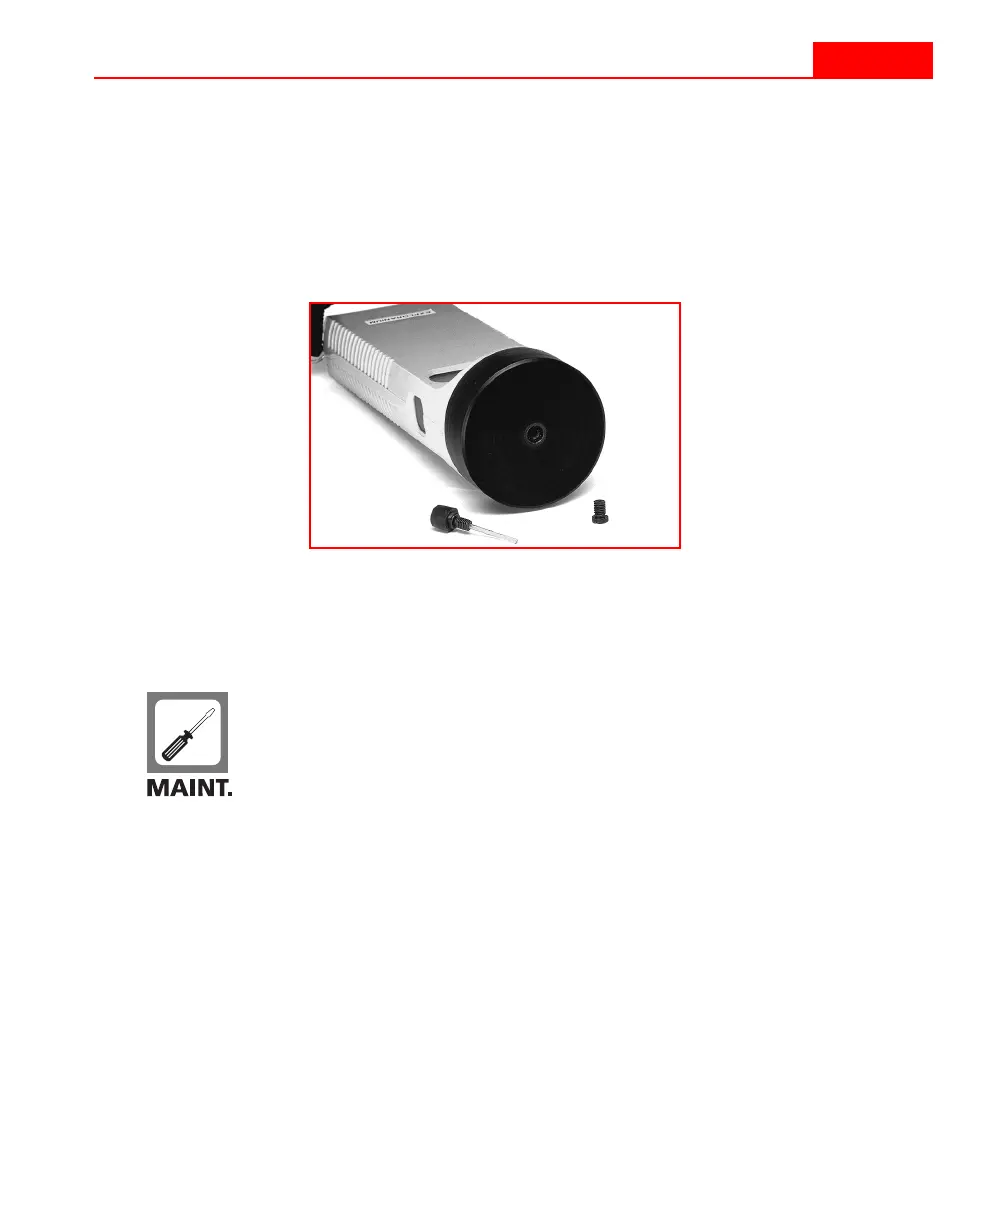
This is the recommended mode of operation for the KT-9, and is
sometimes referred to as the read-zero method. You may need
to replace the
S
TUD
in the centre of sensor head with the
P
IN
.
These items, found in the lid compartment of the storage case
(as shown in Figure 12 on page 42), can be seen in the following
figure.
Figure 6
P
IN
and S
TUD
components for sensor
Installing the P
IN
1
Unscrew the
S
TUD
from the sensor and place it in the lid
storage compartment.
2
Screw the
P
IN
into the hole on the front sensor until it is
finger tight.
3
Push in the
P
IN
with your finger tip. You should feel some
tactile feedback and hear a clicking sound if it is installed
correctly.
P
IN
mode
21
P
IN
mode
This is the recommended mode of operation for the KT-9, and is
sometimes referred to as the read-zero method. You may need
to replace the
S
TUD
in the centre of sensor head with the
P
IN
.
These items, found in the lid compartment of the storage case
(as shown in Figure 12 on page 42), can be seen in the following
figure.
Figure 6
P
IN
and S
TUD
components for sensor
Installing the P
IN
1
Unscrew the
S
TUD
from the sensor and place it in the lid
storage compartment.
2
Screw the
P
IN
into the hole on the front sensor until it is
finger tight.
3
Push in the
P
IN
with your finger tip. You should feel some
tactile feedback and hear a clicking sound if it is installed
correctly.